---
title: How to load test a Rest API
url: https://blog.octoperf.com/how-to-load-test-a-rest-api/
date: '2015-07-28'
authors:
- jloisel
categories:
- Load-Testing
tags:
- REST
- Design
- Open Source
- Runtime
- Analysis
- HTTP
- JSON
- Regexp
description: See how to realistically load test a REST API in under 10 minutes. From virtual user validation to parameterization.
---
# How to load test a Rest API
[REST APIs](https://en.wikipedia.org/wiki/Representational_state_transfer) are becoming widely popular.
Our own application is designed with a **REST API**. What does it mean?
It's a software architecture where a client (the Web Browser) talks to a server (an HTTP server in our case) mostly using the HTTP protocol.
REST services used to communicate using an XML based protocol called [SOAP](https://en.wikipedia.org/wiki/SOAP). **SOAP** is still used by big companies in legacy REST services.
Nowadays, REST APIs are mostly communicating using the [JSON](https://en.wikipedia.org/wiki/JSON) format.
**JSON** is human readable, like XML, but simpler. It lacks all the security layers SOAP can offer, but most of the web application don't require them.
In this article, we explain how to easily run thousands of concurrent users on your REST Api using OctoPerf.
## The requirements
**Load Testing a REST API using JSON over HTTP** does not involve any particular tool.
It's not so different from load testing a web app which is serving HTML pages.
In fact, it can be easier to load test a REST API than a website because JSON is very easy to understand.
You basically just need a load testing tool capable of simulating HTTP requests with different methods (GET, POST, PUT, DELETE and more).
## Example: Json-server
In this post, we take [Json Server](https://github.com/typicode/json-server) as the example application we want to load test.
It offers various JSON Rest APIs to retrieve blog posts and comments. It's the perfect example as it's simple and powerful at the same time.
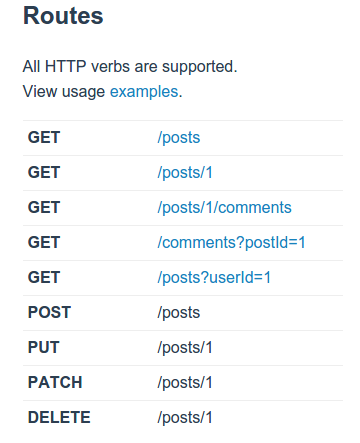
We are going to retrieve a blog post list. Then, we will see how to retrieve the blog post comments.
## Retrieving Blog posts
Let's now create a virtual user which will get the blog posts. To do this:
* Click on *Create VU*,
* Select *From Website URL*,
* Enter [http://jsonplaceholder.typicode.com/posts](https://jsonplaceholder.typicode.com/posts) as URL.
We could also record the interaction between our browser and the server with [JMeter Recorder](https://blog.octoperf.com/recording-http-traffic-with-jmeter/) or [Fiddler HTTP Proxy](https://blog.octoperf.com/recording-http-traffic-with-fiddler/).
The configuration should look like the screenshot below.
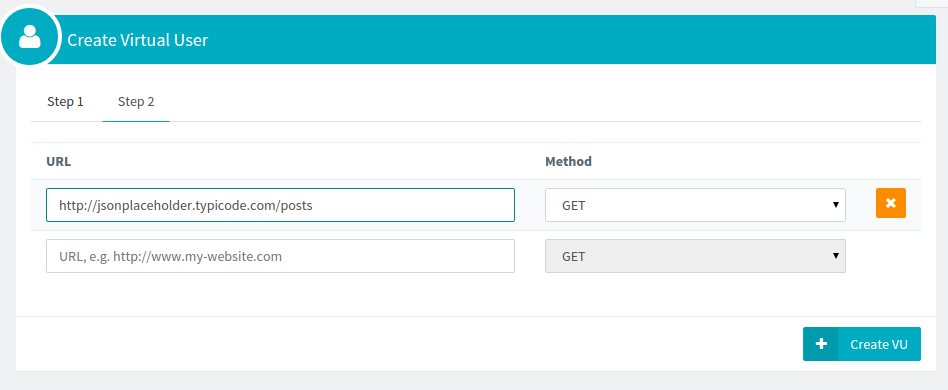
Then click on *Create VU* again to create the virtual user.
You should end up with a virtual user containing a single request to the [/posts](https://jsonplaceholder.typicode.com/posts) rest api.

Now, we need to check that the virtual user queries the rest api correctly. We are going to run a **Virtual User Validation**.
## Virtual User Validation
**The virtual user validation is an important step** to make sure the virtual user behaves as wanted.
You should do this before swarming your servers with thousands of users.
When users don't behave correctly, the test results may be biased as the simulated users does not behave like real users.
To run a virtual user validation, click on the *Validate* button in the top right corner.

It launches a single virtual user instance in debug mode.
Every request and response is collected and will be viewable to find out if **the virtual user is running fine**.
Once the validation is finished, a Green dot should be displayed next to the requests.
It means that the request was successfully executed and the server returned a response with **HTTP 200 OK** status.

## Inspecting requests and responses
Let's take a look at the request sent by OctoPerf and the response returned by the server. Click on the GET tile to open the request details.

The detailed request view allows to fine tune the HTTP request as well as **check the requests emitted and responses received during virtual user validation**.
Click on the *Requests* button to see the request being sent to the server by our system.
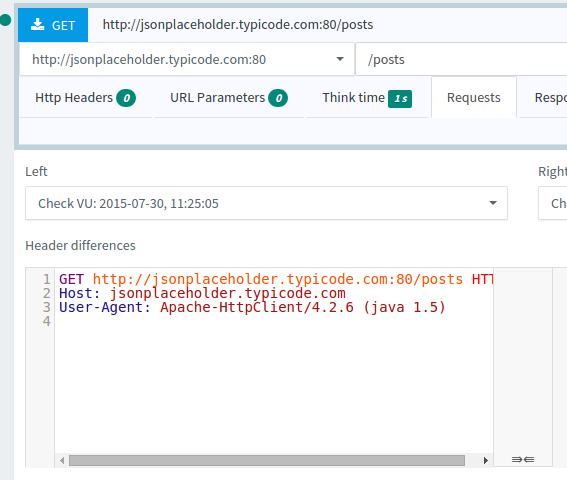
This panel shows the HTTP request which has been sent to the remote HTTP server, on the */posts* JSON REST API endpoint.
Now, click on the *Responses* button to see the server response.
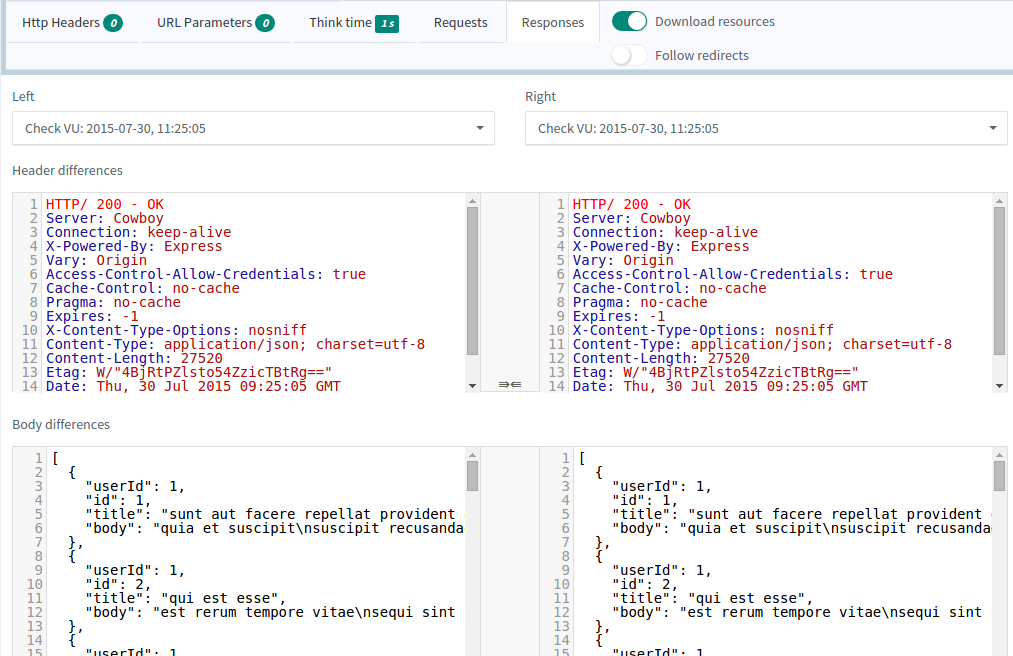
This panel shows the HTTP server response received from the REST API Server.
The server returned the list of blog posts. Pretty easy! Now, let's make the virtual user a bit more interesting by introducing **dynamic behavior**.
We are going to simulate a user retrieving the comments of a random blog post.
## Retrieving random post
To retrieve a random blog post comments, we first need to extract a random blog post id from the received server response.
For this, we need to setup a [Variable Extractor](https://api.octoperf.com/doc/design/edit-virtual-user/action-types/post-processors/regexp-variable-extractor/).
The *Variable Extractor* is a component of the *Post Processors* family. Those items are performing operations on the received server responses.
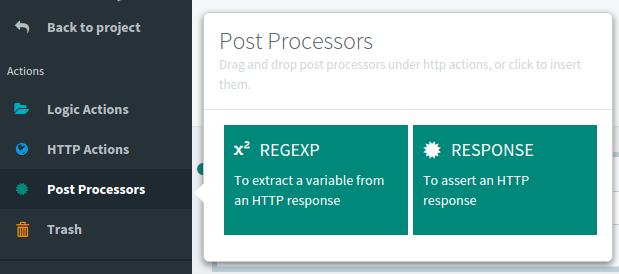
Select the *Post processors* on the left and click on the *Regexp* item.
You should end up with the item being configured as child of your request.
Give it the name *post_id* by editing the field.
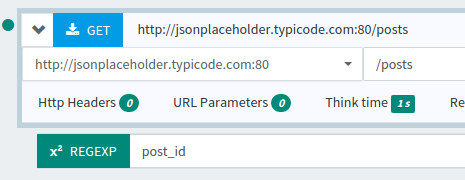
This extractor allows to apply a [Regular Expression](https://en.wikipedia.org/wiki/Regular_expression) on the server response to extract part of the response.
Don't panic! We made it simple enough to be easily understandable. Click on *Configuration* and select the id number with your mouse.
You should end up with the same as below.
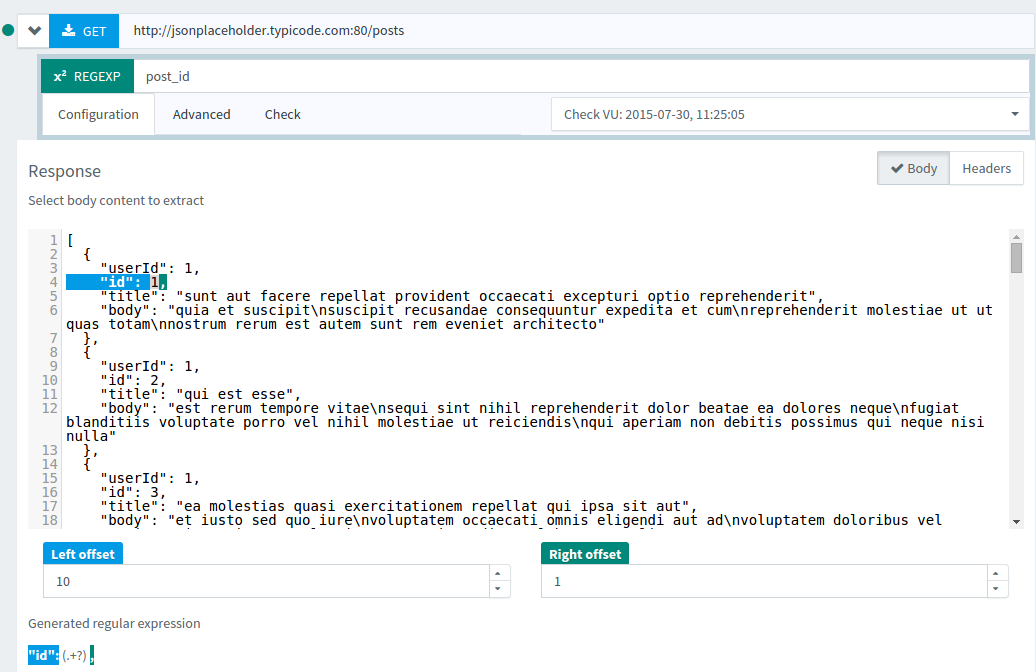
Great, the extractor is now able to extract the post id from the JSON server response. Click on *Check* tab to see the **extracted variables**.
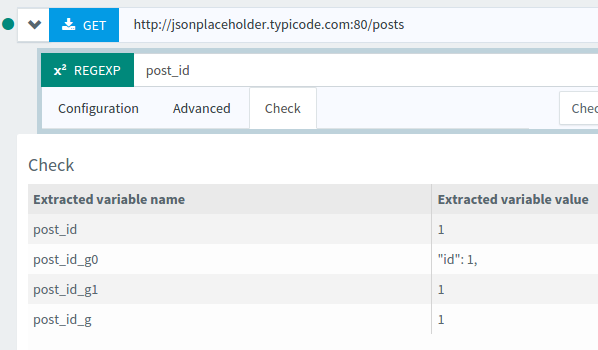
The variable *${post_id}* now contains the first blog post id and is available in sub-sequent requests for reuse. But, we want a random blog post!
Click on *Advanced* tab, and select *Random* match number.
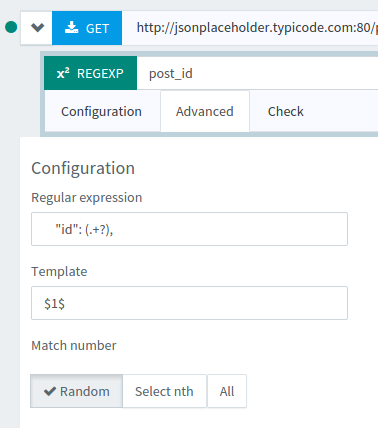
Go back to *Check* tab, and Click on *Refresh* several times to see the blog post id change. Great! You have now extracted a random blog post id from the server response.
Let's reuse it in a sub-sequent call to the comments rest api.
## Retrieving post comments
Now we just need to setup an HTTP GET to the [/comments](https://jsonplaceholder.typicode.com/posts/1/comments) rest api, like shown below.
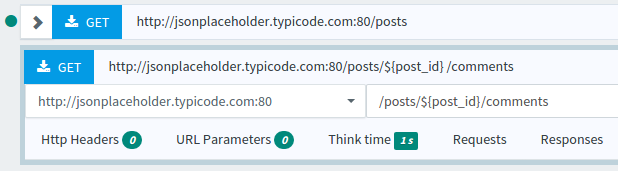
Let's **run the validation** again to check that the post comments are queried correctly.
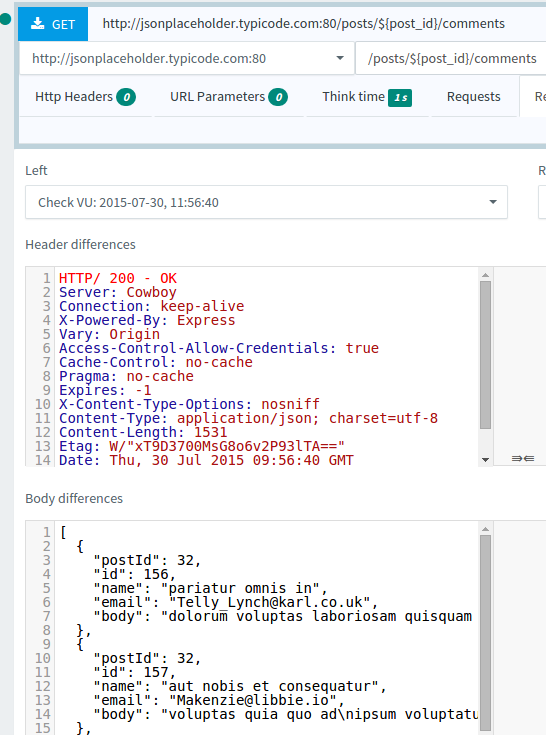
Wow, it works! We've just received the comments of blog post with id *32*.
Validate the user again, and you should see the comments change too. Let's take it one step further and create a virtual user which iterates over all blog post comments.
## Iterating over blog posts
First, we need to change the variable extractor to extract all the blog post ids instead of a random one.
This is dead simple to do: switch the extractor match number to *All*, and rename it to **post_ids**. This tells the extractor to query all the blog post ids.
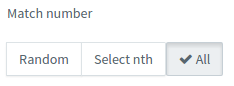
Then, we put the */comments* inside a [Foreach Loop](https://api.octoperf.com/doc/design/edit-virtual-user/action-types/logic-actions/foreach-action/) to iterate over blog posts.
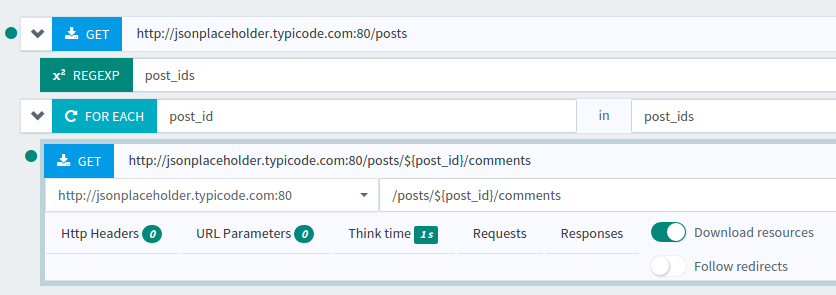
Finally, **run a virtual user validation** again. You should see many entries in requests and responses, showing all the posts being traversed.
It may take some time to complete the virtual user execution.

You should see the blog post id incrementing on each request. You have know a virtual user iterating over all blog posts and retrieving the associated blog post comments.
We can still go further! What about retrieving only the 10 first blog post comments?
## Conditional statement
To retrieve only the 10 first blog post comments, we are going to put a condition inside the *Foreach* loop. Name the *If* condition as you want, and put *${post_id} <= 10* in condition.
Put the *comments* REST API endpoint inside the *If*, and the *If* inside the *Foreach* loop.

The virtual user execution should complete way faster now. When looking at the received responses, you should only see blog posts from 1 to 10 included. Congratulations!
You know how to put a condition on a content extracted from a server response.
## Running the test
Running a test on a REST API is the same as any other load test.
[Create a scenario](https://api.octoperf.com/doc/runtime/edit-scenario/) and then [Launch the test](https://api.octoperf.com/doc/runtime/edit-scenario/launch-test/).
Create a scenario with the virtual user we've just designed and launch the test.
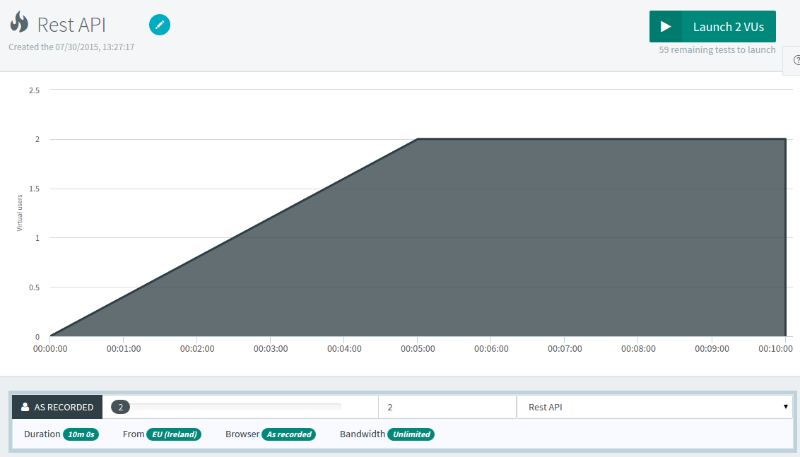
You can now drill down on your REST API calls response times to find out bottlenecks quickly. Experience performance issues before your users!
## Viewing Test Results
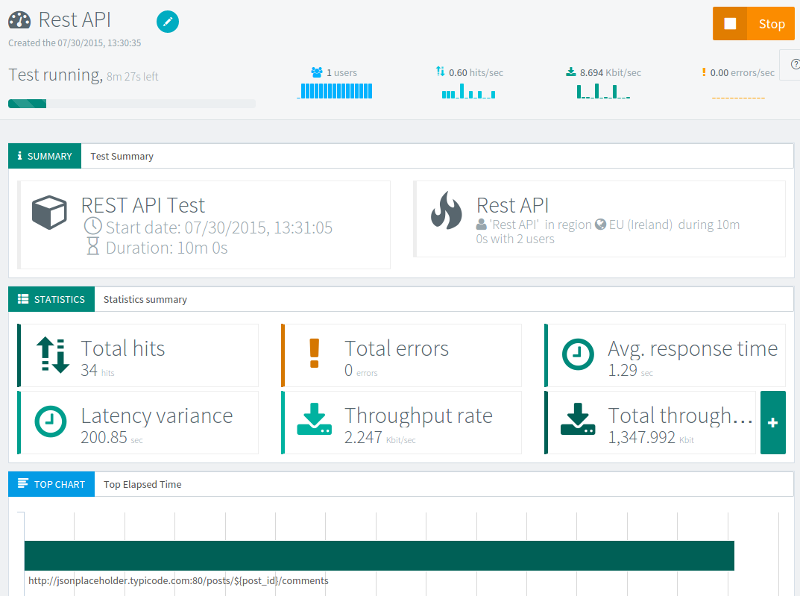
Once the test is launched, you can **view the test results live** while the test is running.
## Conclusion
We have already seen many steps in the process of load testing a REST API:
* Design REST API Calls,
* Extracting content from a server response,
* Reusing server response content inside requests as variables,
* Designing a dynamic virtual user with loops and conditional statements,
* Running a load test on our platform,
* And analyzing test results.
It took only ten minutes to do all of these! There are still many other possibilities we don't have explored yet to make even more realistic load tests.
We will talk about these advanced steps in future blog posts, so stay tuned and have fun load testing!