
Simple Way to Create Complex JMeter Scenarios
Creating complex performance testing scenarios in JMeter can be a complicated but necessary problem you will encounter as you build tests to mirror real user behaviour in your testing.
There are many add-ins that can support you in the creation of these scenarios. Which is good if they do what you want them to do. But if you want the flexibility to build tests without the limitations of 3rd party add-ins then there are several techniques you can use which come with the standard JMeter install.
All you require is a bit of imagination, a basic understanding of Groovy and the JMeter Switch Controller.
The resulting JMX script can be downloaded here.
Build a simple test
Before we add any sort of complexity into a scenario let’s build something simple that we can add to.
If you have not already done so I would recommend installing:
- JMeterPlugins-Standard,
- JMeterPlugins-Extra,
- JMeterPlugins-ExtraLibs.
Using either the recommended approach of using the Plugins Manager or downloading from the JMeter Plugins Site and copying to the lib folder of your JMeter installation directory.
We are going to use Dummy Samplers to demonstrate the building of our complex scenario and this sampler is not part of the standard JMeter install which is why we recommend you install the plugins above.
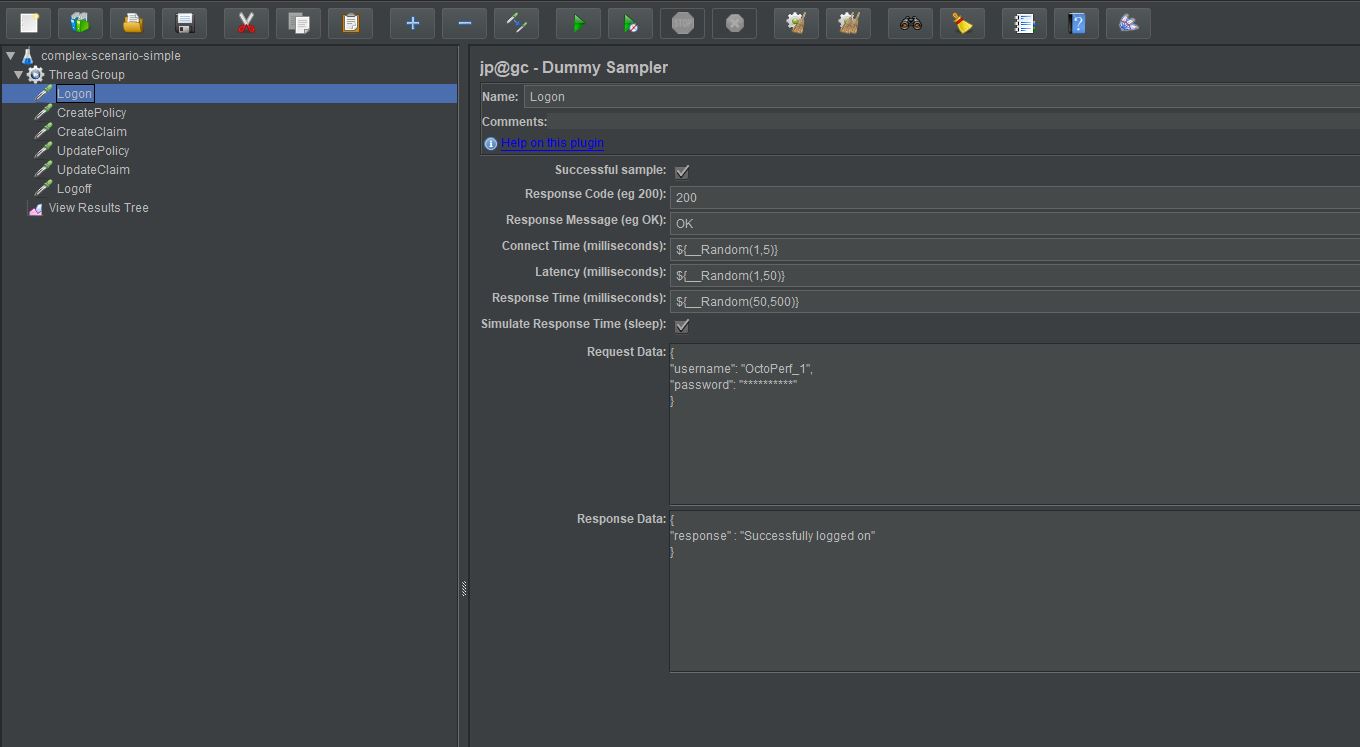
You can see from the screenshot that we have created six Dummy Samplers that are just artificial requests that generate an artificial response.
The purpose of creating this is to demonstrate that if we run this test we see a sequential execution of the samplers.
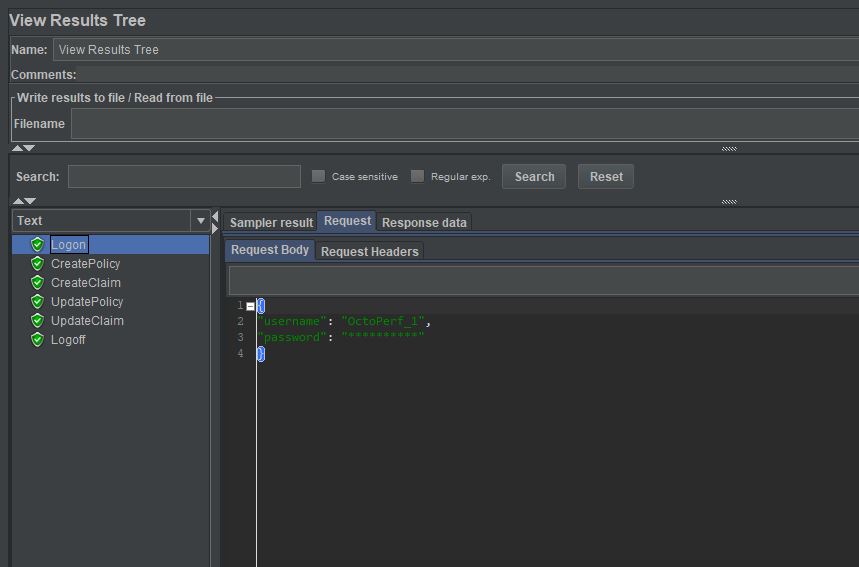
Adding Complexity
If we wanted to use our samplers to create a more complicated scenario we could just copy and paste them any number of times into the JMeter UI.
In our extremely simple example we may end up with something like this.
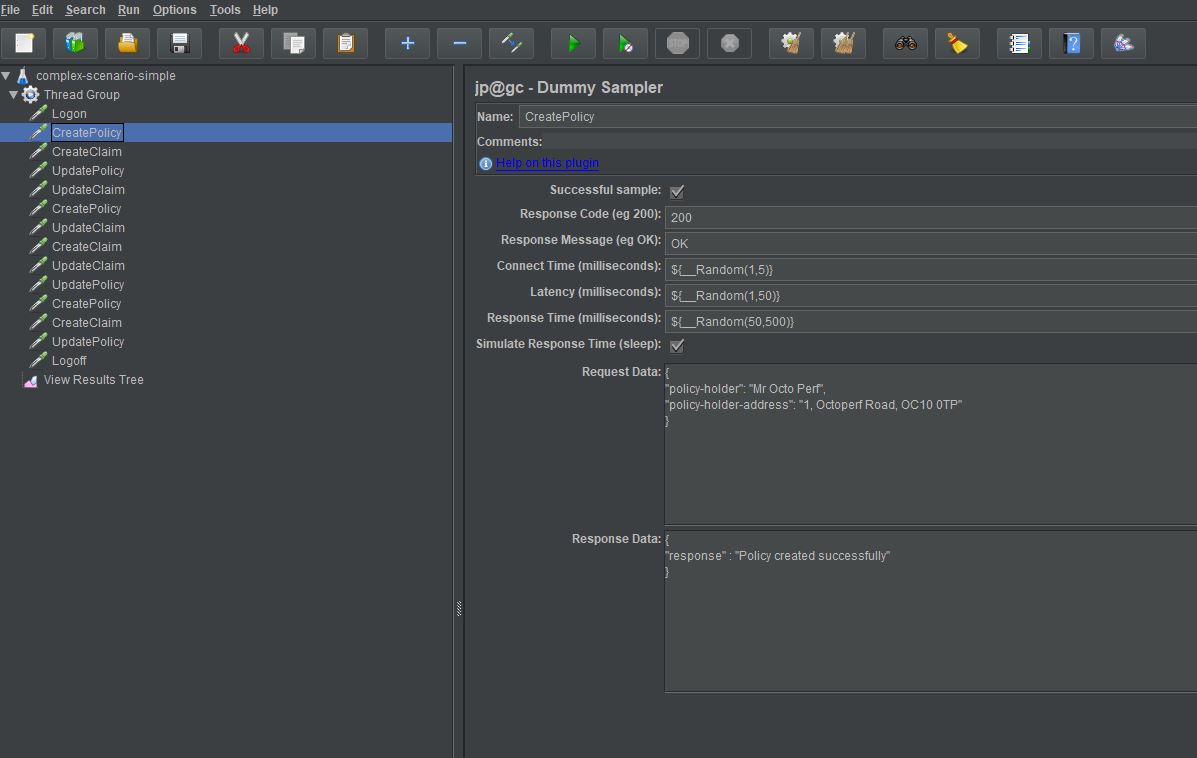
Which would work but is not particularly elegant and would be time consuming to maintain if one of the samplers was to change.
Switch Controller
This is where we introduce the Switch Controller which to be honest is not going to magically help us in the creation of complex scenarios in JMeter but we will come to that bit soon.
The Switch Controller is to quote from the JMeter documentation:
The Switch Controller acts like the Interleave Controller in that it runs one of the subordinate elements on each iteration, but rather than run them in sequence, the controller runs the element defined by the switch value.
Most of you who have used pretty much any programming language will be familiar with this concept but for those that are not let’s look at an example.
Firstly, we will add a Switch Controller to our original example.
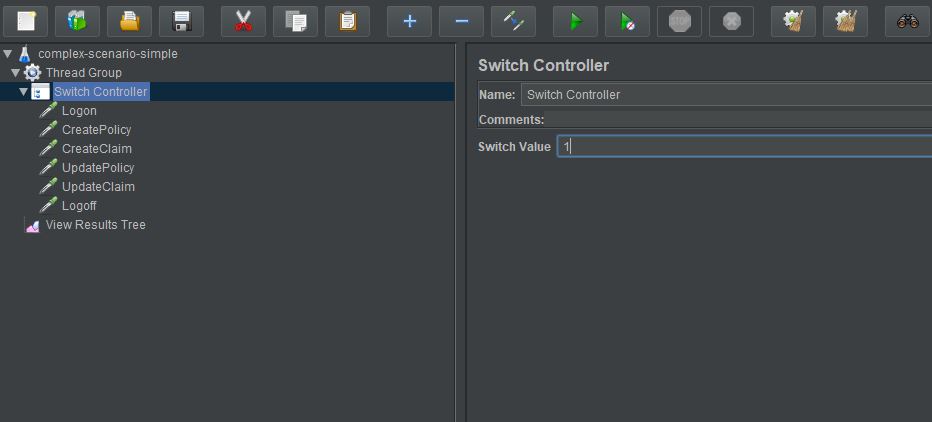
As you can see we have added a Switch Controller and moved our Dummy Samplers underneath this controller.
If we enter a switch value of 1 and execute our test again.
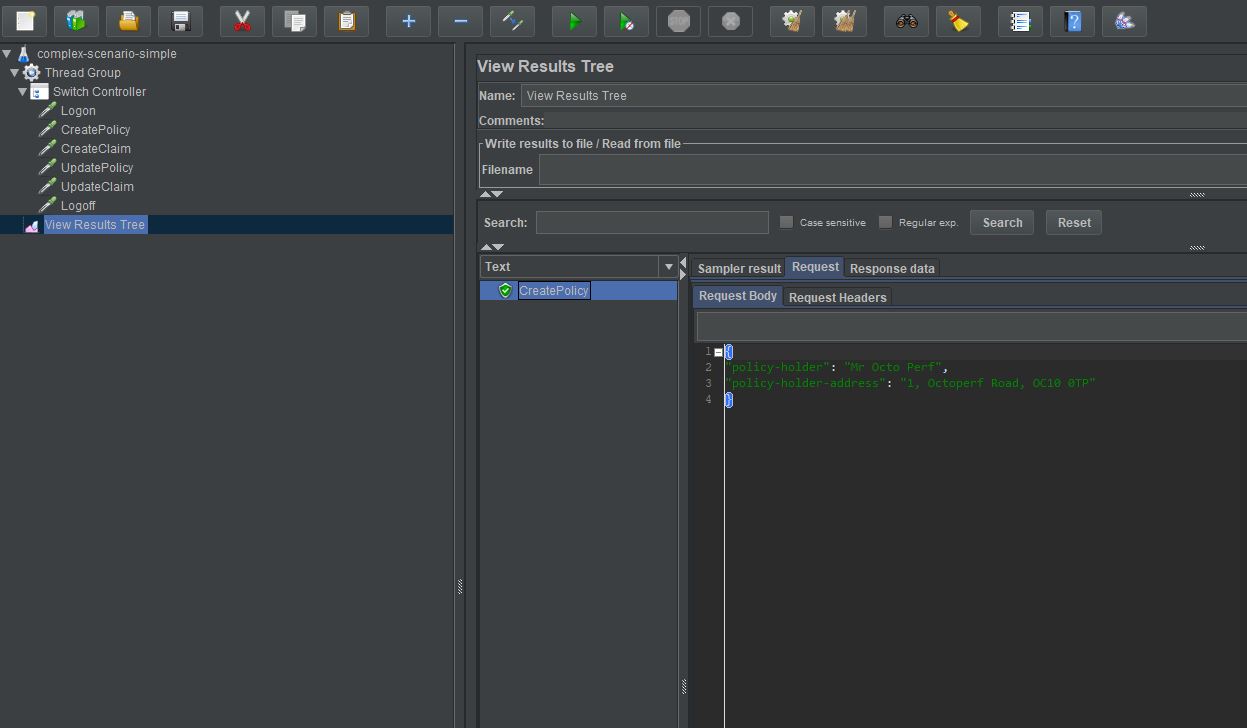
We see that the Create Policy sampler has been run. That's because it is the sampler at position 1 under the Switch Controller as the controller uses a zero-based numbering system.
The Switch Controller also takes a string to identify the sampler to call, if we replace the Integer with the String ‘UpdatePolicy’.
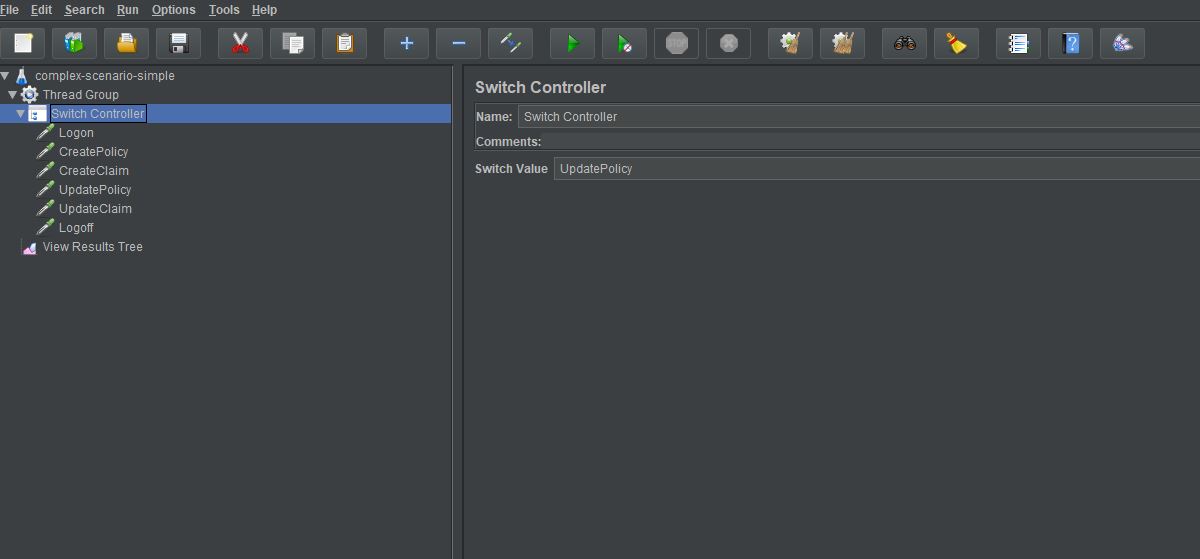
And re-execute the test.
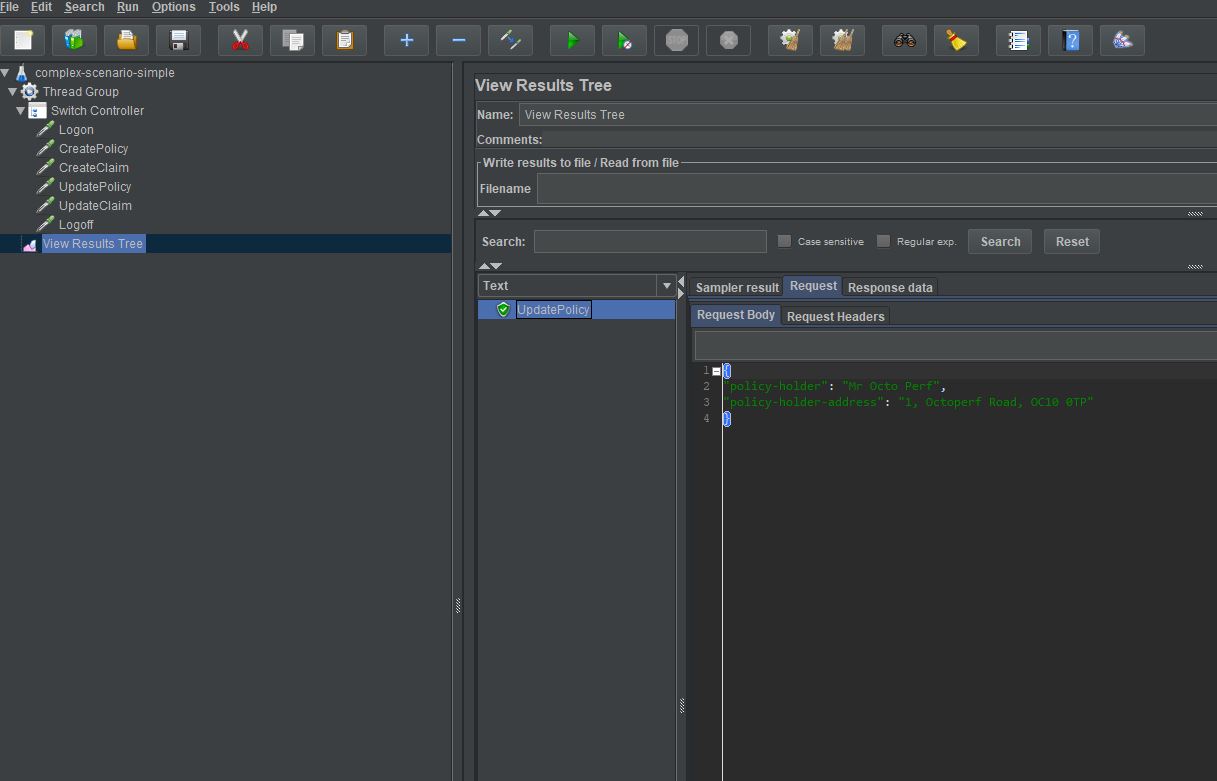
We see that the sampler we identified by name has been executed.
Now you still might be thinking this is all well and good but how does it help me in creating complex scenarios, we will move onto that now.
Using a JSR223 Sampler
This is where we can really leverage the power of the Switch Controller and we do this simply by adding a JSR223 Sampler to our test.
You can see that we have added it above the Switch Controller.
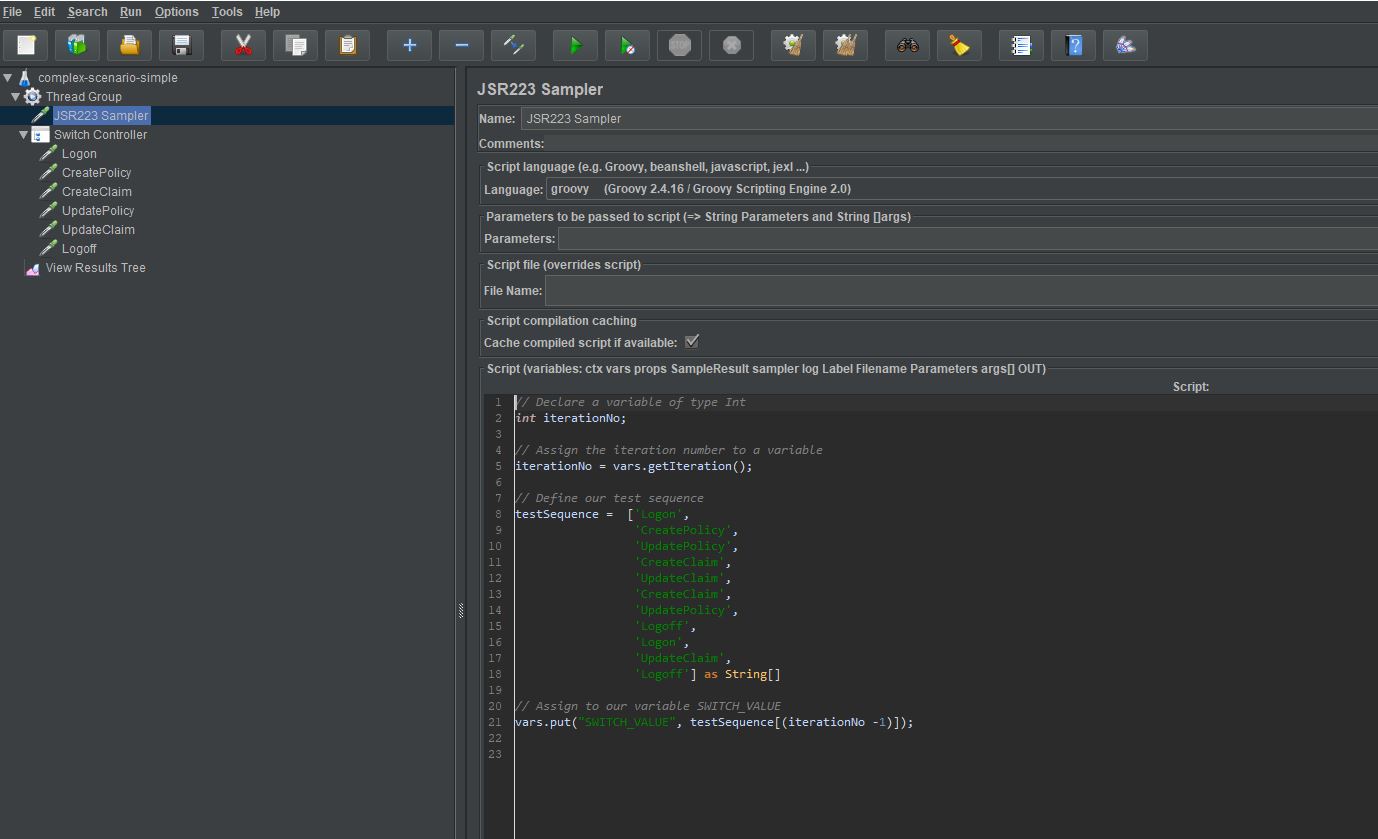
Let’s look at the JSR223 Sampler and look at what we are doing.
We start by declaring a variable of type Int and then assigning the current iteration value to that variable, so every time we iterate the Thread Group this integer will increment.
// Declare a variable of type Int
int iterationNo;

// Assign the iteration number to a variable
iterationNo = vars.getIteration();
Next, we define our sequence of samplers as a String Array.
// Define our test sequence
testSequence =  ['Logon',
              'CreatePolicy',
              'UpdatePolicy',
              'CreateClaim',
              'UpdateClaim',
              'CreateClaim',
              'UpdatePolicy',
              'Logoff',
              'Logon',
              'UpdateClaim',
              'Logoff'] as String[]
Finally, we assign the Array element at the position defined by the current iteration to a variable called SWITCH_VALUE. We have subtracted 1 from the iterationNo variable because, as we discussed earlier, the Switch Controller is zero based.
// Assign to our variable SWITCH_VALUE
vars.put("SWITCH_VALUE", testSequence[(iterationNo -1)]);
If we now replace the value in the Switch Controller with our variable.
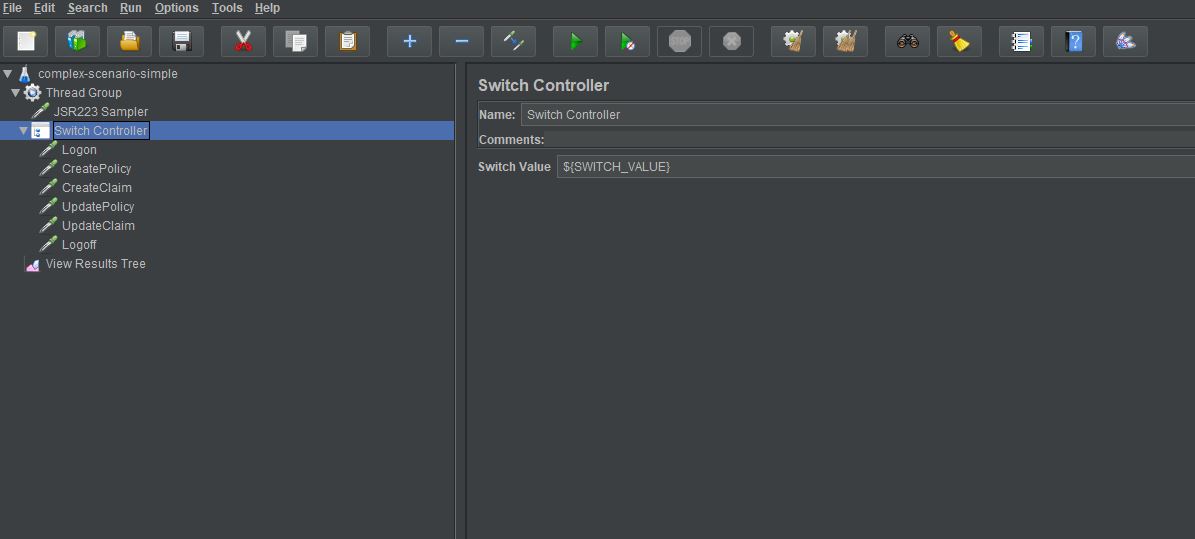
And set our Loop Count in the Thread Group to equal the number of values we have in our testSequence Array.
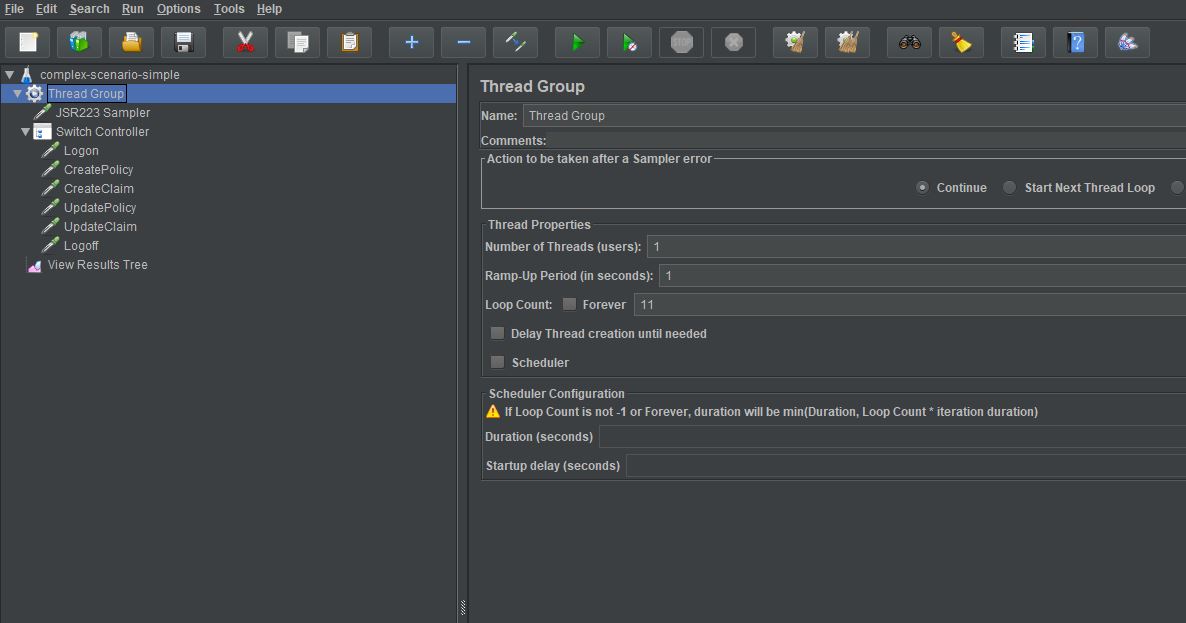
We can now run re-run our test.
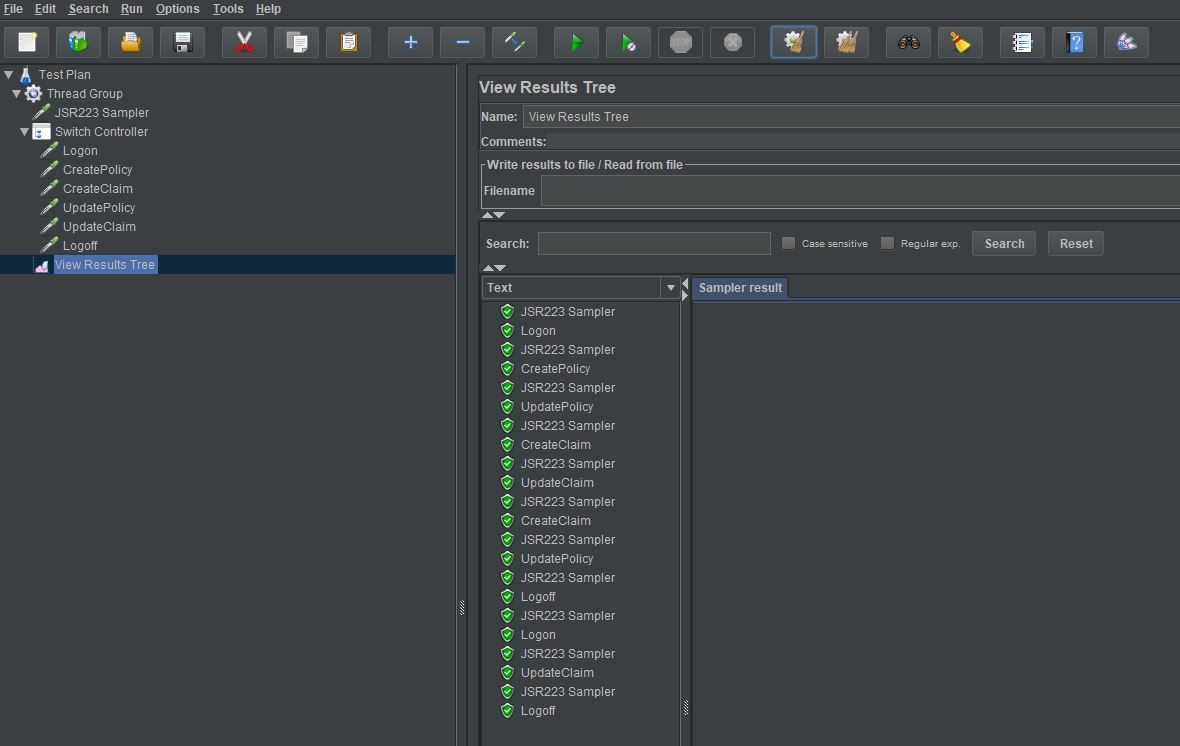
We can see that the Switch Statement has executed each of our tests in the order they appear in the testSequence Array.
As you can see there is also the JSR223 Sampler being output to the results, if we want to tidy this up we can by adding a new line of code to our JSR223 Sampler:
// Ignore the response, we do not want to report on this
SampleResult.setIgnore();
We now re-run our test.
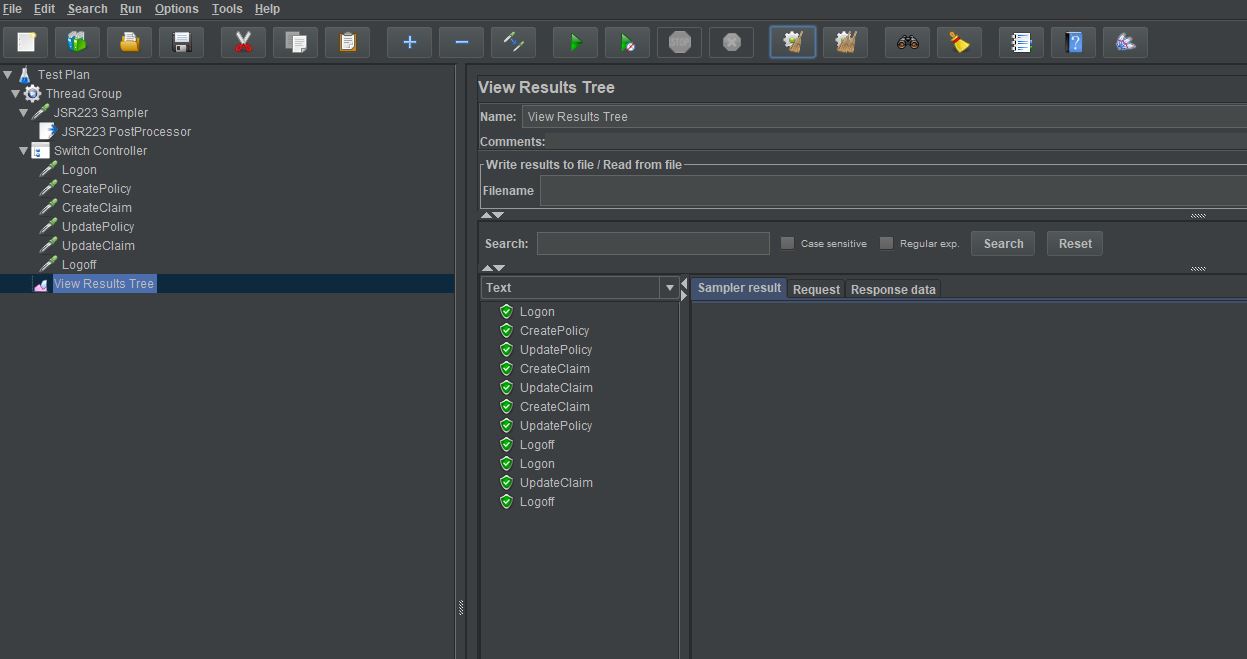
And we can see from our results that we are only reporting on the Samplers we have defined in our testSequence Array.
Final Touches
There is one more thing we can do to this test as a final touch and that is to set the Loop Count in the Thread Group to be populated depending upon the size of the testSequence array rather than defining it manually.
This way if you want to add more test samplers to your complex scenario its just a case of adding these to the array and run the test.
To do this we create a setup Thread group and add a JSR223 Sampler to it.
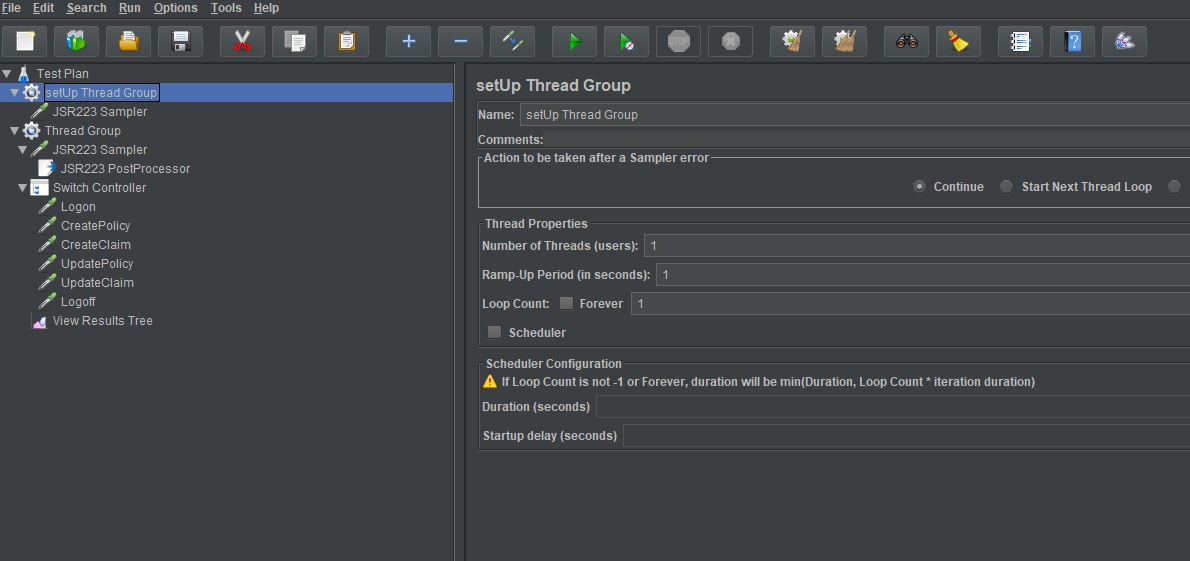
Our JSR223 Sampler contains these lines of code.
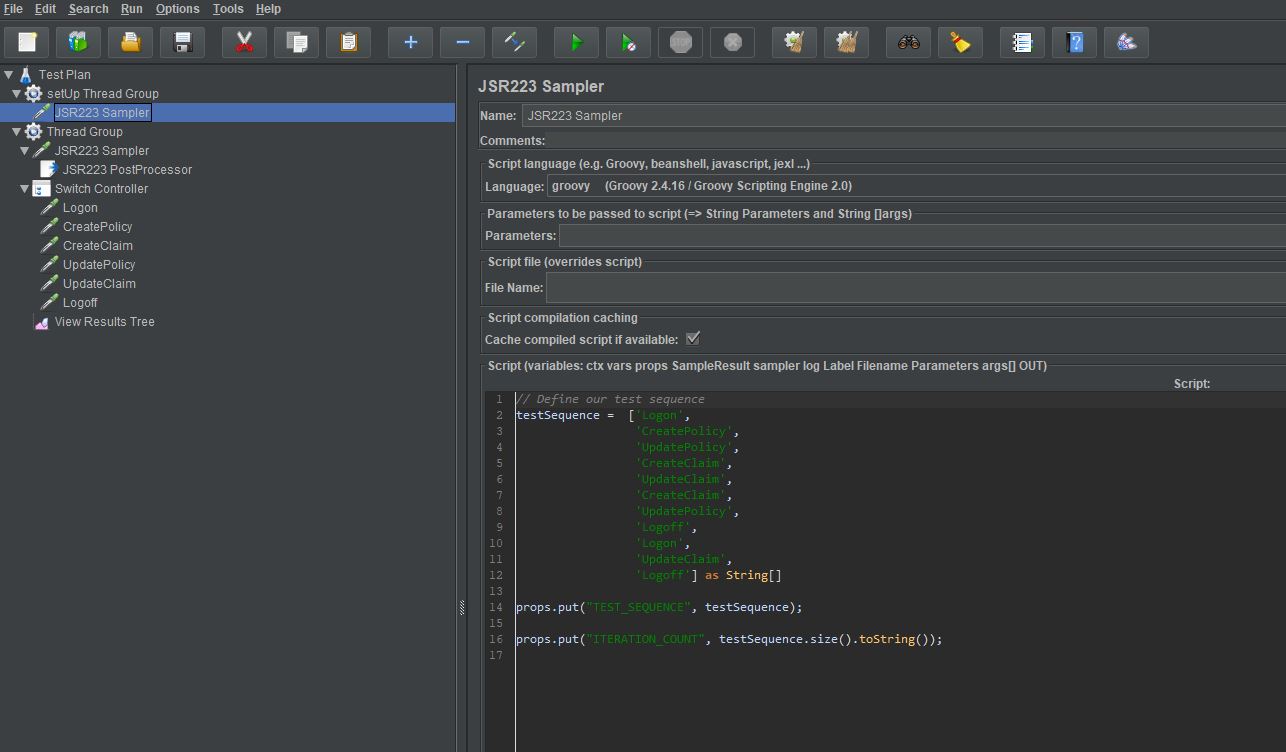
Let’s look at the JSR223 Sampler and look at what we are doing:
testSequence =  ['Logon',
              'CreatePolicy',
              'UpdatePolicy',
              'CreateClaim',
              'UpdateClaim',
              'CreateClaim',
              'UpdatePolicy',
              'Logoff',
              'Logon',
              'UpdateClaim',
              'Logoff'] as String[]
We have moved the testSequence Array to here.
props.put("TEST_SEQUENCE", testSequence);
We have assigned our Array to a property called TEST_SEQUENCE.
props.put("ITERATION_COUNT", testSequence.size().toString());
And finally assign the size of the testSequence array to a JMeter Property called ITERATION_COUNT.
If we now replace our static Loop Count value in the Thread Group to use our ITERATION_COUNT Property.
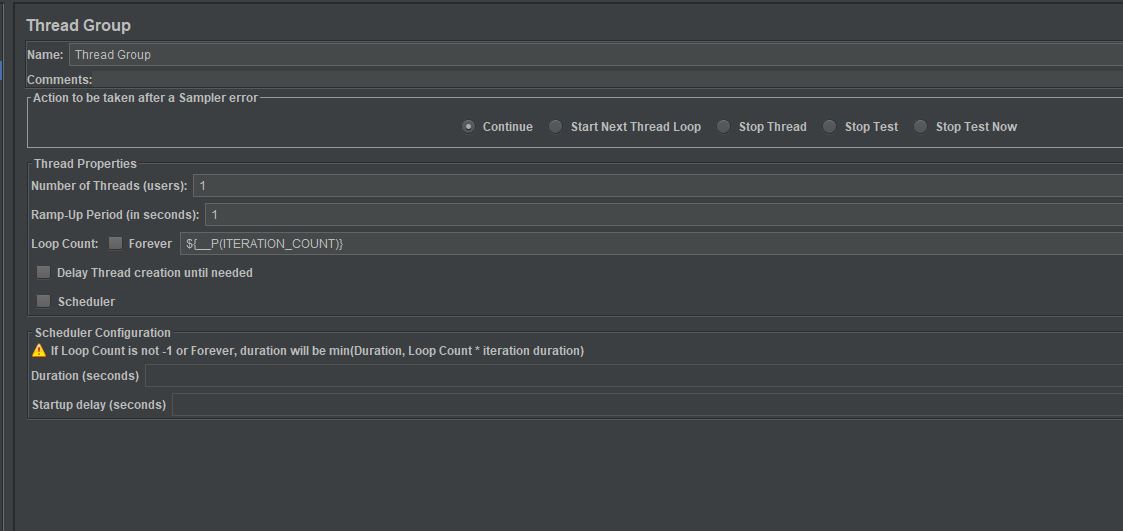
And make a change to the JSR223 Sampler to use our testSequence Property value.
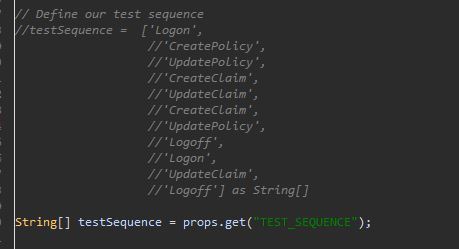
The previous testSequence Array has been commented out to show the difference between the two.
We can now run our test and get the same results again, only this time with no hardcoded Loop Count.
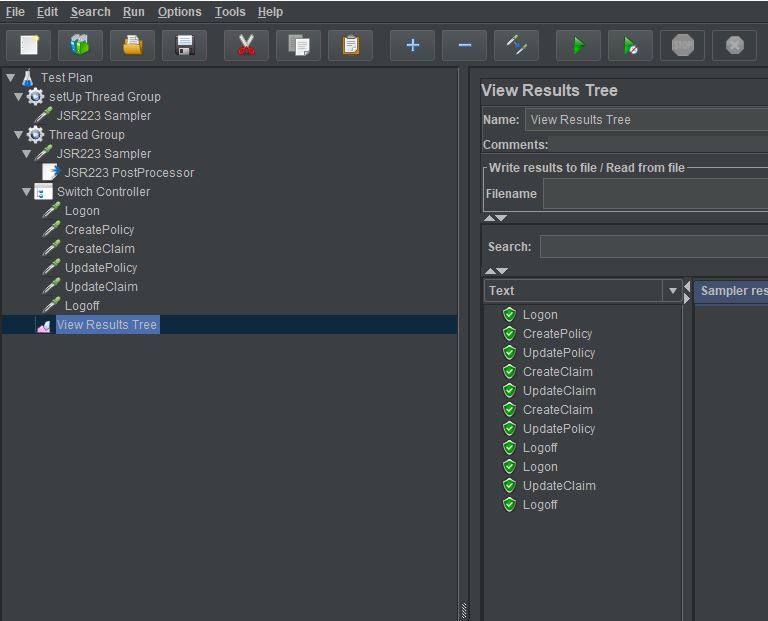
Conclusion
There are many ways to build complex scenarios but by minimising the number of samplers and using some simple JSR223 Sampler logic to manage the flow of the samplers you can accomplish this is a straightforward way.
