
From Performance Tests to Sanity Tests with JMeter
In this blog post we are going to look at how we can use our performance tests to act as Sanity Test. We have touched upon the subject in one of our blog posts on the hidden benefits or performance testing.
This post will however look to provide more detail on the subject and provide guidance on how you can accomplish this.
Aim of this post
We are not suggesting that you write a set of JMeter tests to act as sanity tests for our application under test as that would not be that beneficial. There are much better ways to write sanity tests for applications in the form of Unit Tests in code or by using a functional testing tool such as Playwright.
What we are going to investigate is how you could use already existing JMeter tests to also support Sanity testing. If you have a set of performance tests or are in the process of creating a set of performance tests for a particular project or programme, then to build them in such a way that they can double as Sanity tests would be beneficial.
We will look at how when building a test, you could also add some additional logic to give your performance tests the capability of supporting an application Sanity test. If you have a set of tests already that you have built, then by following this post will show you how these existing assets can be updated to support Sanity testing.
All tests will be written in JMeter.
What is Sanity testing
From an online source a sensible definition of Sanity testing is:
Sanity testing is a type of software testing that aims to quickly evaluate whether the basic functionality of a new software build is working correctly or not. It is usually performed on builds that are in the initial stages of development before the full regression testing is performed. Sanity testing is limited in scope and typically focuses on critical functionality and does not aim to uncover every possible error or bug in the system. It is a quick and lightweight way to ensure that the software is functioning as expected before further testing is conducted.
We can determine from this definition that as our performance test coverage normally has limited scope and traditionally focuses on critical functionality then to repurpose them as Sanity tests is a sensible and potentially time saving approach for this purpose.
Building a dummy test.
Before we start to consider how we can re-purpose our performance tests as sanity tests, we need to build a dummy test.
We will use a set of dummy samplers in our JMeter script to create this test.
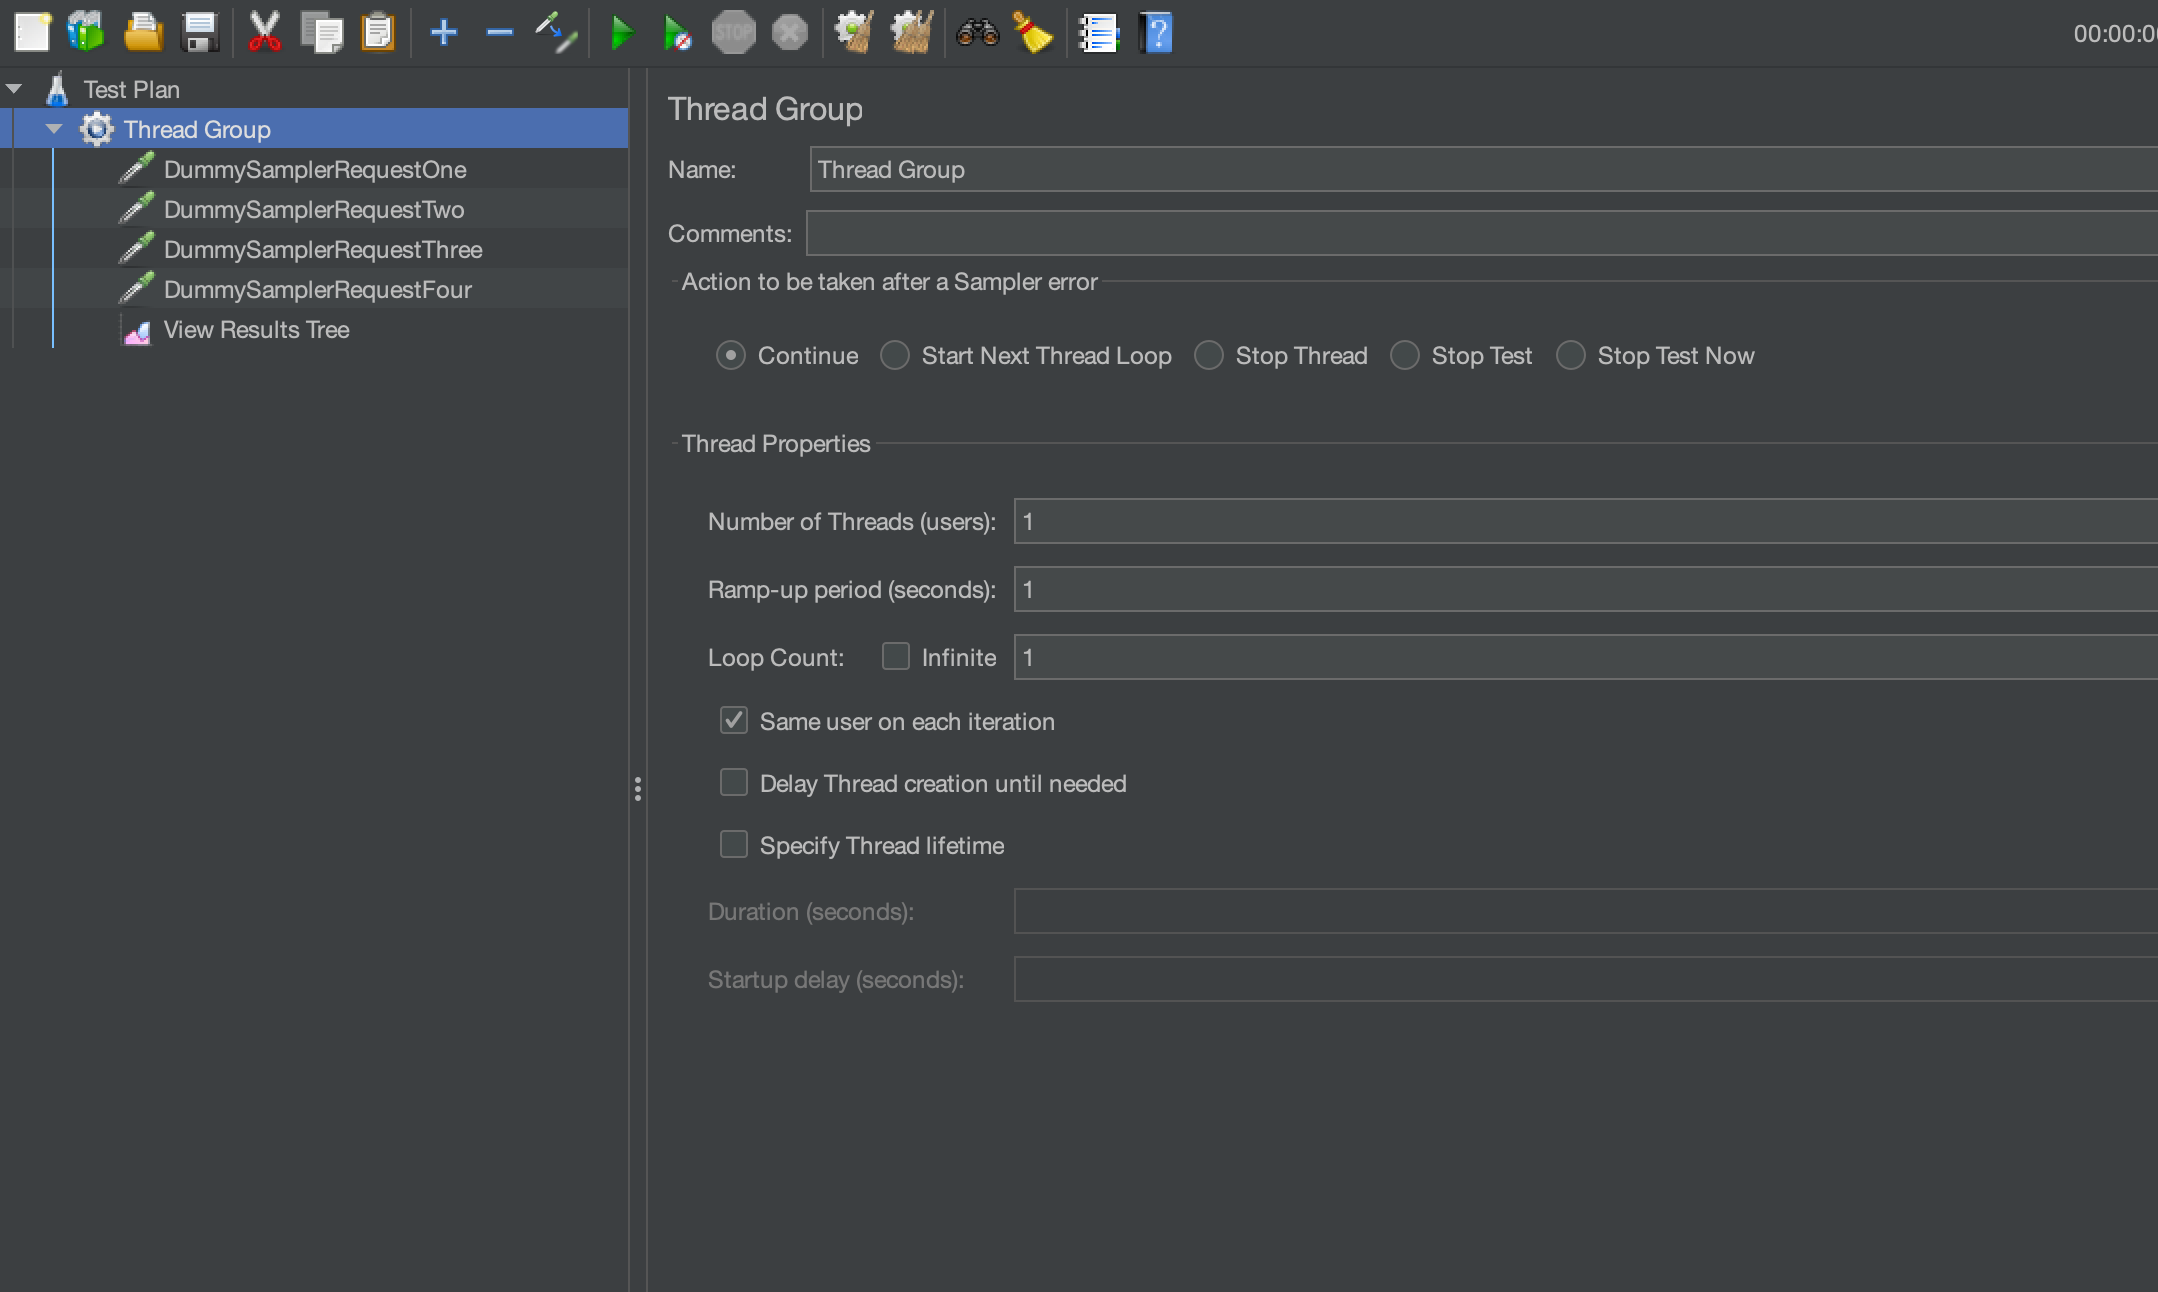
We can see that there are 4 dummy samplers, and each are broadly identical except for the request name and the response payload.
Here are the 4 samplers:
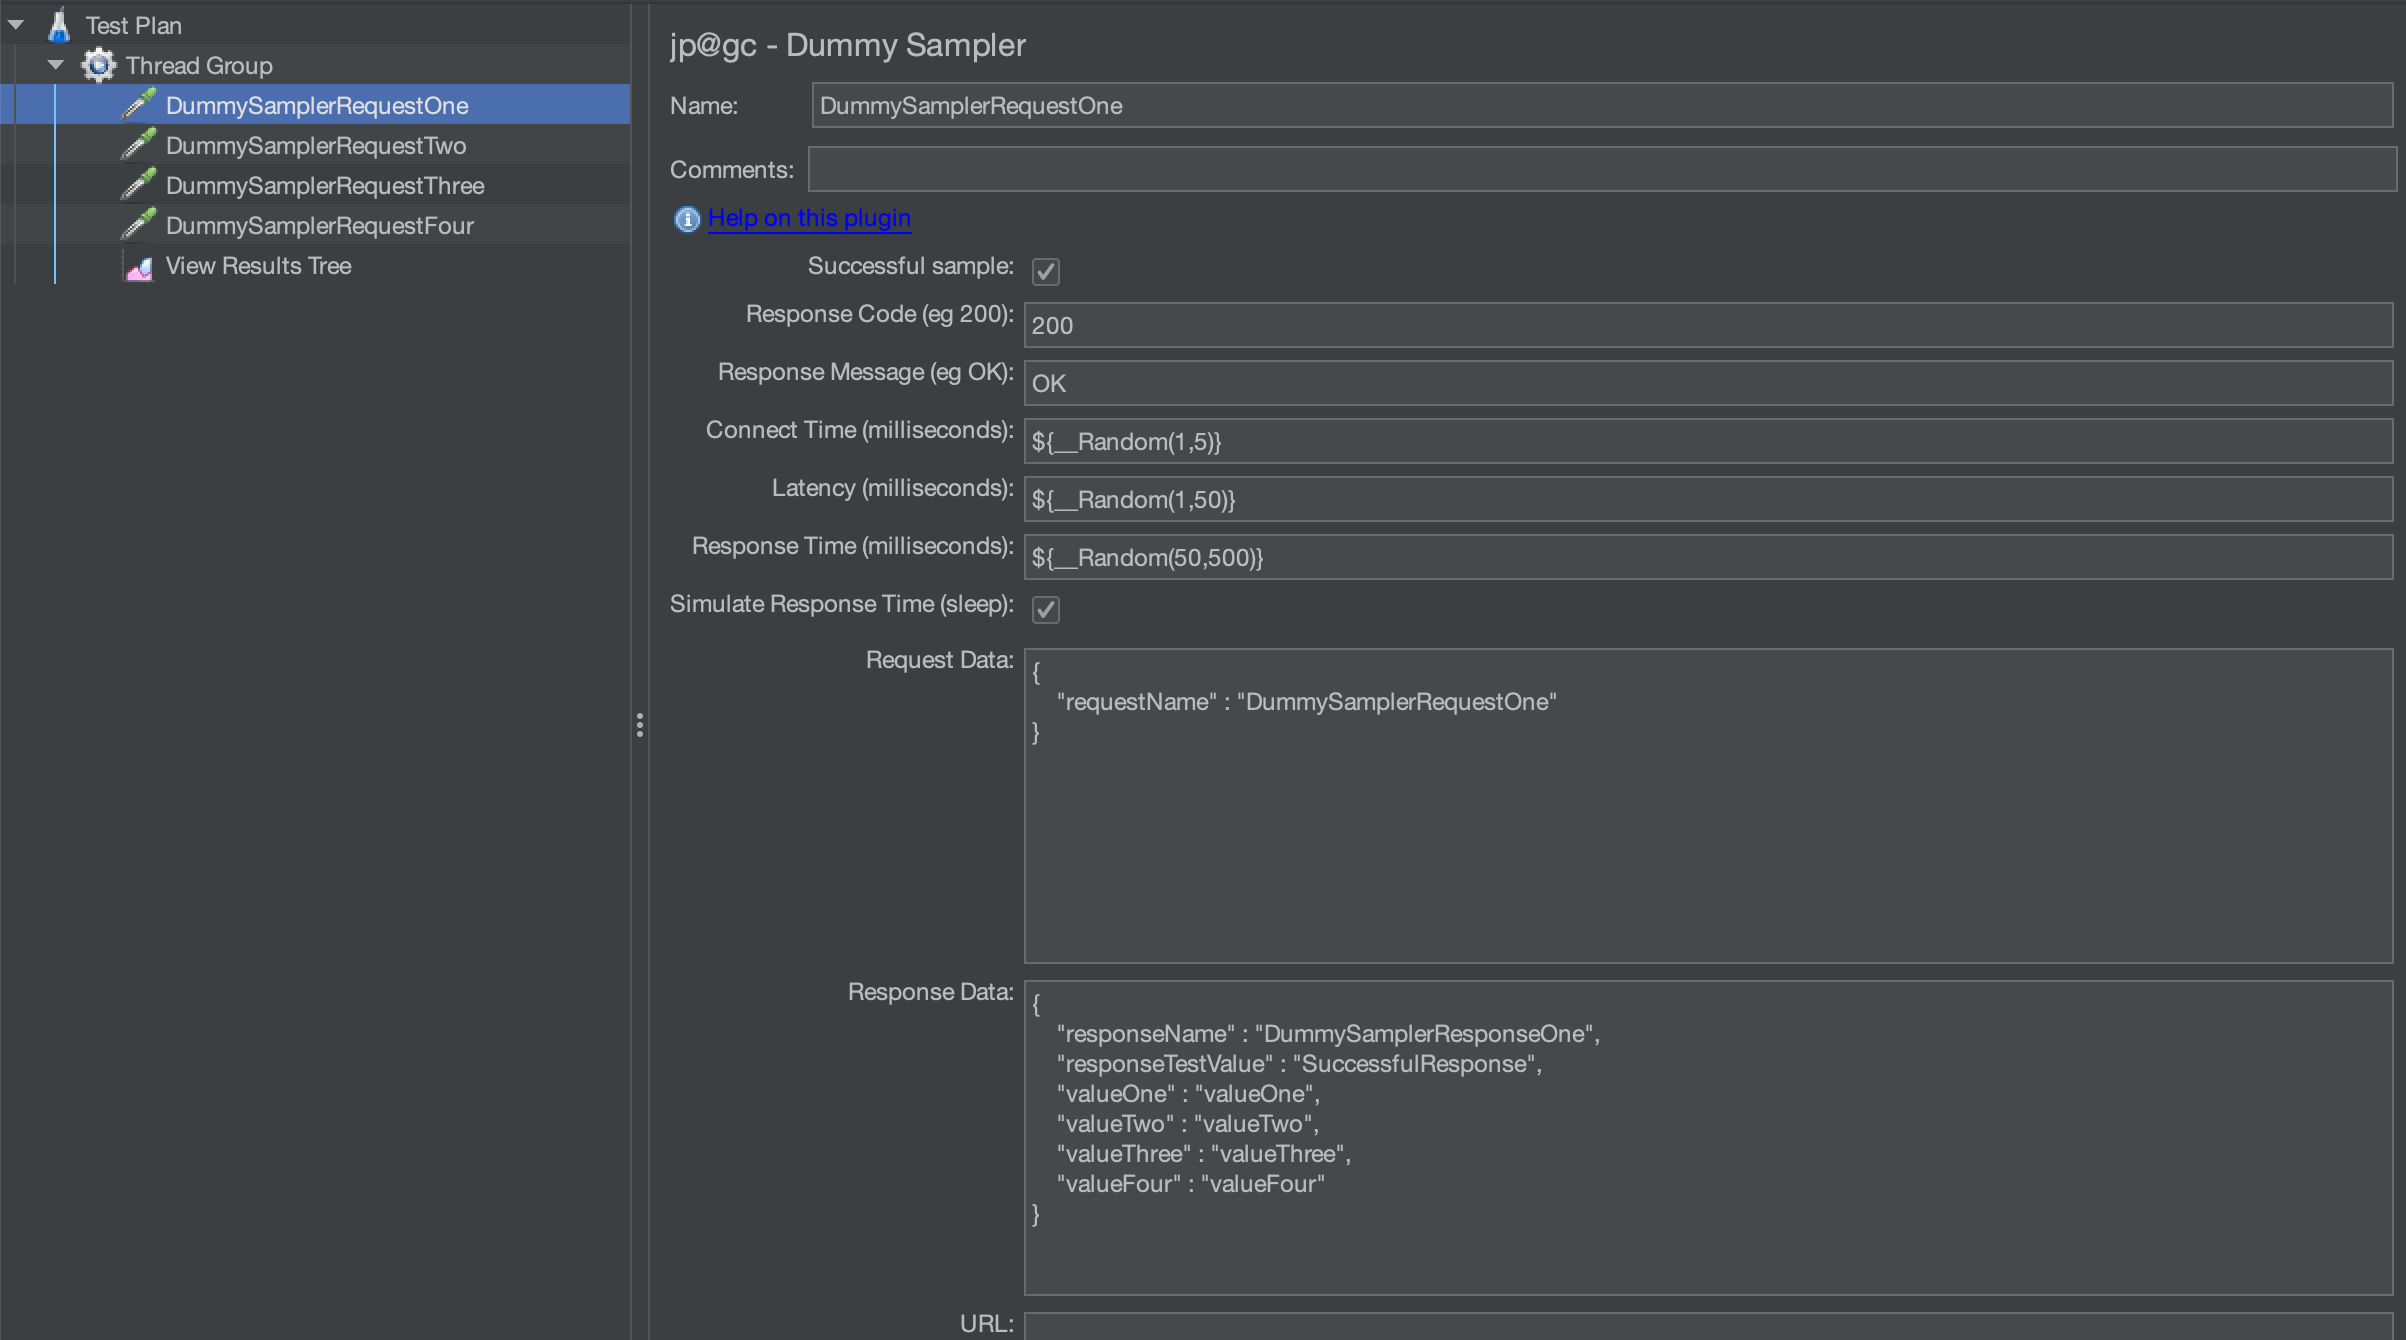
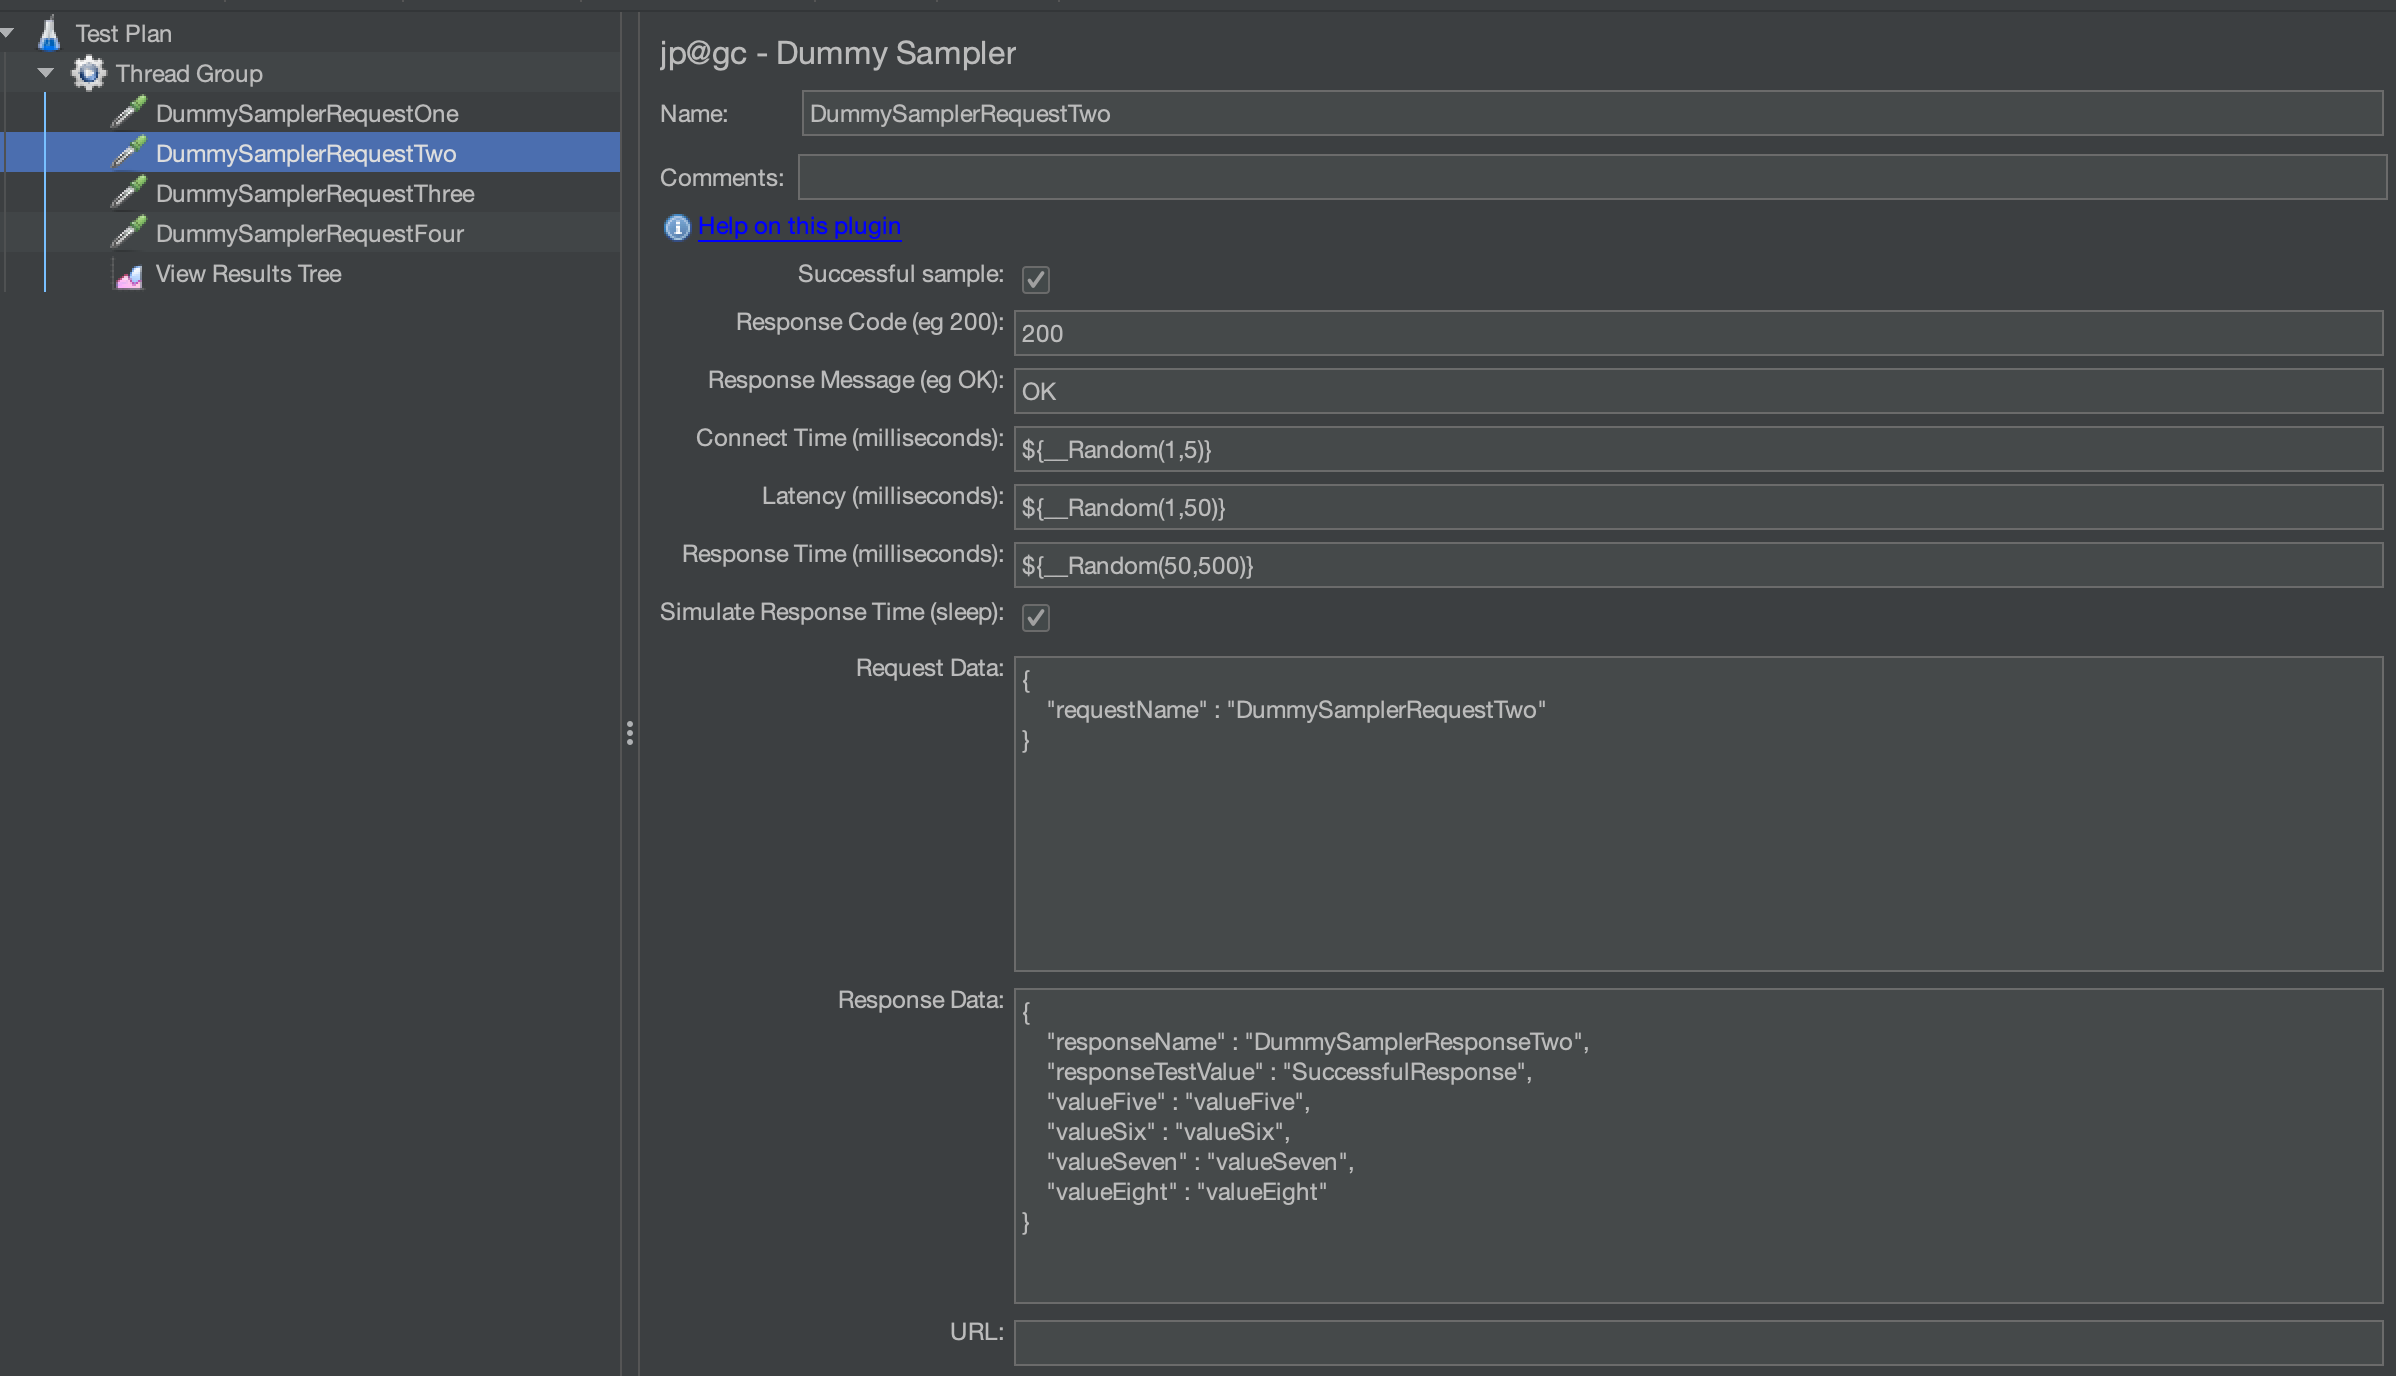
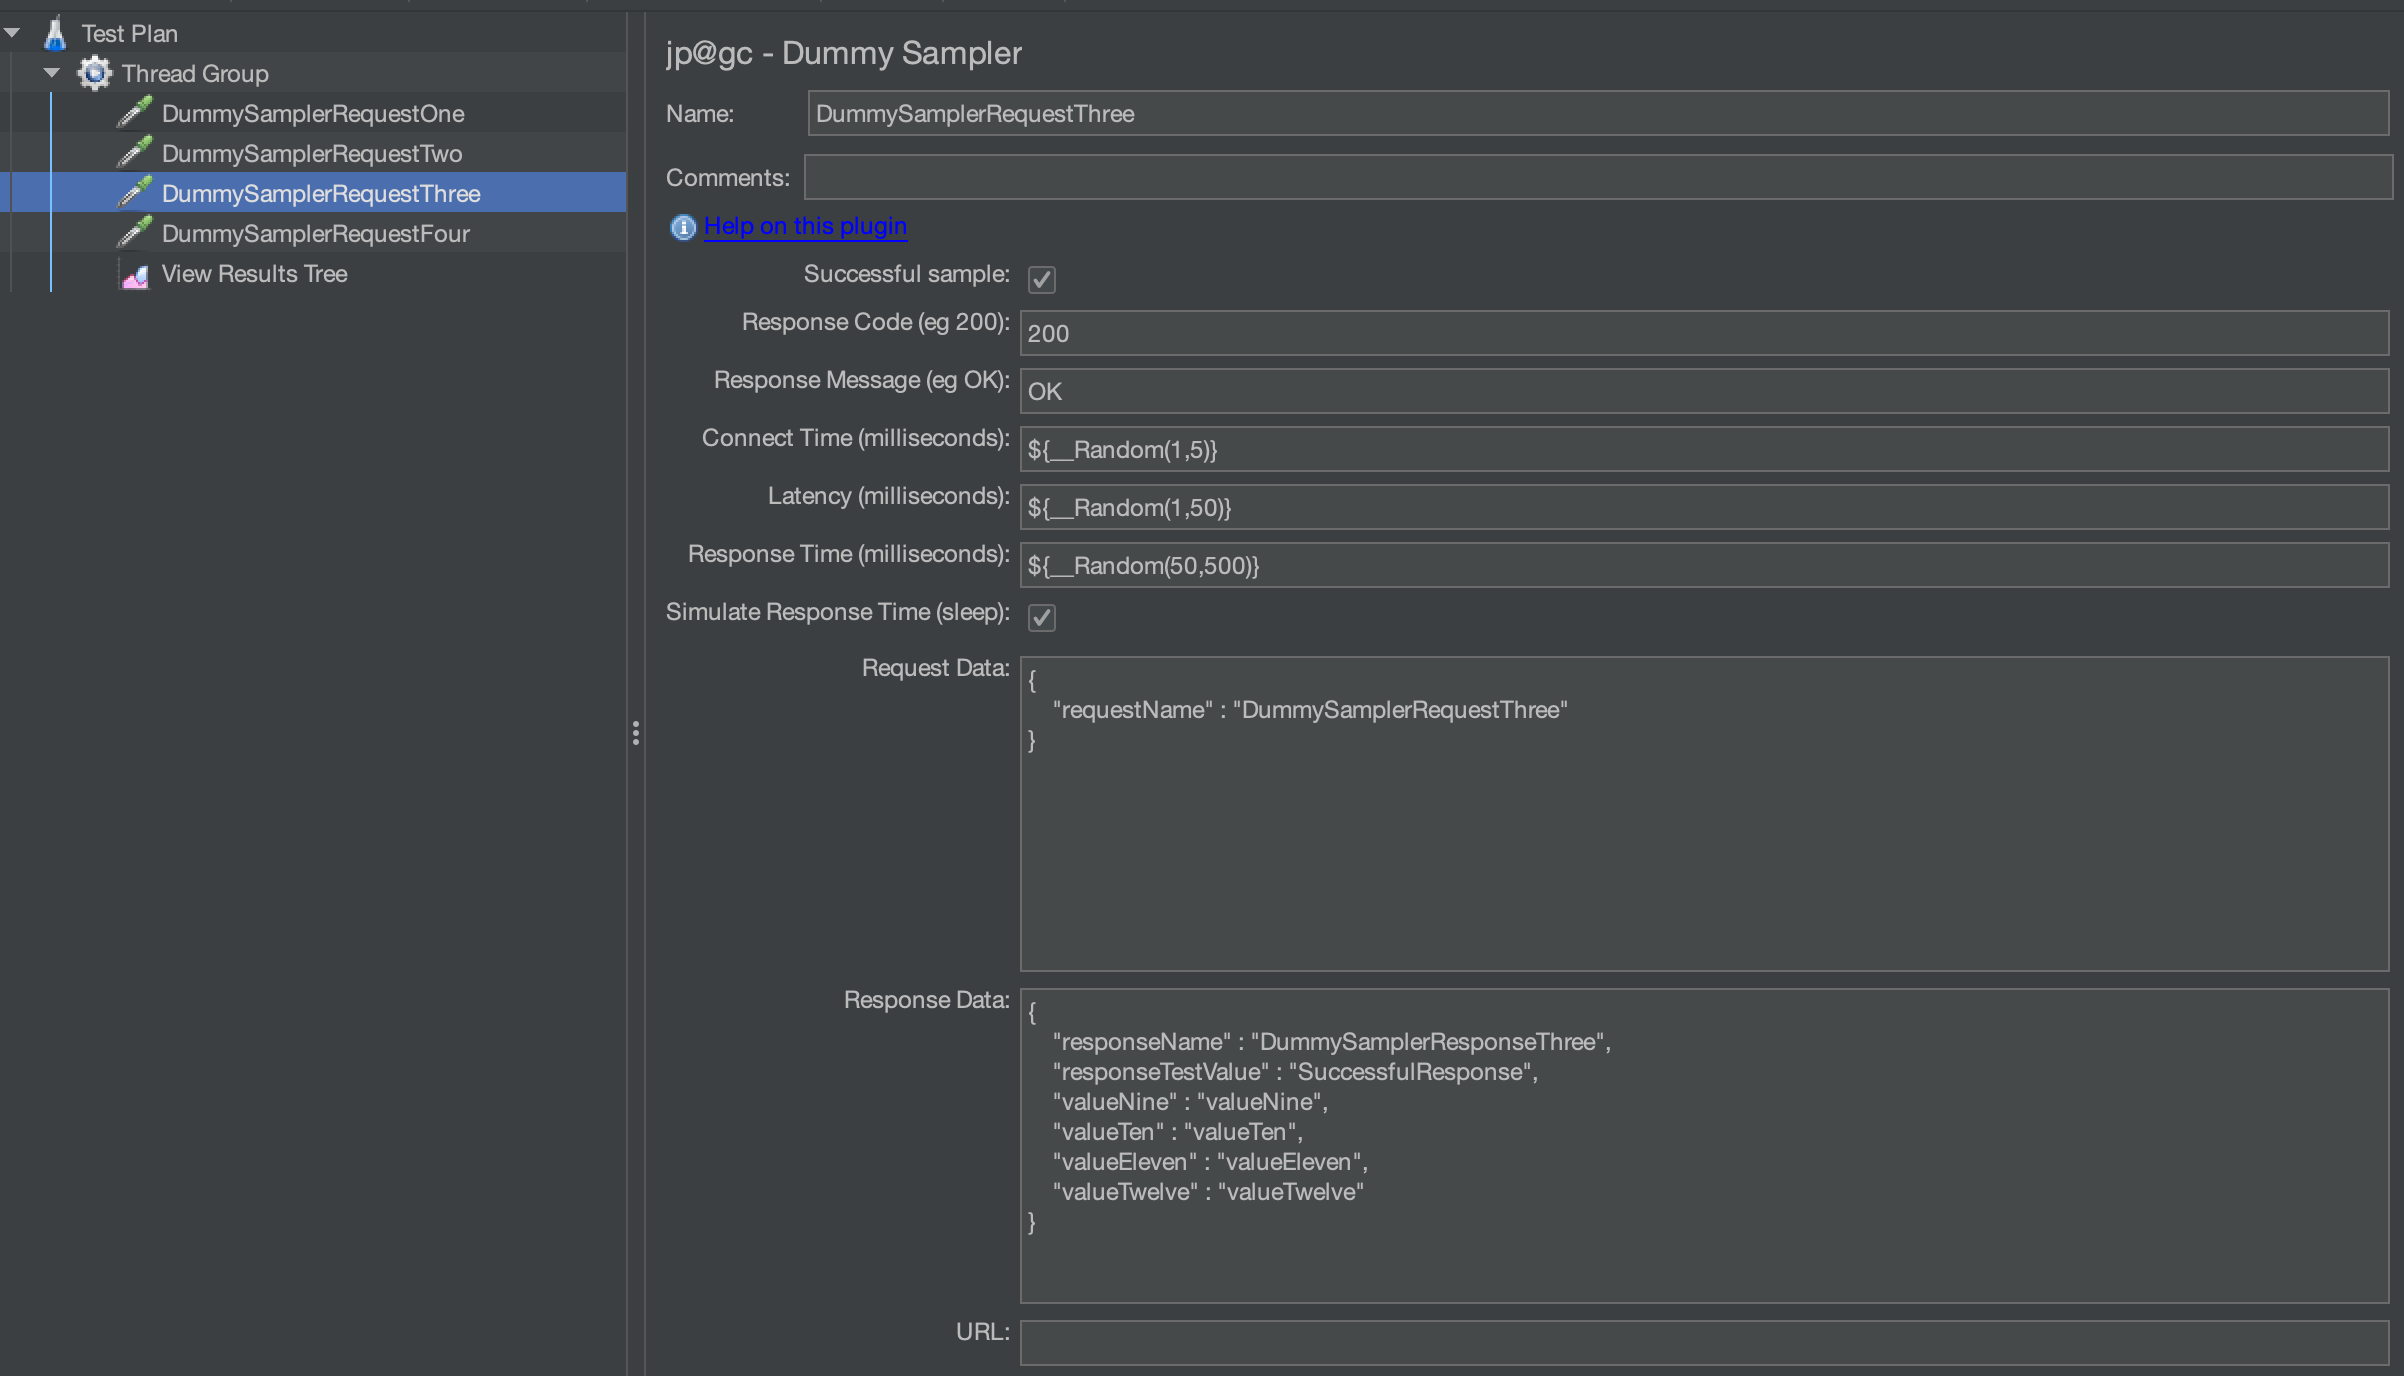
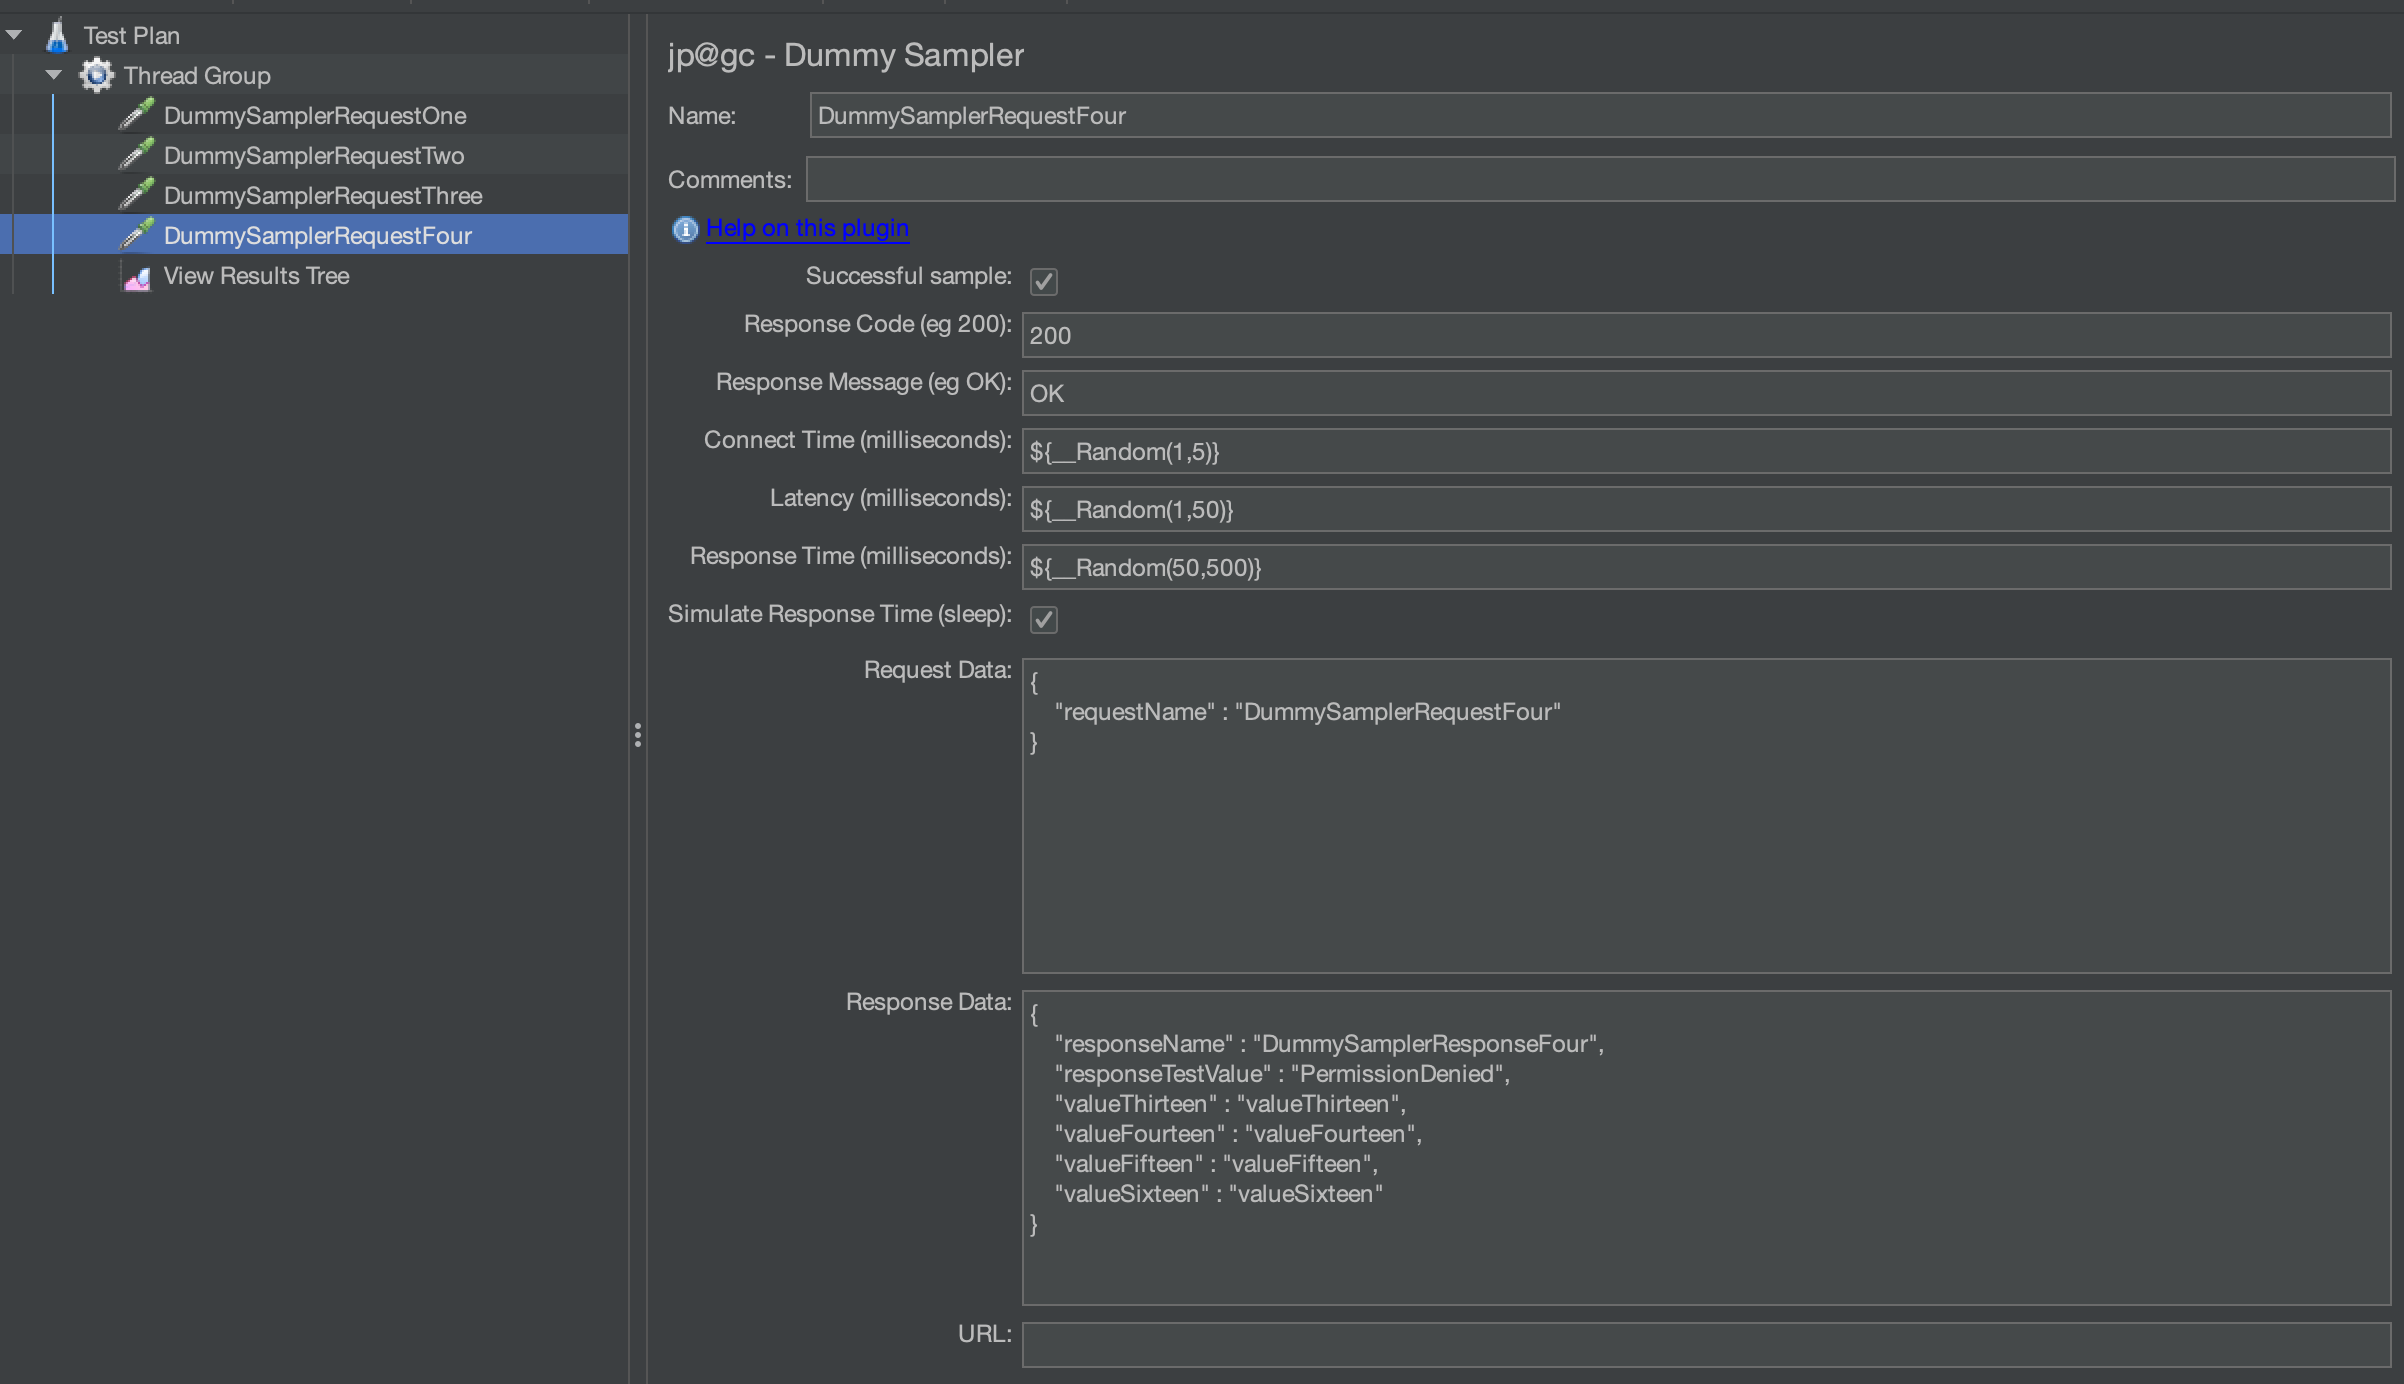
We will start to look at the test in detail and how it can be used in the next sections.
Running as a performance test
Before we consider adding the elements we are going to need to allow us to run this test as a Sanity Test, we need to consider how this test runs as a Performance Test.
After all the object of this post is to consider how we can give our existing Performance Tests the capability to also act as Sanity Tests rather than writing tests explicitly for that objective.
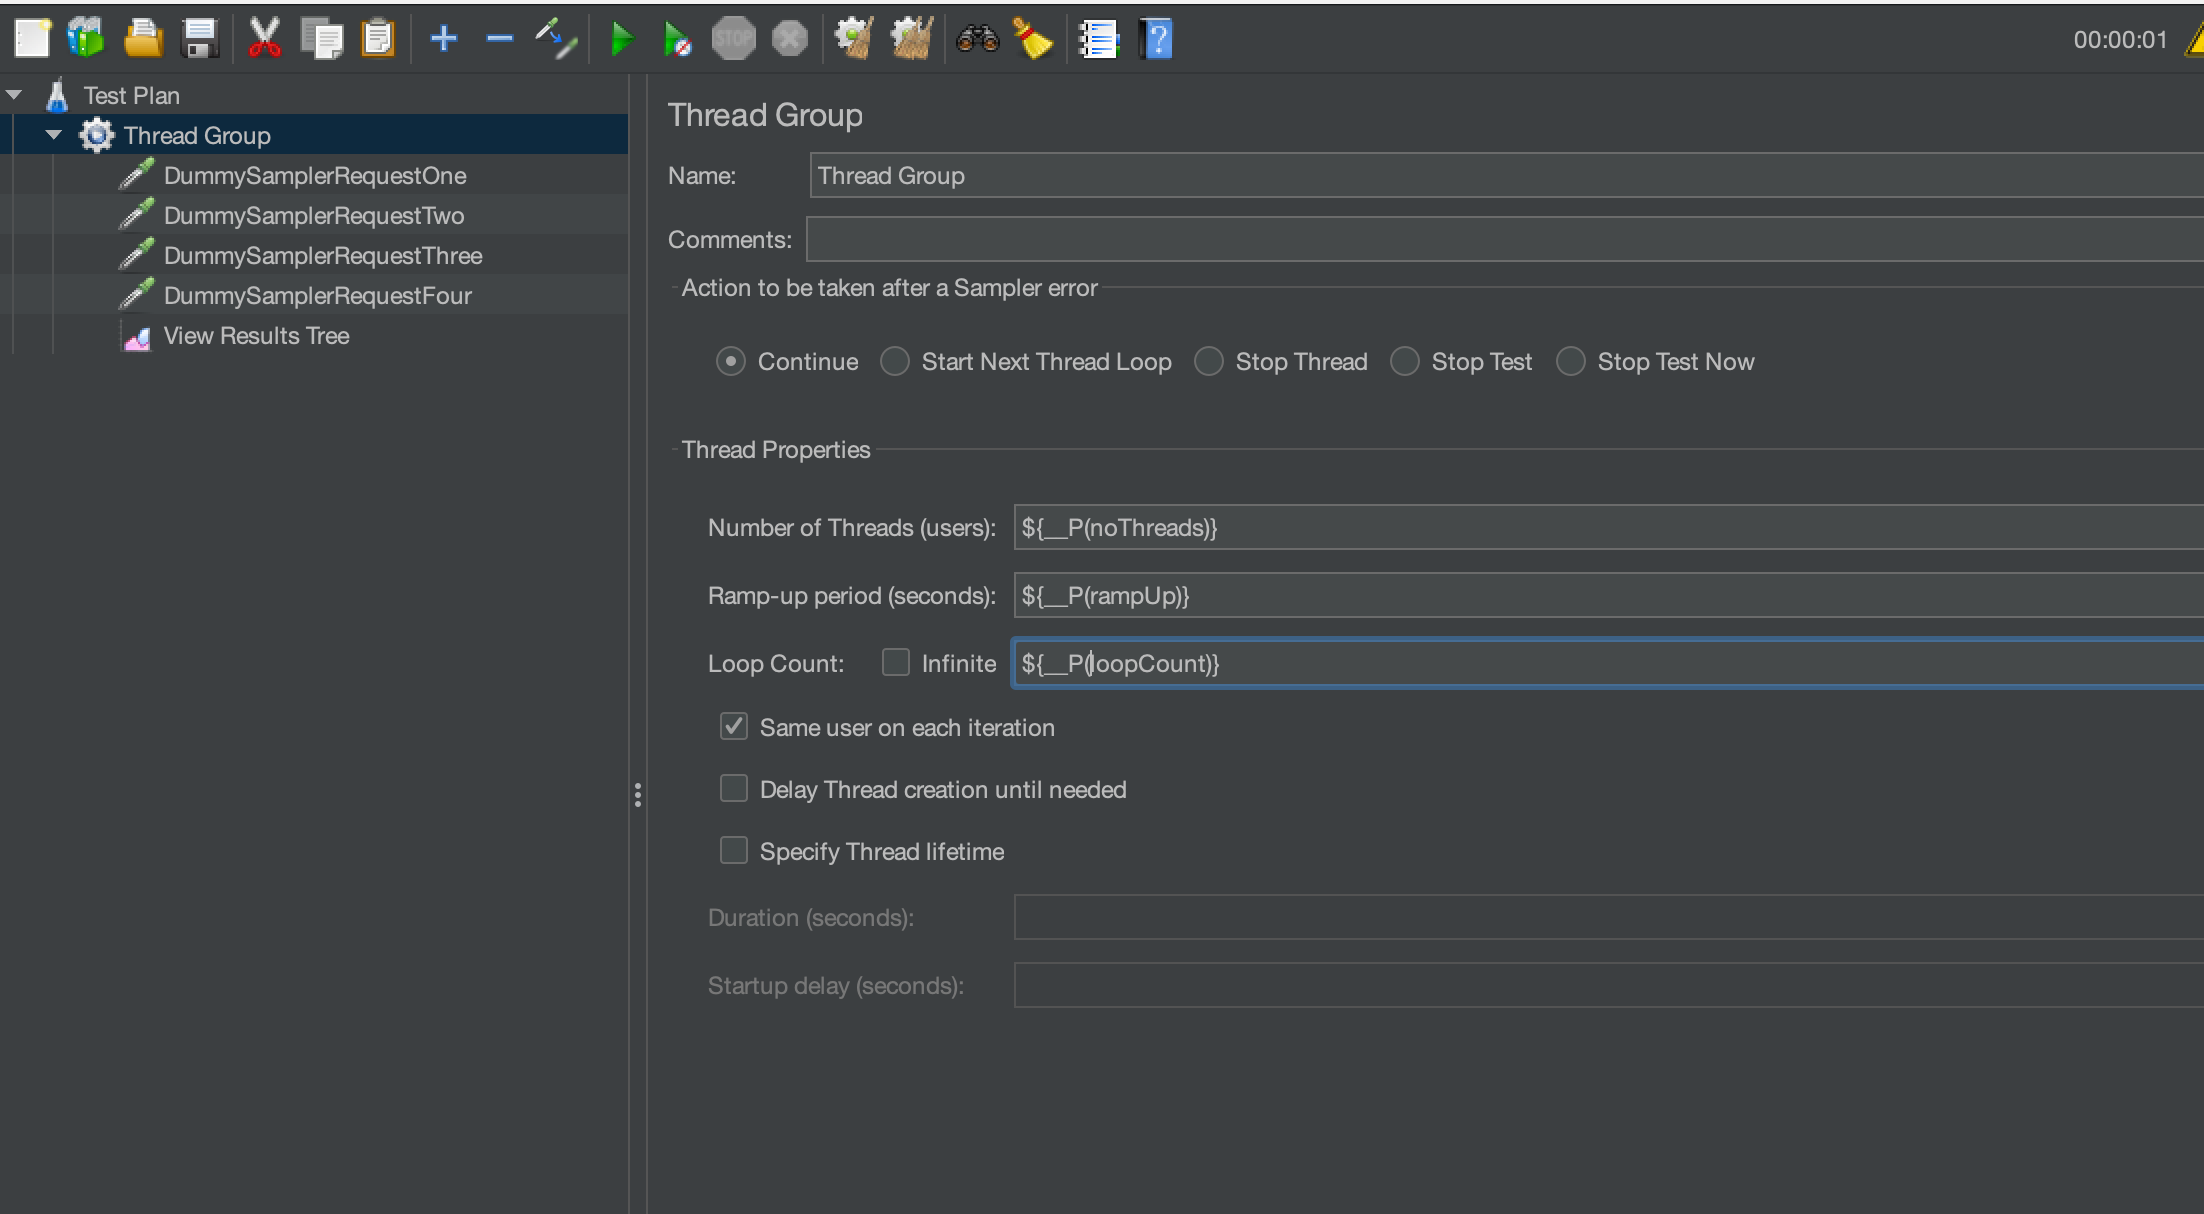
Let’s make our dummy tests more like a performance test. Firstly let’s set up the Thread Group to be configured using properties rather than hard-coded values. We will update our Thread Group to look like this:
Let’s then create a flat file that we can use to define the values used by these properties. We will call the file SanityTestProperties.dat and we will save this in the same location as our JMeter binary, just for ease of use. This is our flat file:
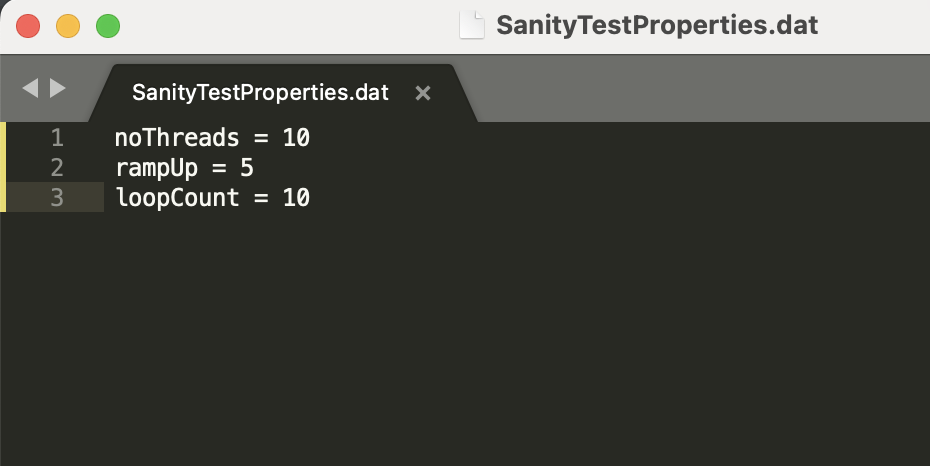
We can see that we have defined some values for our test, this is clearly not a proper performance test but creates something that is configured similar to a performance test. Let’s now run this test, we’ll open it in UI mode so we can see the results.
From the command line we can run:
./jmeter.sh -t sanity-tests.jmx -p SanityTestProperties.dat
Once this has launched, we can run the test and see the outcome in the Aggregate Report Listener we have added.

We can see that we have achieved 100 Sampler iterations for all 4 Samplers which we defined in our SanityTestProperties file, 10 threads x 10 iterations.
Another thing to consider is the way your performance test handles errors. If we look at the Thread Group, we can see that this defaults to Continue after a Sampler error.

This may be different in your performance tests, but it might not be. You probably will expect to encounter a few errors when running performance tests. This can be due to the load they are placing on your system under test, data issues that are commonplace with large performance tests or because of system limitations.
That is why this value is normally set to Continue as you want your Performance test to carry on running even with errors. This allows you to gather as much useful data that you can about response times and concurrency etc. We have highlighted this setting as we may want to change this in our Sanity Tests.
Before we move on, we are going to add another Thread Group as this is likely to be the case in Performance Test and we can look at how me manage multiple Thread Groups in our Sanity Tests. Our full tests now look like this:
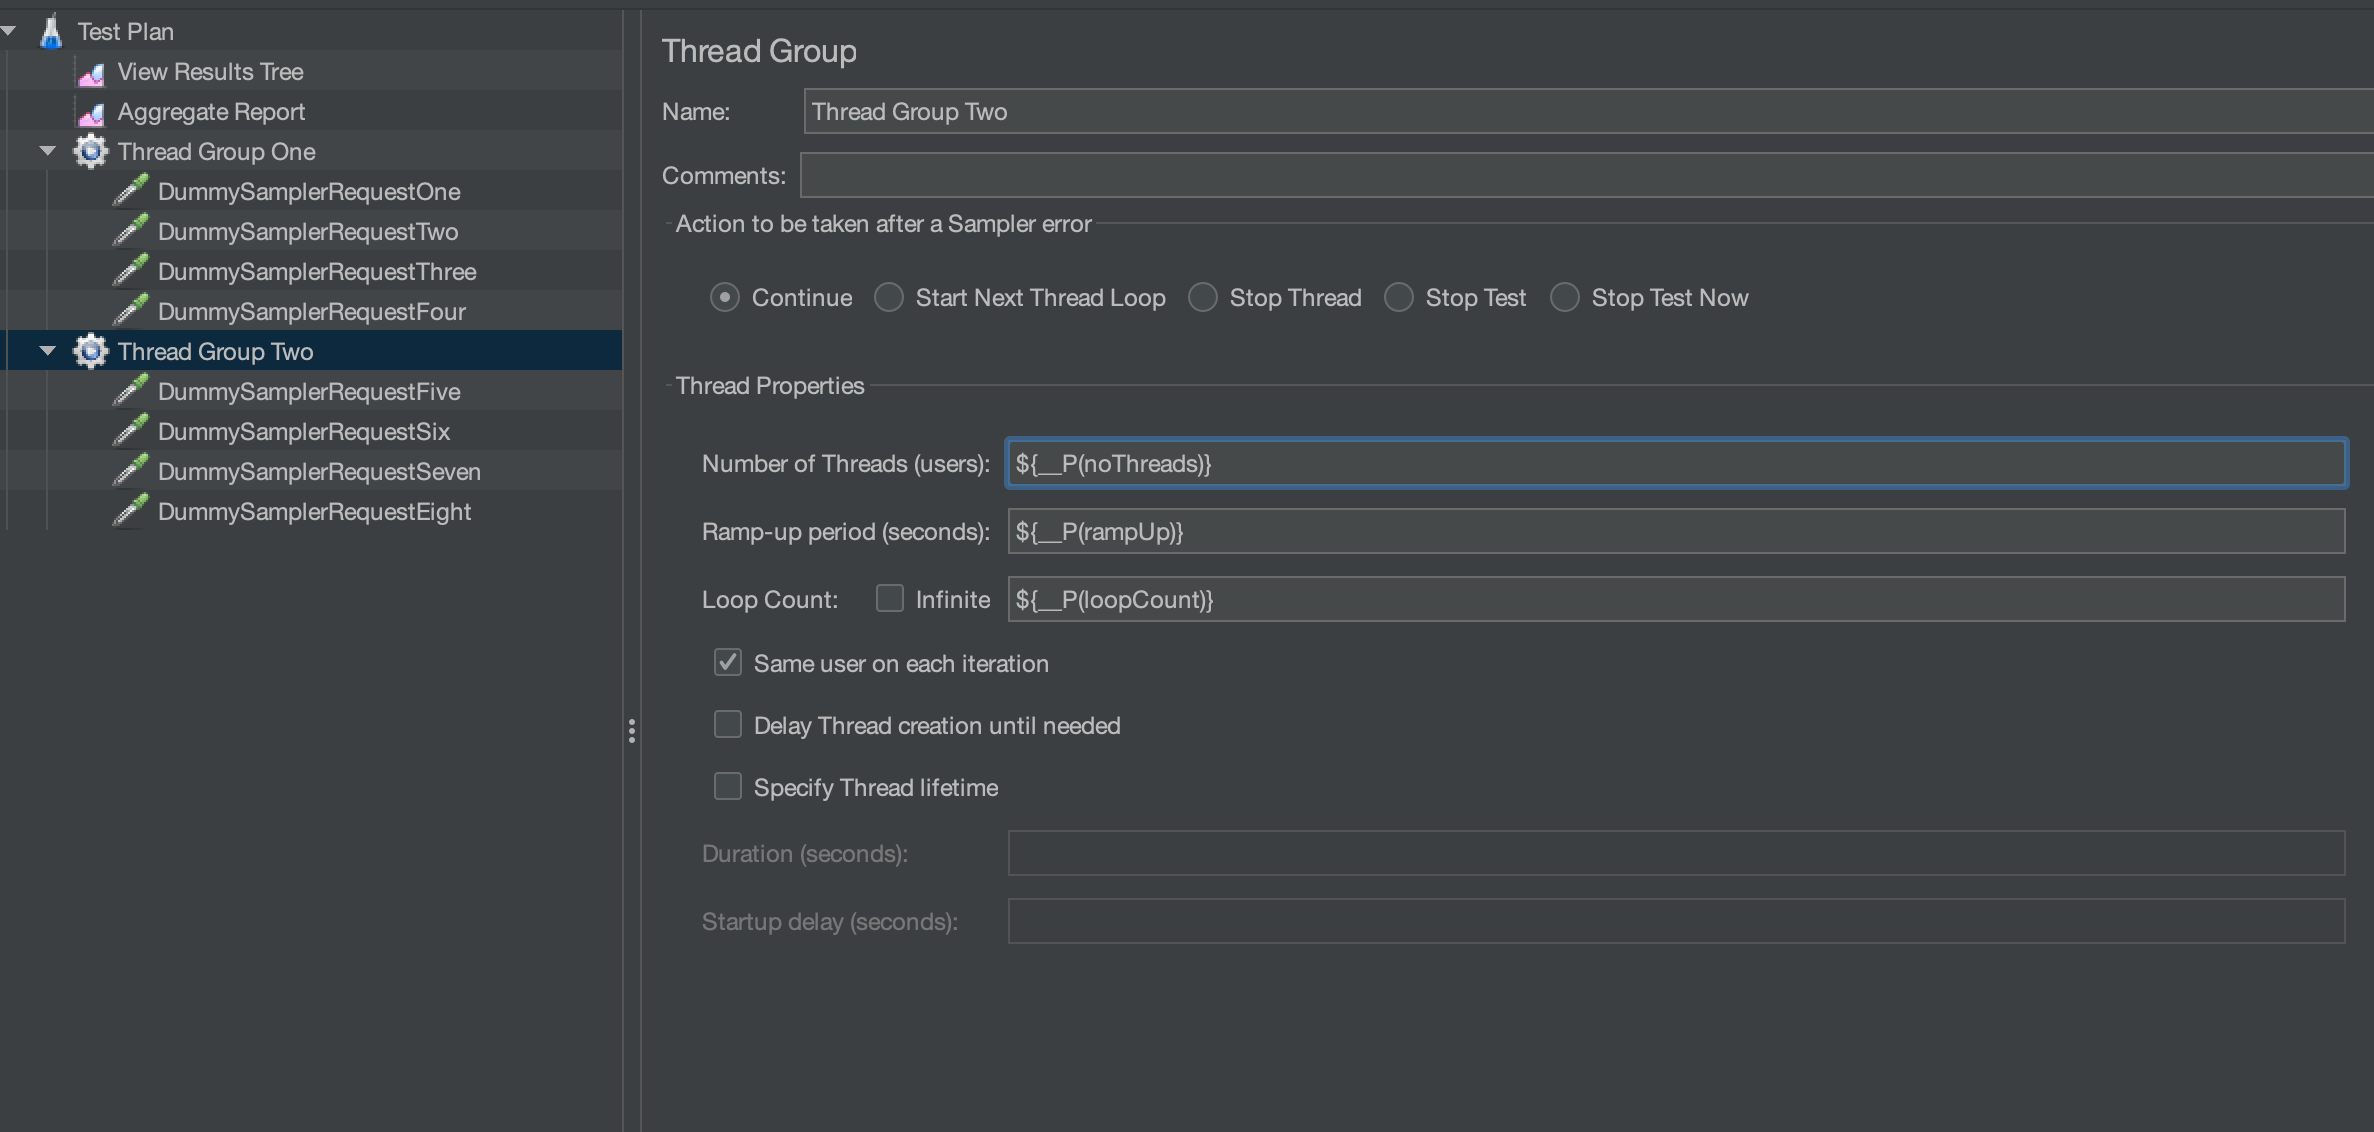
We can see that we have given the Number of Threads, Ramp Up and Loop Count properties the same as the first Thread Group, this is purely for simplicity. If we run this test, we can see that we now have 100 Sampler iteration for all 8 Samplers. So now we have looked at our dummy Performance Test let’s get to the point of this post and consider how we can transform it into a Sanity Test without affecting its ability to be a performance test.
Conversion to a Sanity Test
We have built a dummy Performance Test, and we have discussed how this is configured and executed the tests to show a complete set of results. We now want to add some non-intrusive functionality to the tests to allow them to also be used as Sanity Tests. This will be done incrementally to allow us to discuss in more detail what changes we are making.
The first change we are going to make is to use different values for Number of Threads, Ramp Up and Loop Count. In a Sanity Test these only need to be set to one for each value, a Sanity Test only requires a single iteration with a single user to be of use. For us to change the tests make up and run time values we only need to create a new property, which we will call isSanityTest. We can then check this property in our test and if True we will run as a Sanity Test and if False it will default to its primary purpose of being a Performance Test.
The first thing we will do is add a setUp ThreadGroup. This will run before the other Thread Groups and allow us to make sure the test is configured as a Sanity Test. In the setUp Thread Group we are going to add a If Controller. Our If Controller works by evaluating an expression, and if the expression resolves to True then any logic nested withing the If Controller is executed.
This is what it looks like:
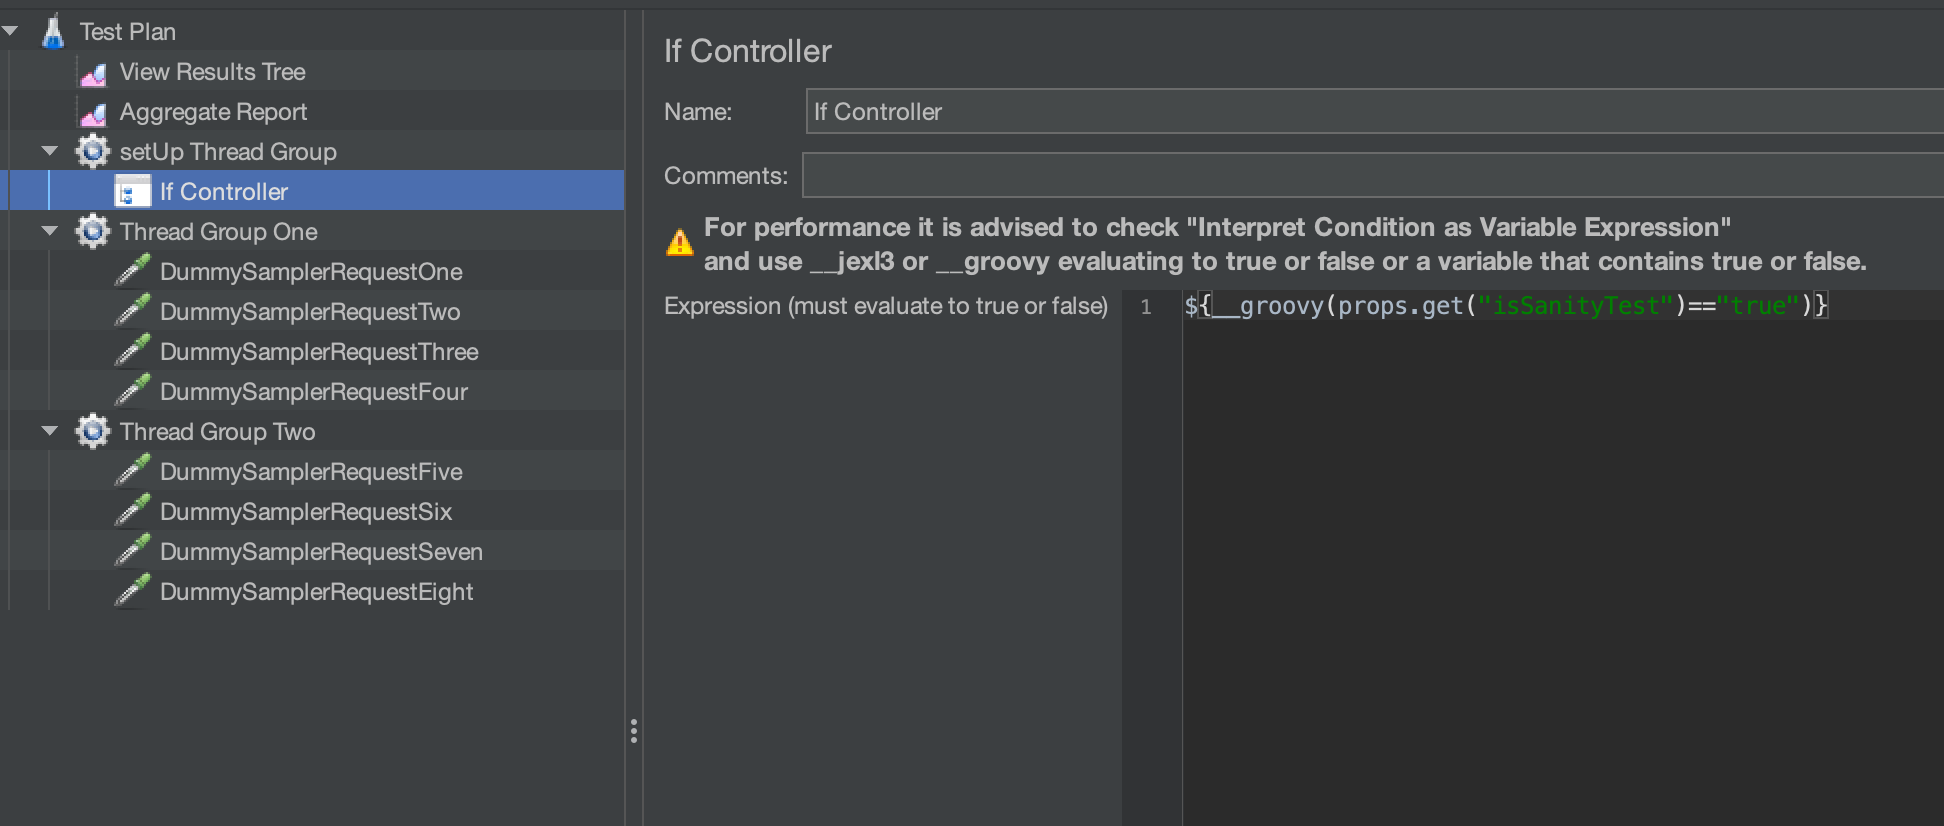
This is our expression:
${__groovy(props.get("isSanityTest")=="true")}
So basically, if we pass in the property, we touched upon earlier, called isSanityTest and its value is True then anything that is a child of the If Controller will be executed.
Let’s add a child to the If Controller in the form of a JSR223 Sampler and overwrite our Number of Threads, Ramp Up and Loop Count values.
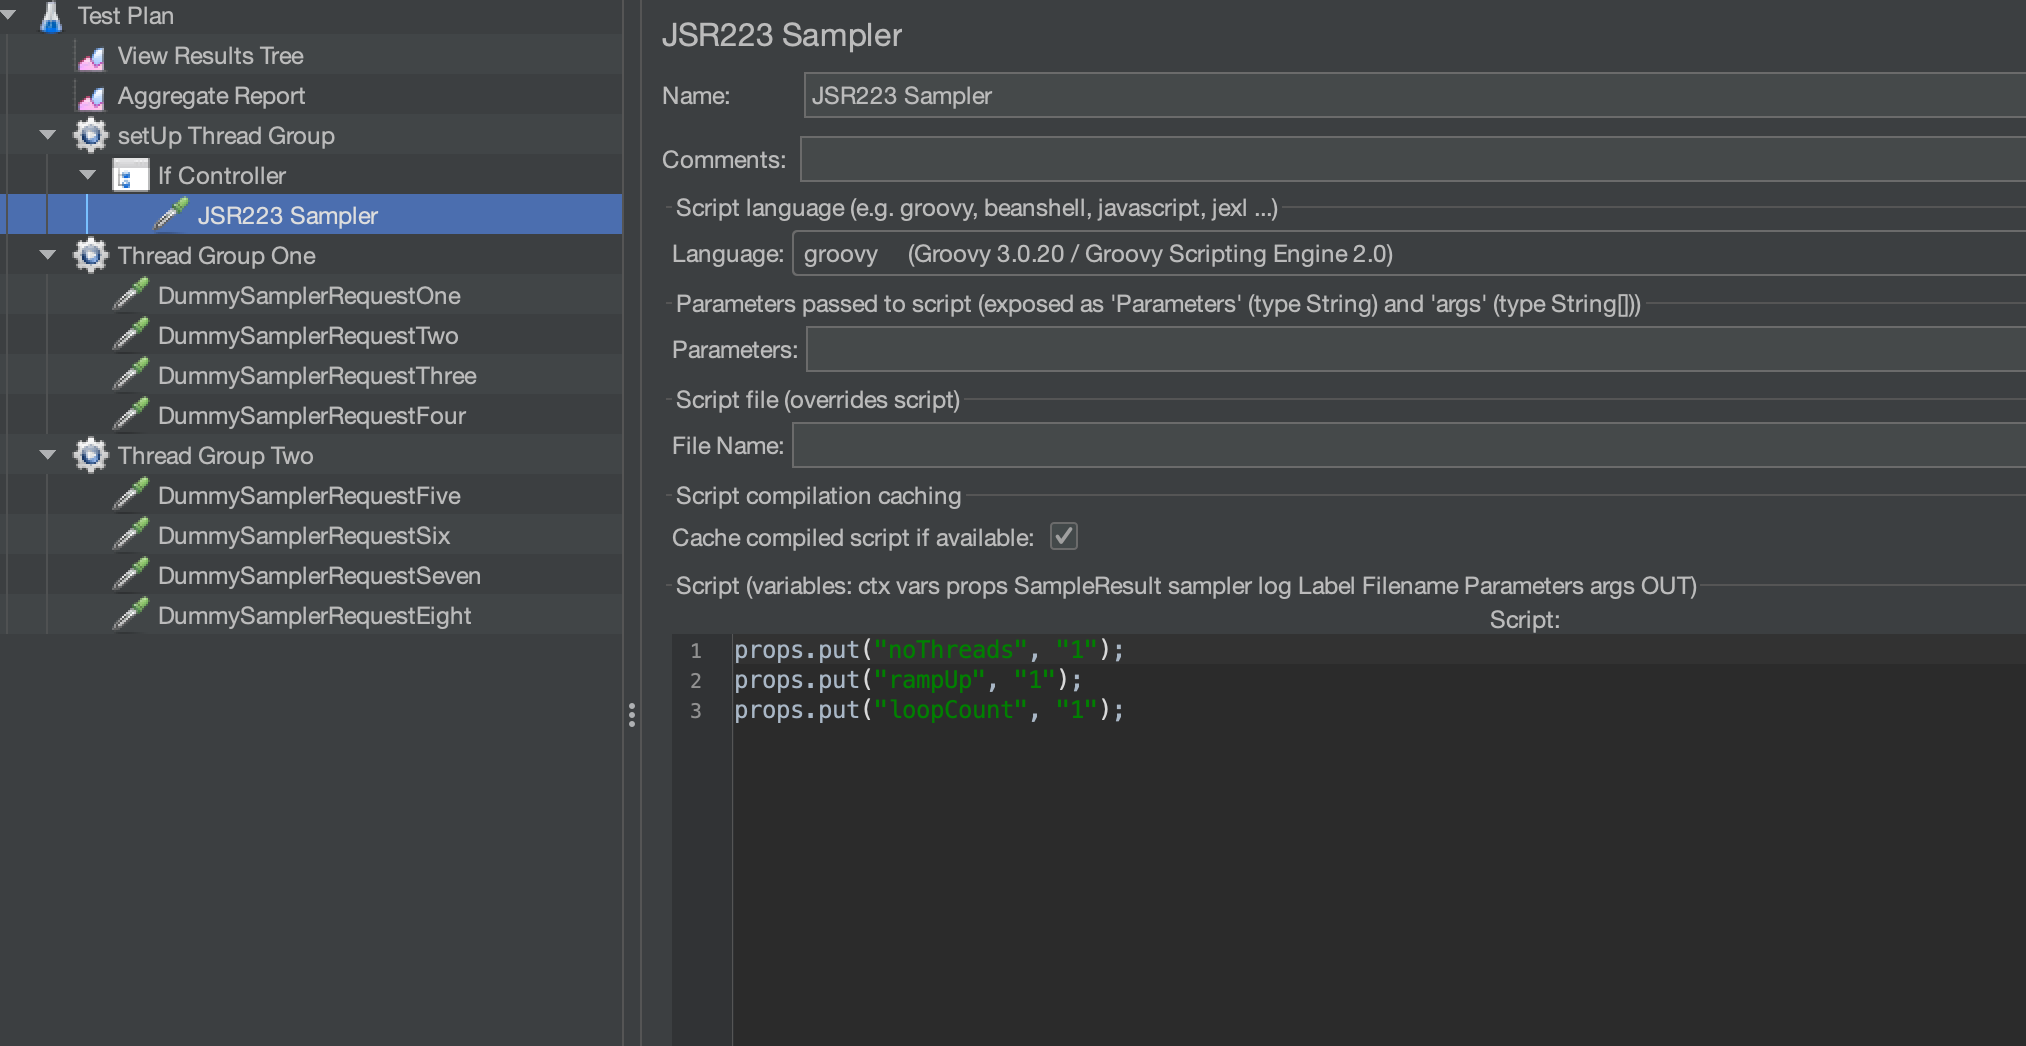
We are basically just setting our properties used in the Main Thread Groups to be 1.
We now need to set an initial value for isSanityTest and we can do this by adding a value to our SanityTestProperties file.
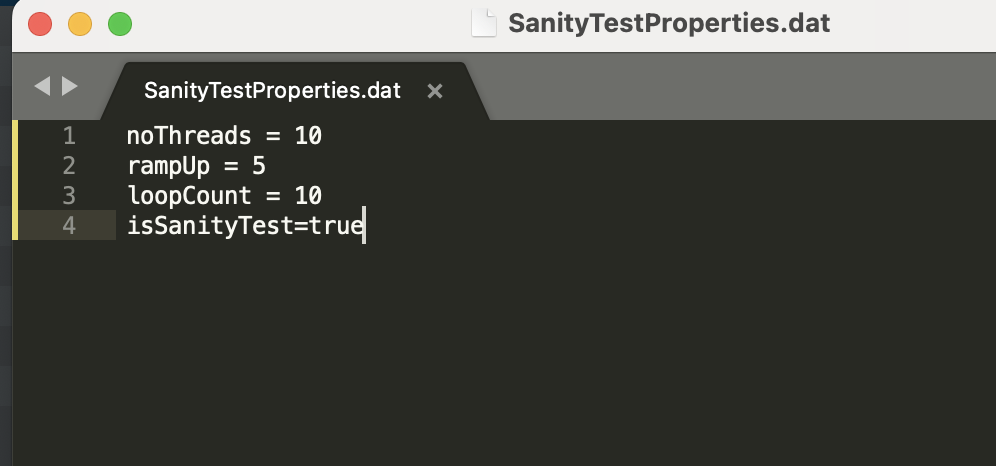
If we now relaunch our test using this command:
From the command line we can run:
./jmeter.sh -t sanity-tests.jmx -p SanityTestProperties.dat
And then execute the test we can see from the Aggregate Results Listener that each Sampler is only executed once.
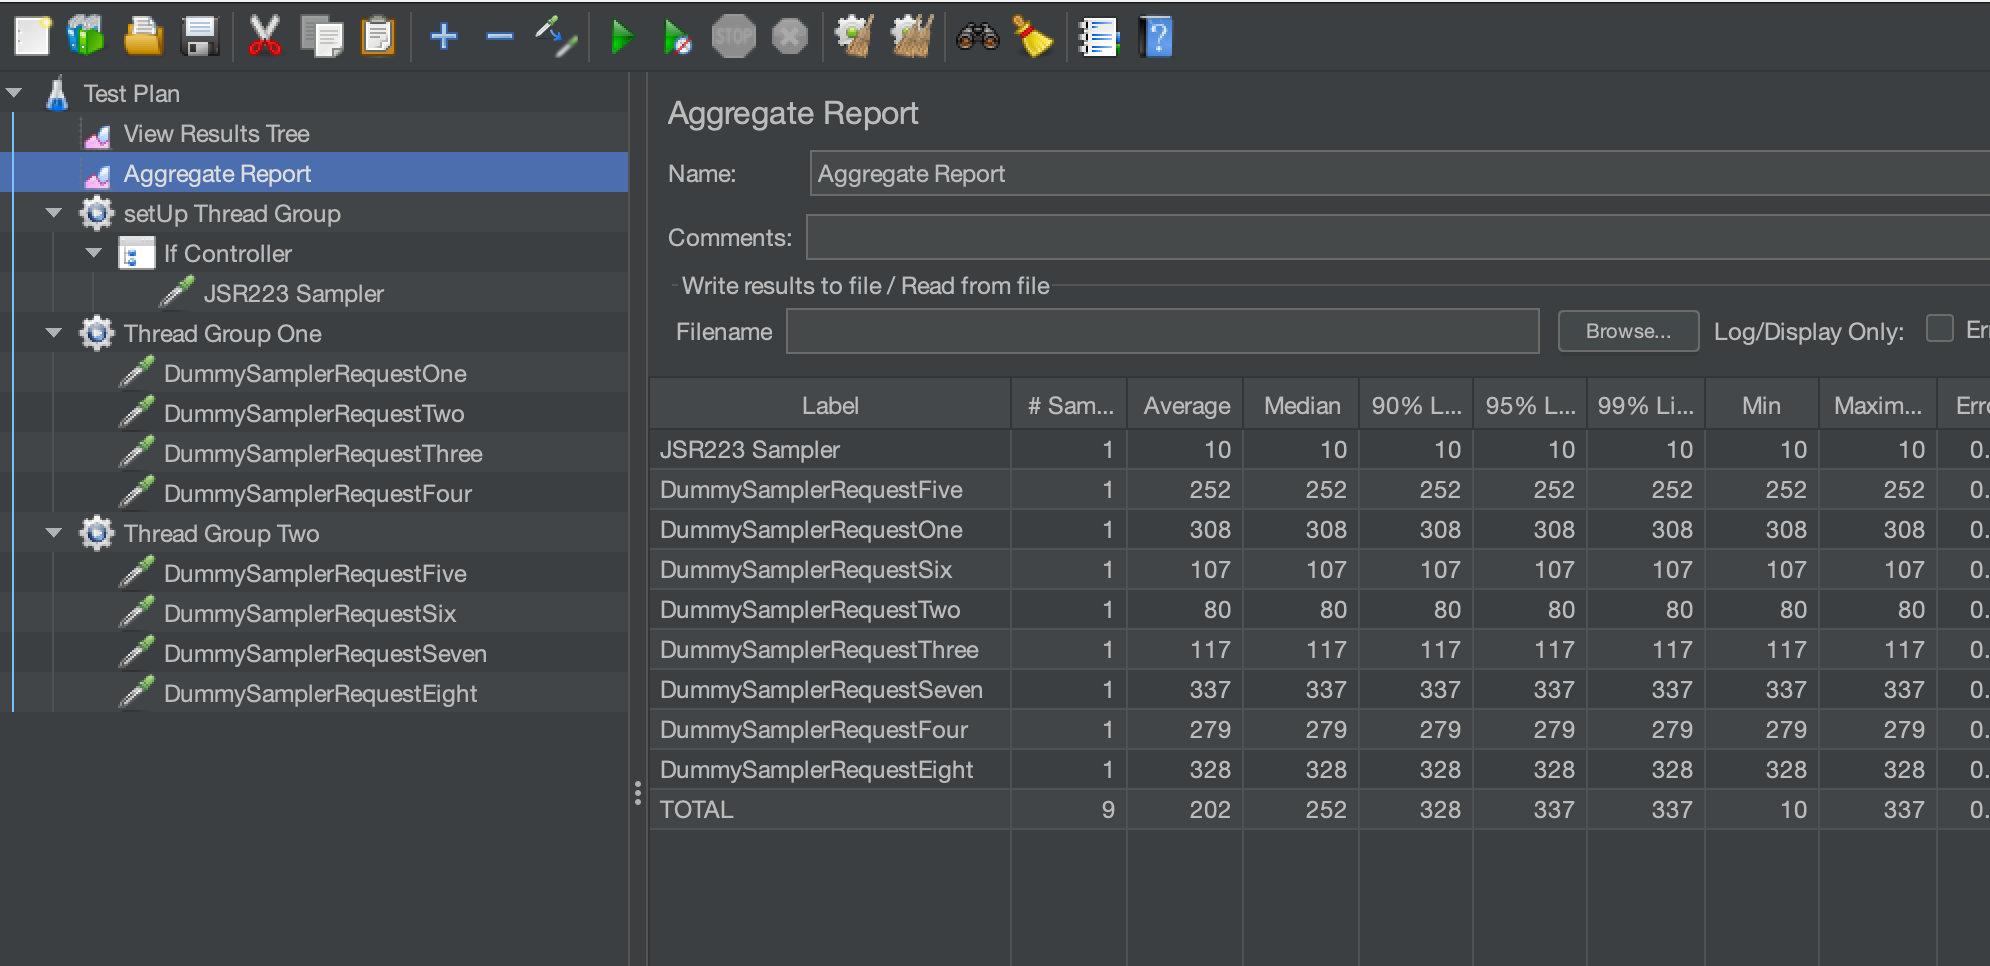
We can see that our logic is working. Before we move on, it's important to clarify one thing. We could have just used a different properties file with our Number of Threads, Ramp Up and Loop Count values explicitly set to a value of one to achieve the same outcome.
But we are going to have to want to make some additional changes to our test to make it a Sanity Test, which we will discuss next, and therefore we will need to make these in the test itself.
Therefore, this logic is inevitable, and therefore it is easier to also manage the Number of Threads, Ramp Up and Loop Count values in the test rather than maintain two different properties files.
The next thing to consider when updating your Performance Tests so they can also act as Sanity Tests is that you may experience Sampler failure. We discussed in the section Running as a performance test that it is common for the Thread Group to be set-up to Continue on error.
When we are running in Sanity Test mode, we will probably want our test to stop when a Sampler fails. After all, Sampler failure means that the application is returning an error and failed our Sanity Test. The way we are going to accomplish this is by using a JSR223 PostProcessor.
Let’s look at an example. We have added one to each of our Samplers in our dummy performance test.
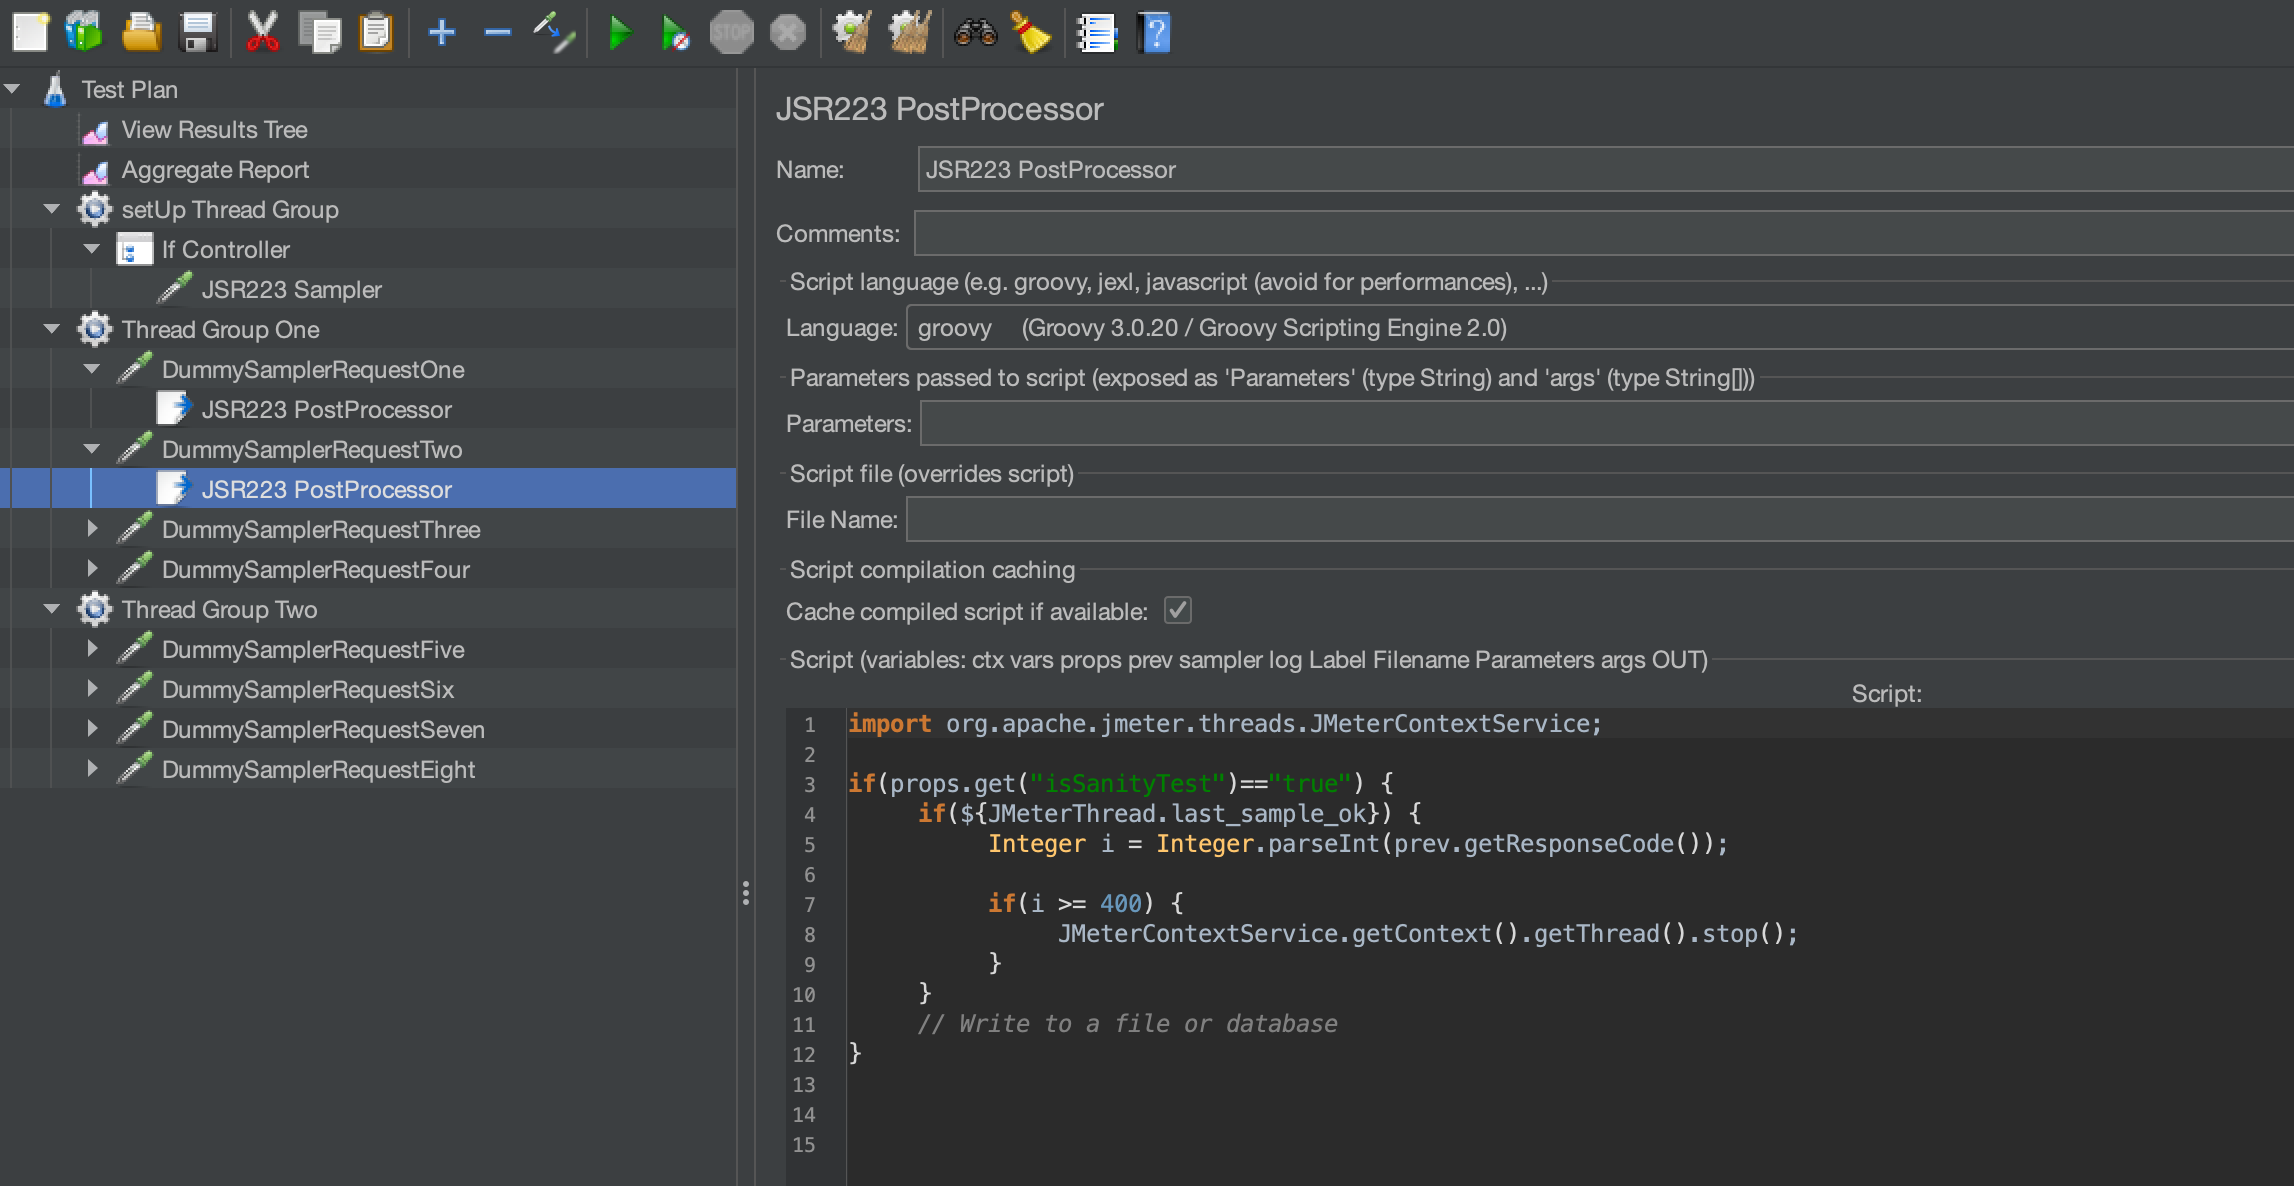
If we take a closer look at the code we have added to our JSR223 PostProcessor we see:
import org.apache.jmeter.threads.JMeterContextService;

if(props.get("isSanityTest")=="true") {
    if(${JMeterThread.last_sample_ok}) {
        Integer i = Integer.parseInt(prev.getResponseCode());

        if(i >= 400) {
            JMeterContextService.getContext().getThread().stop();
        }
    }
    // Write to a file or database
}
We are going to step through this to determine what it is doing. There are a few ways to do this using Groovy which is the Language of choice for JSR223 Samplers in JMeter.
We have tried to use several approaches in our example to give you some idea of the various way you can accomplish this and to provide you with some references for you to read up on should you wish to do so.
We start by importing the JMeterContextService so we can use this in our JSR223 PostProcessor.
import org.apache.jmeter.threads.JMeterContextService;
We are then going to check is we are in Sanity Test mode, this is the same approach we used in our If Controller we discussed earlier.
if(props.get("isSanityTest")=="true") {
We are then going to us the JMeterThread class to check if the last sample executed ok.
This does not check whether the response was a success or not it just checks that a response was received.
if(${JMeterThread.last_sample_ok}) {
We then use the prev script variable to get the Response Code from the Sampler.
The prev script variable is shorthand for the SampleResult class.
Integer i = Integer.parseInt(prev.getResponseCode());
The response code is a String, so we have converted to an Integer.
We then check the response code.
If it is greater than HTTP400 response code, in our example we have considered this an error.
Clearly you can be a precise as you want in your Response Code checking.
You may consider 1xx response codes failure and maybe even some of the more obscure 2xx response codes.
if(i >= 400) {
We then use the JMeterContextService to stop the Thread.
JMeterContextService.getContext().getThread().stop();
We have at the end of the JSR233 PostProcesser put a comment where we could output the results of our Sanity Test to a file or database.
We will not look at this in detail in this post but there are examples of how you could achieve this in this Results Analysis post.
// Write to a file or database
Finally, lets force one of our dummy samplers to fail and return a 401.
We have chosen DummySamplerRequestTwo.
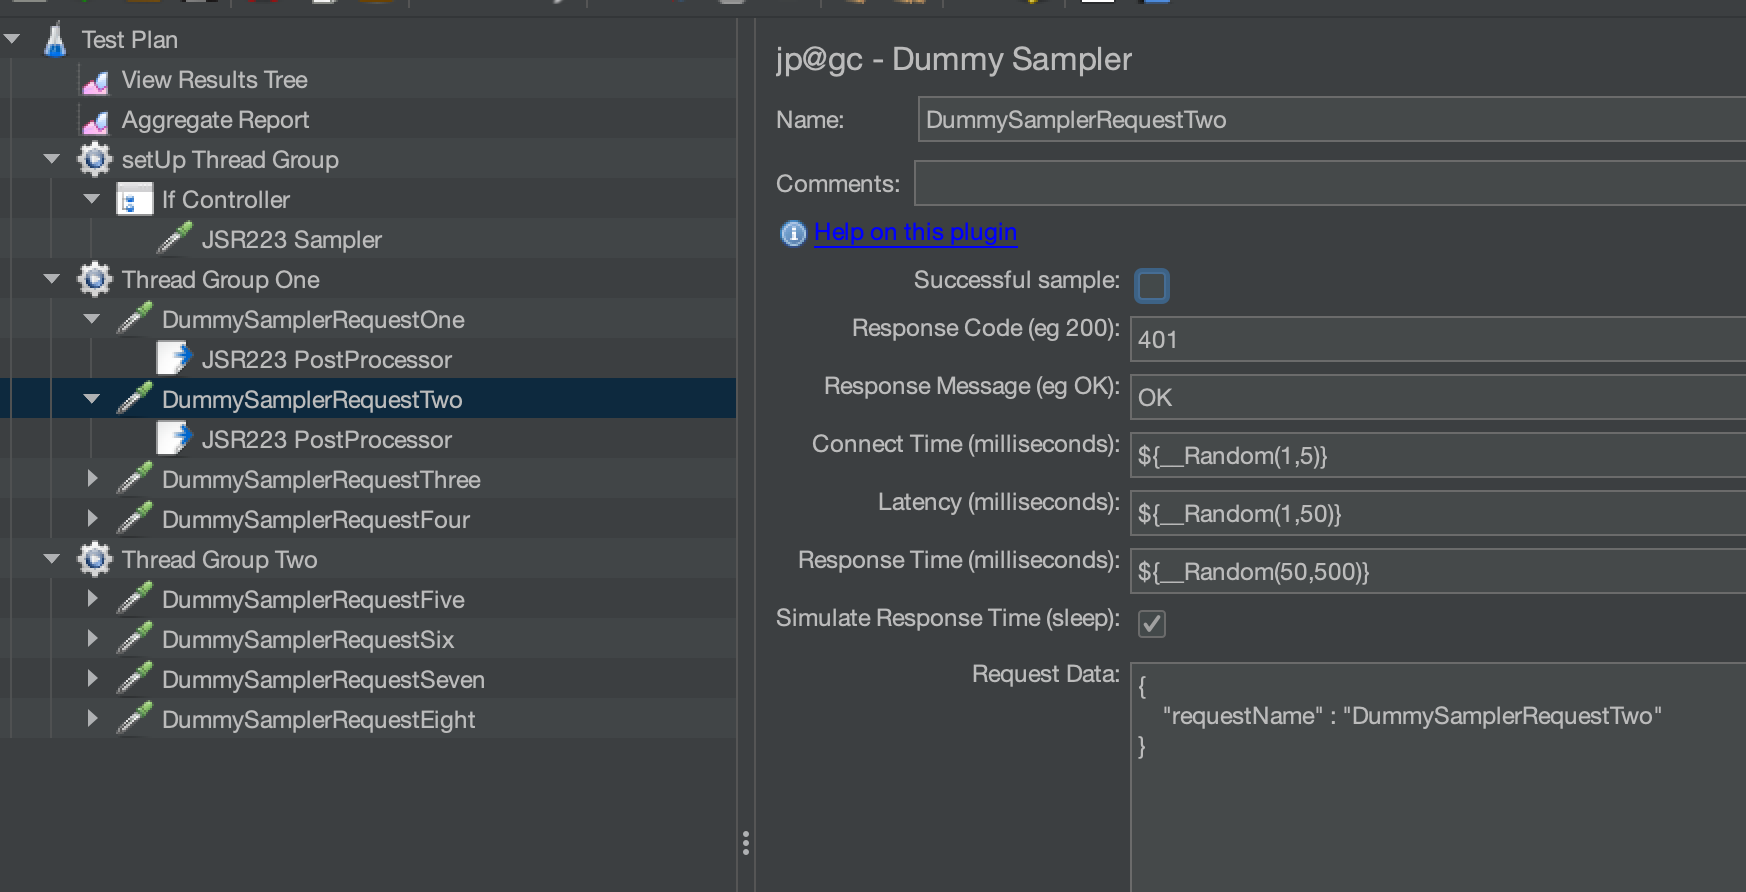
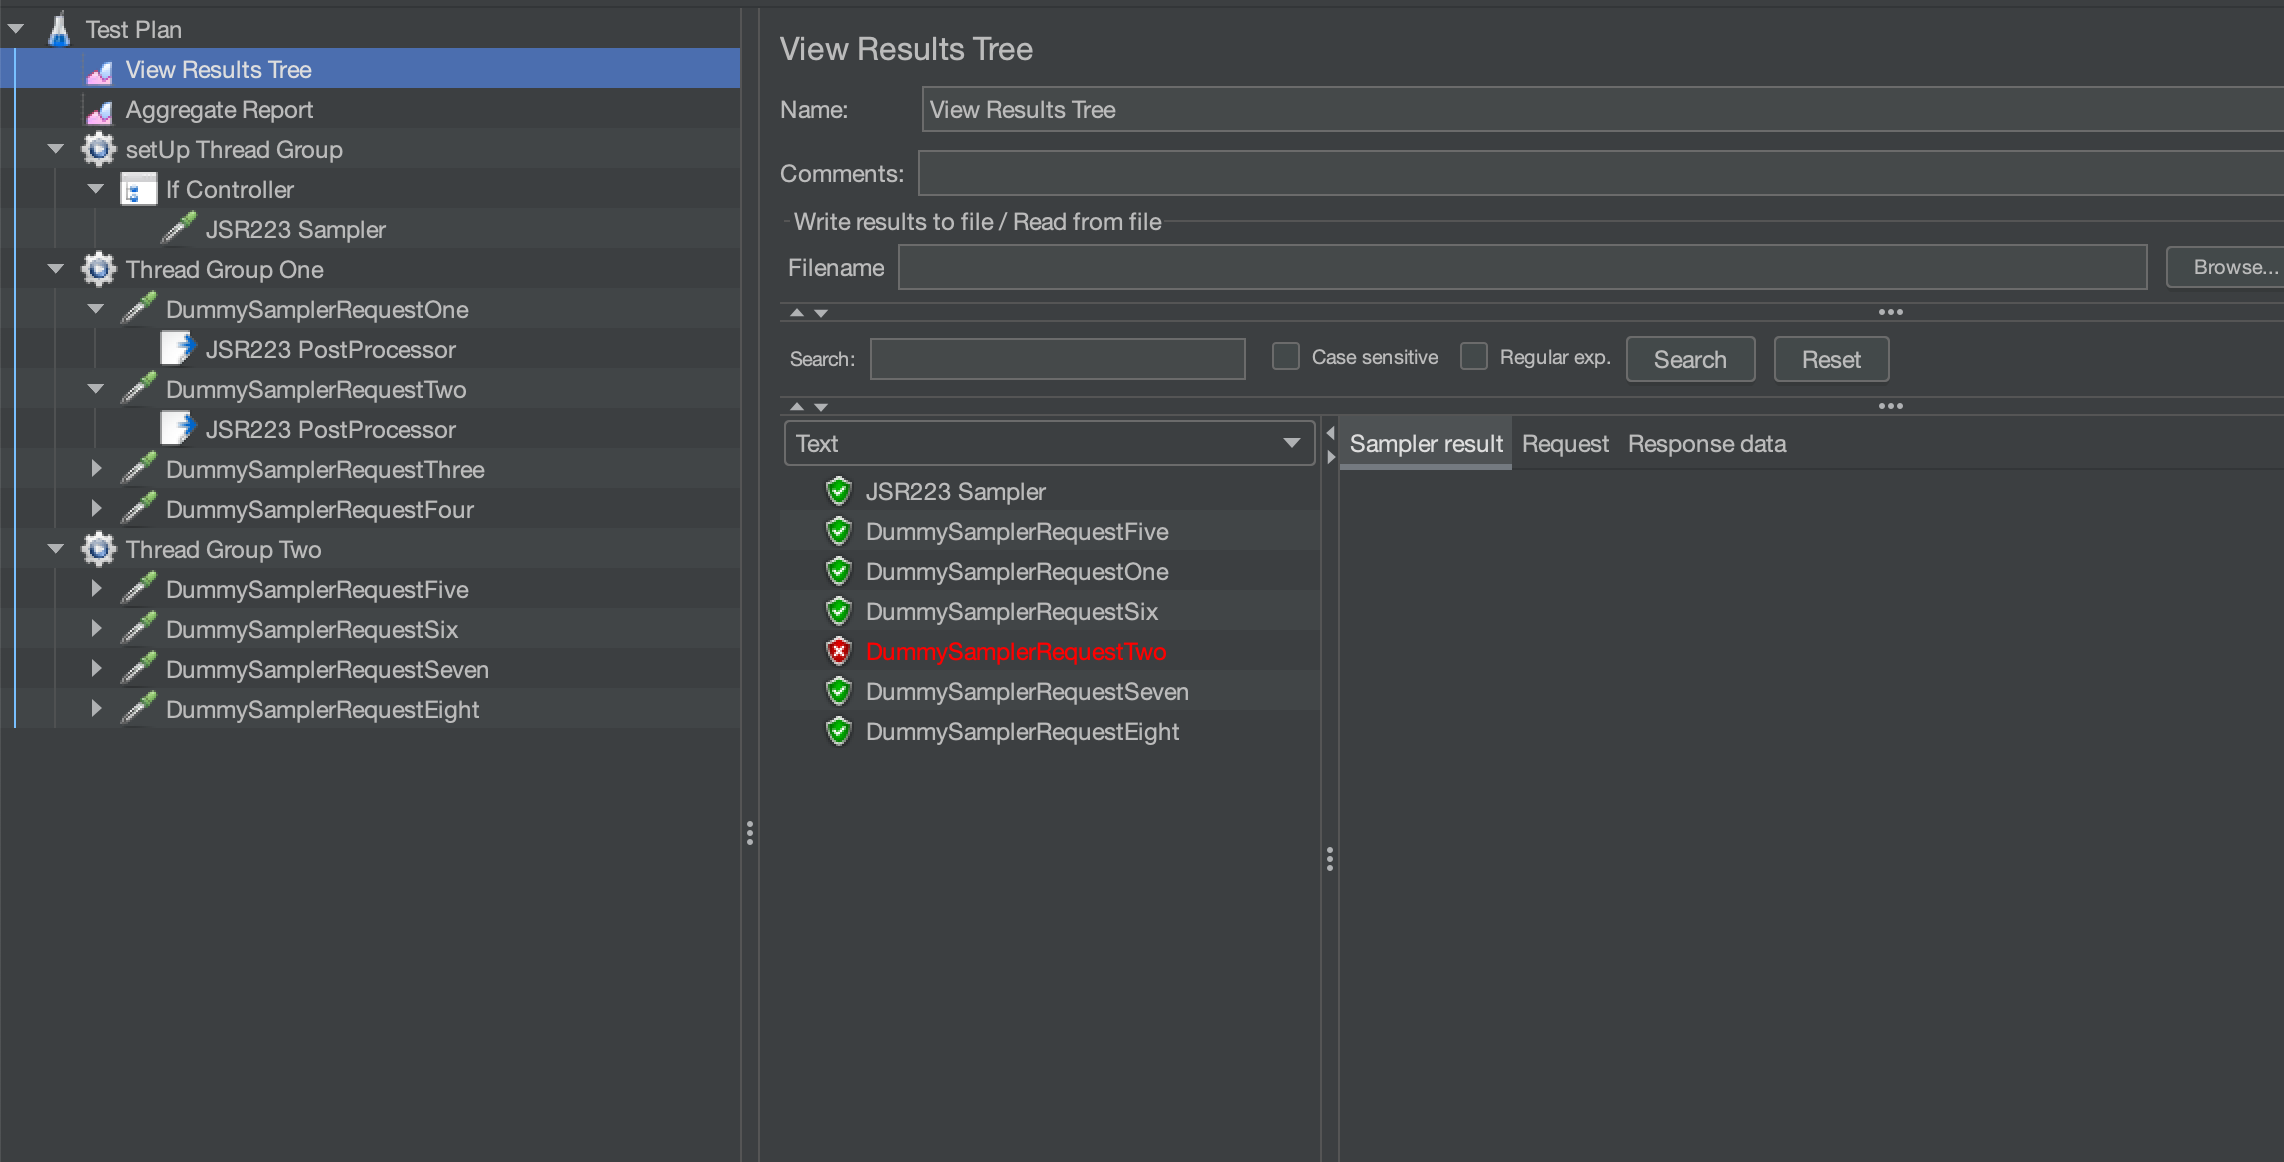
If we now run our test, we can see that ThreadGroupOne stops after the DummySamplerRequestTwo failure while ThreadGroupTwo continues to the end.
Conclusion
We have looked at some examples of how you could leverage your Performance Tests to be used as Sanity Tests. Sanity Testing is important but difficult to justify developing a set of automated tests for this sole purpose.
By configuring your Performance tests to have the ability to be run as Sanity Tests you could not only save your organisation time and money in development but also demonstrate that Performance Tests and their upkeep have many benefits for your organisation and the software it uses.
The test can be downloaded from here .
