
Looking at the uses of JMeter Timers
Timers in JMeter are incredibly important when it comes to the balance and pace of your performance tests, we are going to look at the Timers that ship with the standard JMeter installation in this Blog post but there are others that are available as a Plugin and hopefully this post will encourage you to investigate these further.
The timers that we will discuss are:
- Constant Timer
- Uniform Random Timer
- Precise Throughput Timer
- Constant Throughput Timer
- Gaussian Random Timer
- JSR223 Timer
- Poisson Random Timer
- Synchronizing Timer
- BeanShell Timer
Timer
In order to build an accurate load profile, you need to use Timers and understanding how they work, because it is not always obvious, is a useful tool to have.
It is important to note that this post is looking at providing an insight into these JMeter Timers and therefore while we are touching on how each one works you should look to explore them further in your own time and with your own load profiles, you can also combine Timers to again provide even greater control over the load that JMeter will provide.
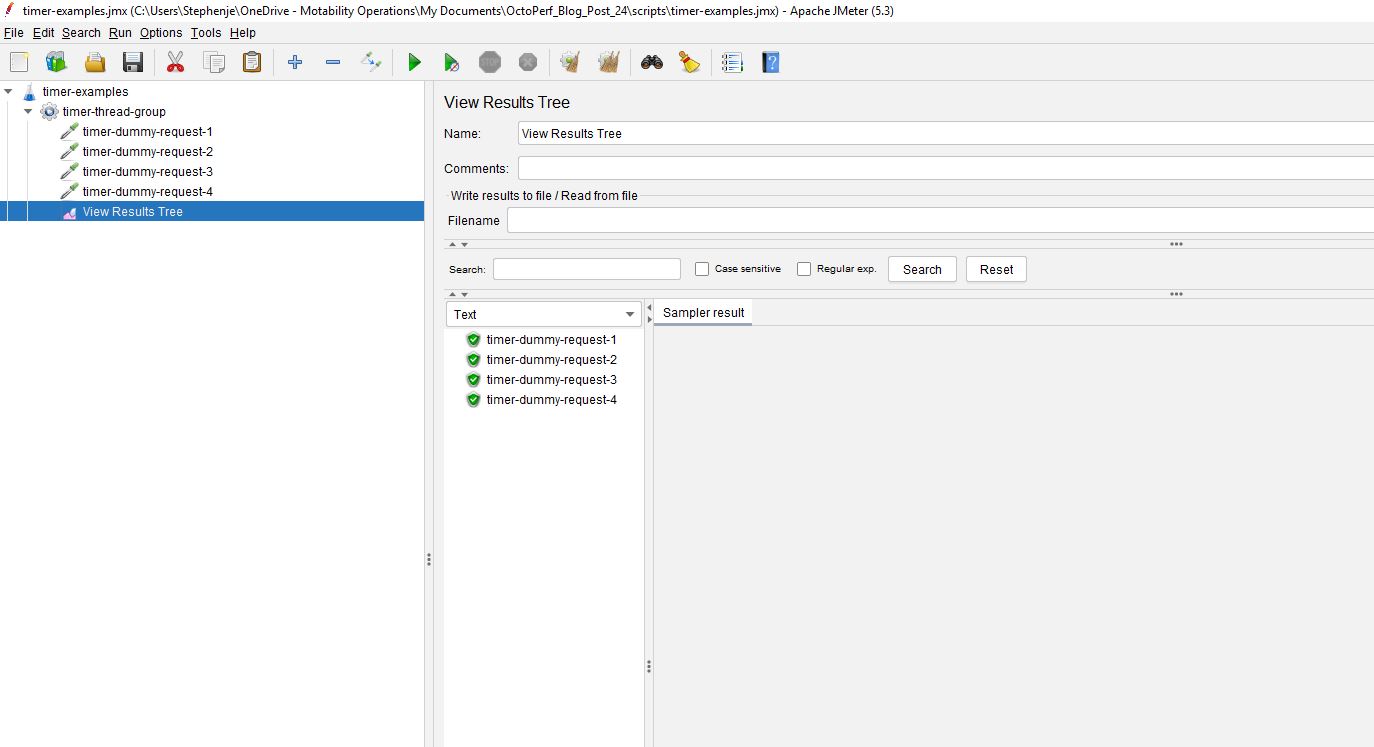
In order to demonstrate the Timers being used we will create a Test that contains a Thread Group with several Dummy Samplers that will allow us to visualise the results in a Listener.
Our test looks like this (The JMX file can be downloaded here):
If we add a Hits Per Second Listener in order to generate a graphical view of the load and execute this test, we see that all the sampler requests execute at the start of the test.
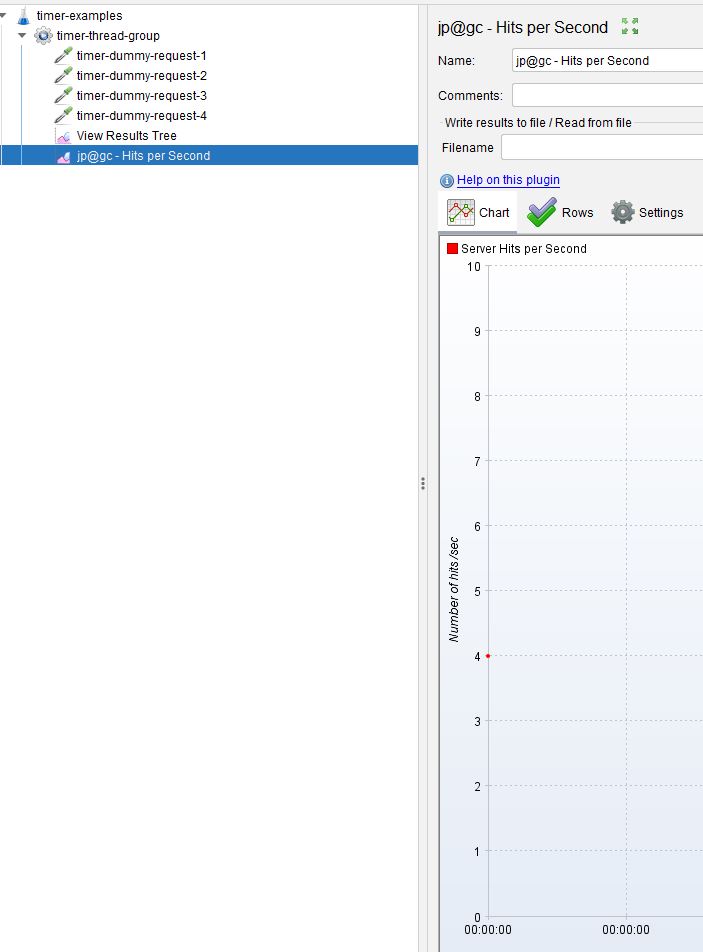
The values we are using are artificially high so we can demonstrate how the timers work, in reality you will be dealing with much smaller values to ensure that your tests match your production levels of load and concurrency.
Constant Timer
The Constant Timer is self-explanatory: it delays each sampler by a constant Thread Delay value.
If we were to add a Constant Timer to the test and set the delay to be 2000 milliseconds.

And then execute the test we see that the execution of each sampler is delayed by 2000 milliseconds.
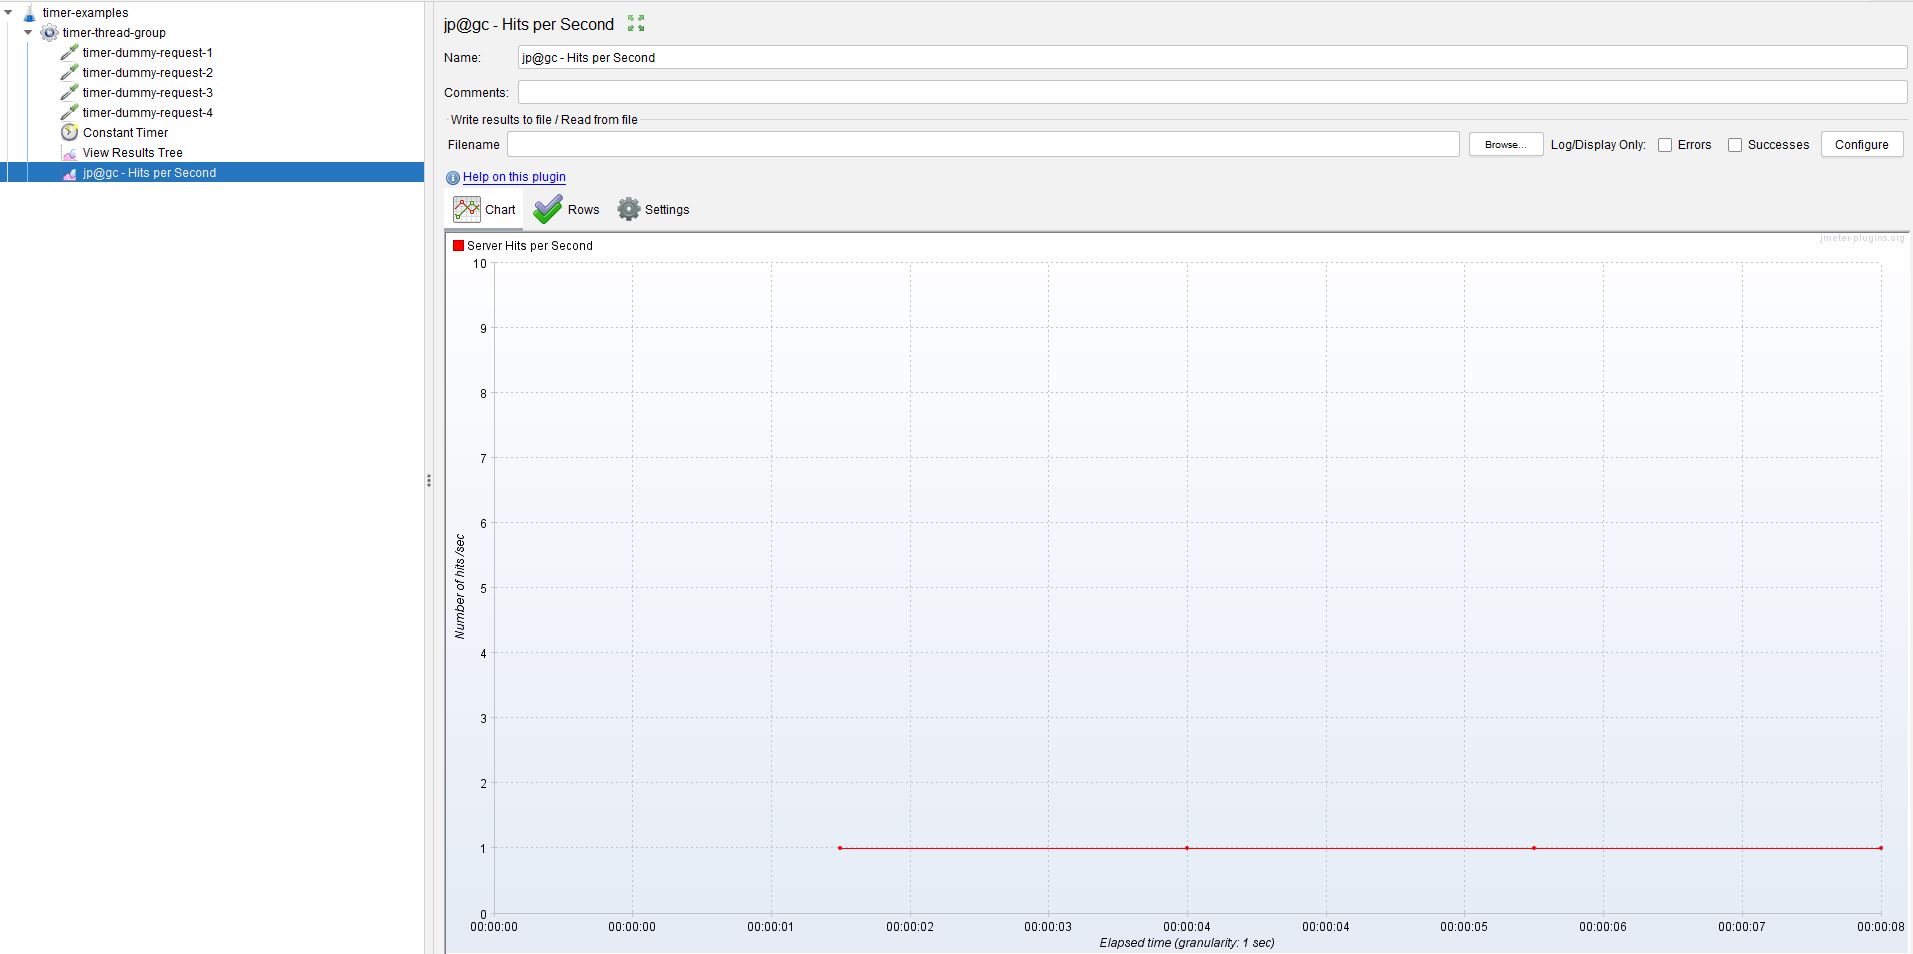
The first sampler is executed after 2000 milliseconds and then each one executed sequentially with a 2000 millisecond delay.
This is a very simple timer that allows you to add constant delays between samplers in a thread group.
Uniform Random Timer
The Uniform Random Timer is again a simple timer that adds an element of randomness to a constant value.
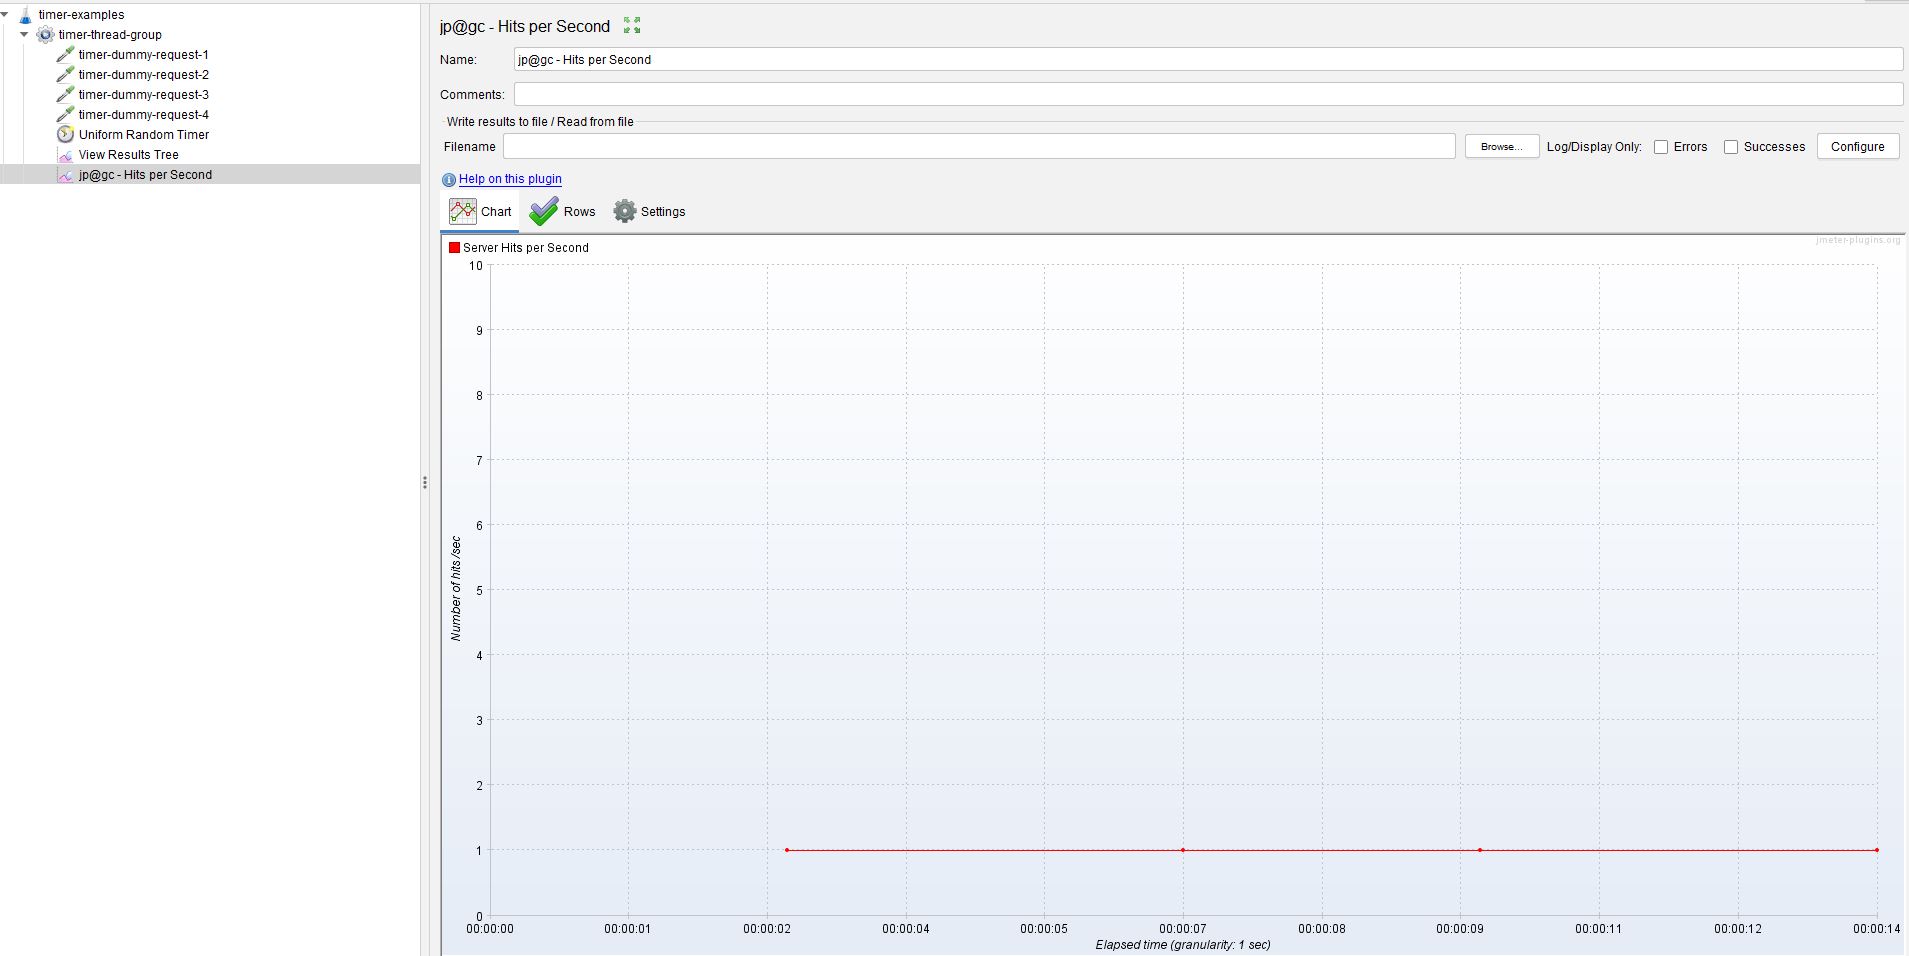
If we add one to our test and set some values.

This will again provide a constant delay of 2000 milliseconds as with the Constant Timer but also added a Random Delay on top of the constant to provide a random delay each time it is executed.
Our example above therefore will provide a delay between samplers of between 2000 milliseconds and 4000 milliseconds.
If we execute our test again, we can see with our graphical view that the delay between samplers is random, albeit greater than 2000 milliseconds.
Precise Throughput Timer
The Precise Throughput Timer provides you with much more control over balancing your load profile across a specific time duration and is more complex that those we have looked at already.
It also provides the ability to batch requests to again provide a fine control over your performance testing profile.
Let’s look at the Timer.
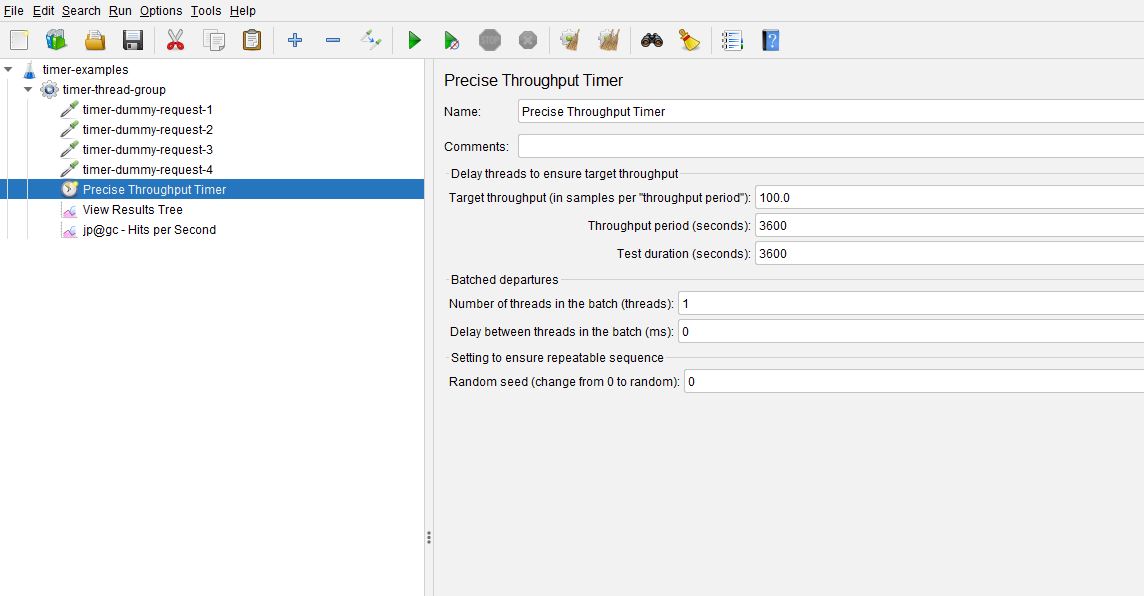
We’ll discuss the Batched Departures shortly but to start with we will focus on the Target Throughput.
The values in the screenshot are included by default when the Timer is added, lets change them.
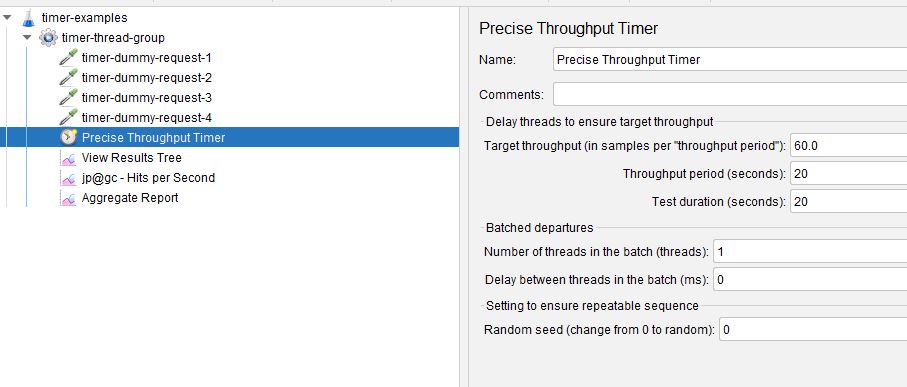
The Precise Throughput Timer has been set to complete 60 samples in 20 seconds with the test lasting 20 seconds, we will come on to the distinction between these 2 values soon.
In order for our test to satisfy these volumes we need to make a change to the Thread Group as we need to increase the Number of Threads to ensure we can handle the concurrency and we need to change the Loop Count to Infinite and set a Thread Lifetime to be the same as the Test Duration in the Precise Throughput Timer.
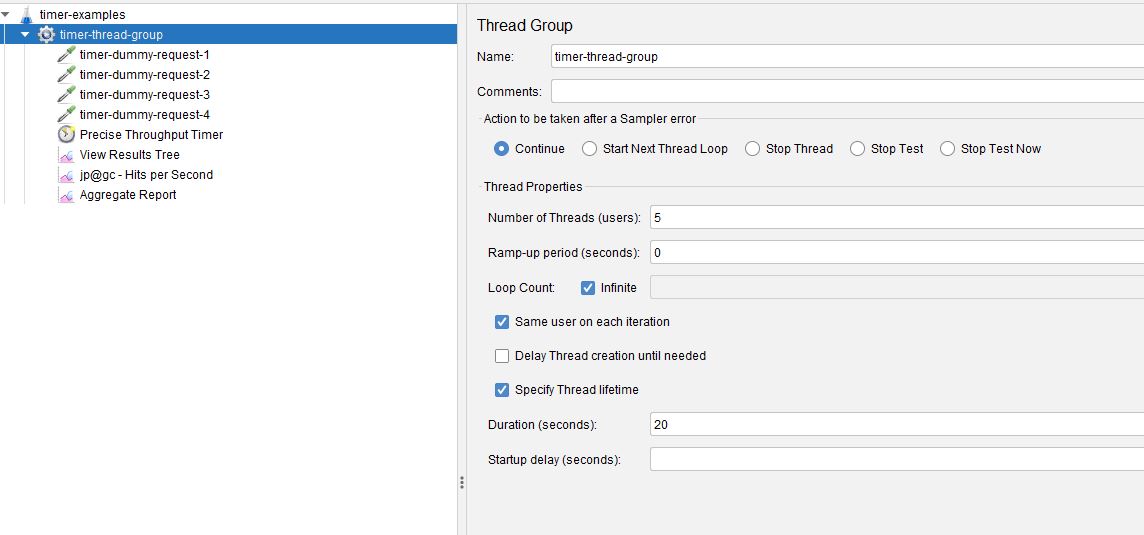
We have added an Aggregate Report Listener to our test so we can check the throughput is accurate.
If we run our test, we can see that we have produced 60 samples in 20 seconds whilst keeping the hits per second relatively smooth.

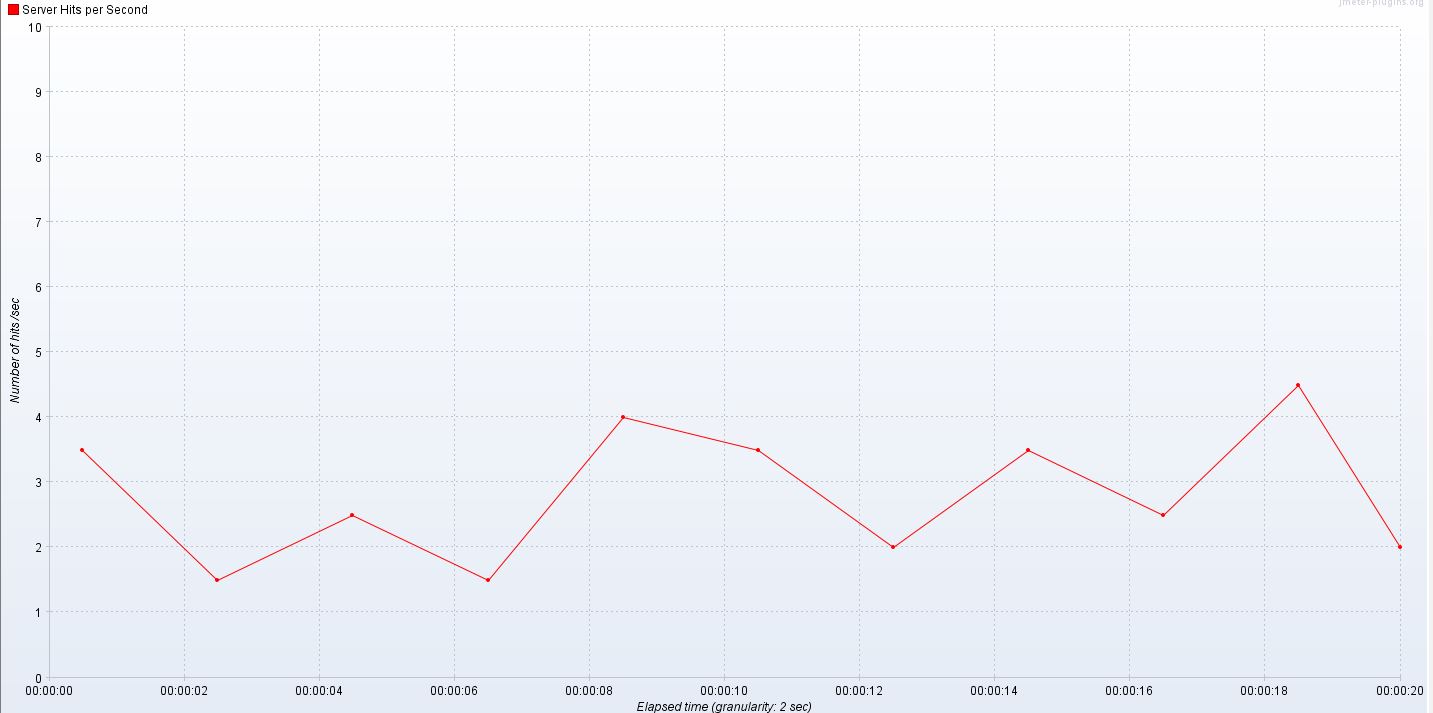
We will look now at the difference between the Throughput Period and test Duration which are identical in our previous test.
If we change the Throughput Period to be 10 seconds down from 20.
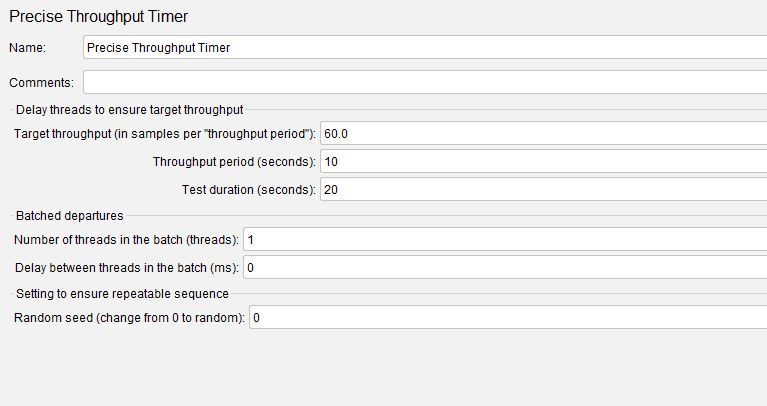
And re-run our test we see what has happened is that the test still runs for 20 seconds but we generate 60 transactions every 10 seconds meaning that effectively we double the transaction rate.

The values in the Batched Departures section of the Precise Throughput Timer allow you to control the way that the Threads are released whilst still maintaining the overall throughput and the Random seed value ensures that either the delays between samplers are Random or Constant.
Use 0 for truly random delays and a positive integer for constant.
Constant Throughput Timer
The Constant Throughput Timer is again a more powerful Timer, not in the same way the previous Timer was but more for its ability to control threads in Thread Groups or across Thread Groups to fulfil a load profile.
We are going to update our Thread Group to run for 60 seconds.
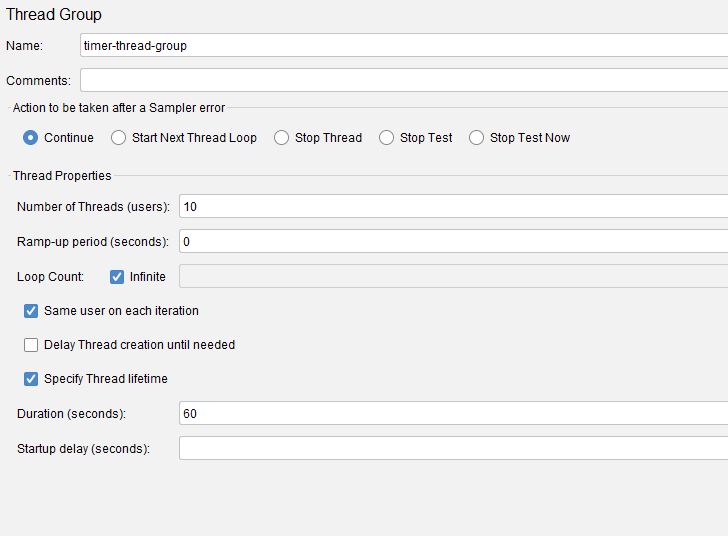
If we add a Constant Throughput Timer to our test and set the Target Throughput to be 60 samples.
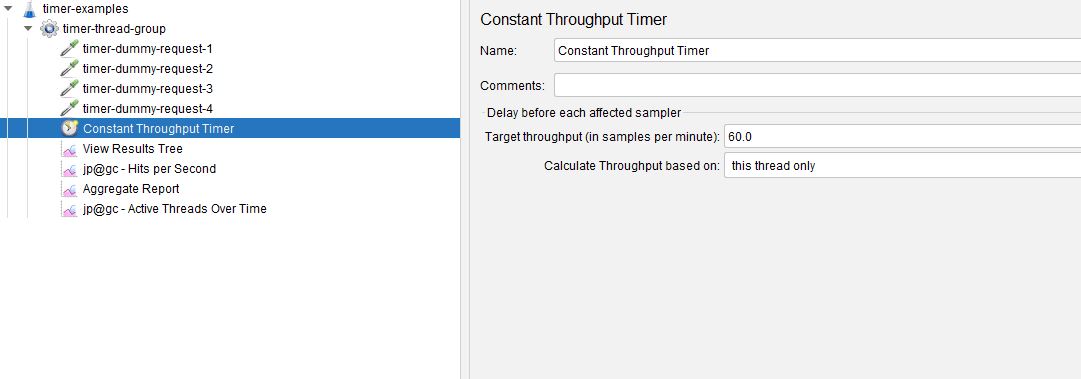
If we now run the test with the Calculate Throughput Based On set to this thread only we see:

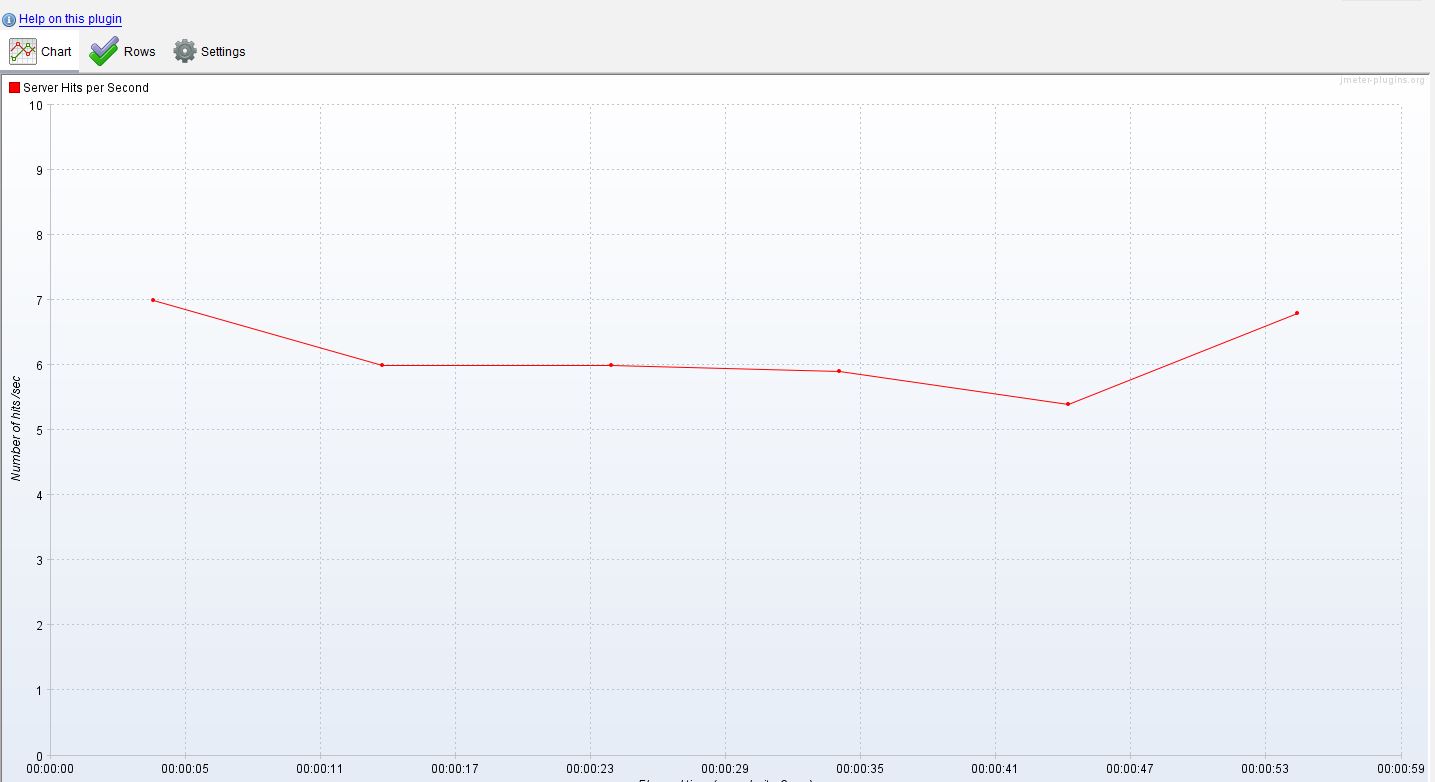
Effectively each thread has been executed 60 times across the duration of the test.
This is where this Timer is so powerful, if we change the Calculate Throughput based on setting to all active threads:
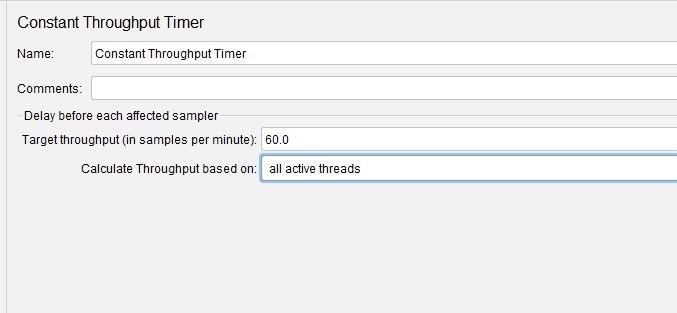
And now we re-run the test.

We now see that our throughput has been distributed across all threads in the thread group
There are 3 additional options in the Calculate Throughput based on drop down, these are All active threads in current thread group which allows you to have multiple thread groups and control the load for each independently.
The last 2 are suffixed with (shared) and as per the JMeter documentation
The shared and non-shared algorithms both aim to generate the desired throughput, and will produce similar results. The shared algorithm should generate a more accurate overall transaction rate. The non-shared algorithm should generate a more even spread of transactions across threads.
Gaussian Random Timer
The Gaussian Random Timer is simple to use and quite complicated to explain, its name comes from a Gaussian Curve which is a feature of statistical analysis and is also known as a ‘Bell Curve’ due to its shape when shown in a graph.
Let’s look at the Timer and then we’ll discuss.
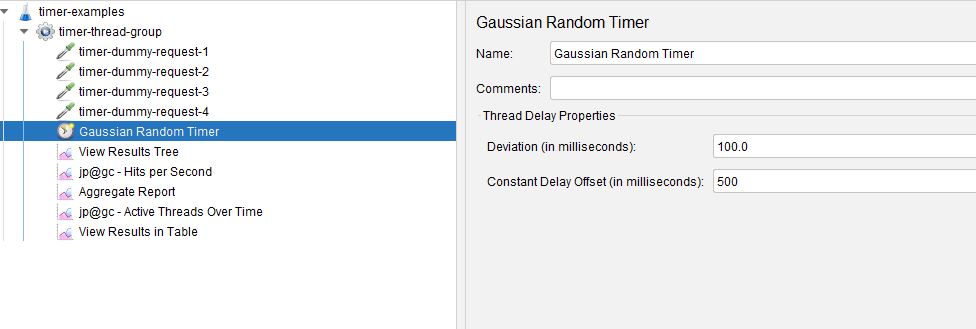
Effectively the delay between samplers will be:
500 milliseconds + (Sum of Gaussian distributed value x Deviation)
Where the Sum of Gaussian distributed value can be between -1.0 and +1.0
So, when multiplied together we can get positive and negative values
Let’s make a change to the Thread Group and run the test:
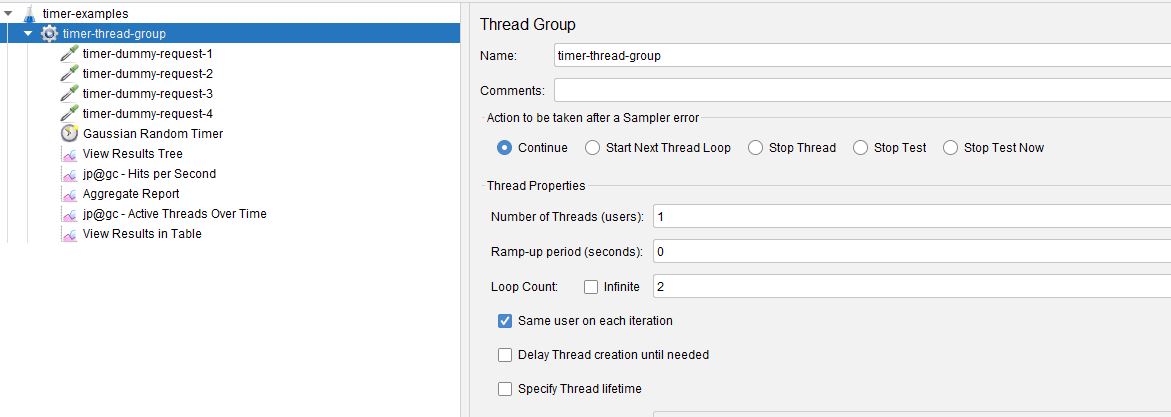
We will add a View Results in Table Listener so we can look at the values created by the Gaussian Random Timer and this shows:

If we look at the durations between the samplers we see:
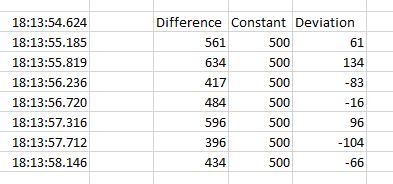
The difference between the samplers in the difference column which is effectively the constant 500 millisecond value + (Sum of Gaussian distributed value x Deviation).
Without looking at statistical probability of numbers within 1 standard deviation of a mean it's not obvious how the Timer is calculated but I think it is enough to show that this is extremely useful for creating random user like delays in your performance tests.
Poisson Random Timer
The Poisson Random Timer is very similar to the Gaussian Random Timer and equally complicated to explain.
Instead of using a Gaussian Distribution for its delay it uses a Poisson Distribution for its delay.
Let’s look at the Timer.

We are not going to delve into the complexities of how Lambda is calculate and just say that as with the Gaussian Random Timer this is extremely useful for creating random user like delays in your performance tests.
JSR223 Timer
The JSR223 Timer is the most flexible of the Timers as it allows you to script your delays, and you can make this as simple or complex as your test demands.
Using Groovy as your scripting language is recommended due to the performance benefits it provides but other options are available in the Language option.
Let’s look at the Timer:
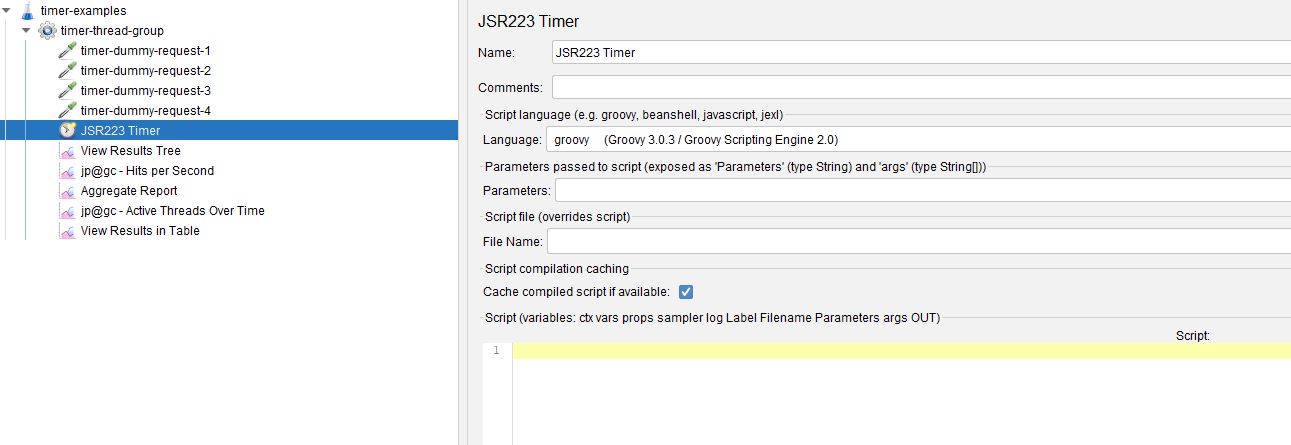
Clearly, we can get as complicated as we want with this Timer but let’s look at a couple of basic examples.
Before we start it is a good idea to familiarise yourself with the variables that JMeter exposes to the JSR223 Timer, these can be found here
We will for the purposes of this post look at how we can use the Context variable, information on which can be found here
Before we look at our first example, we are going to change the Response Code of one of our Dummy Samplers
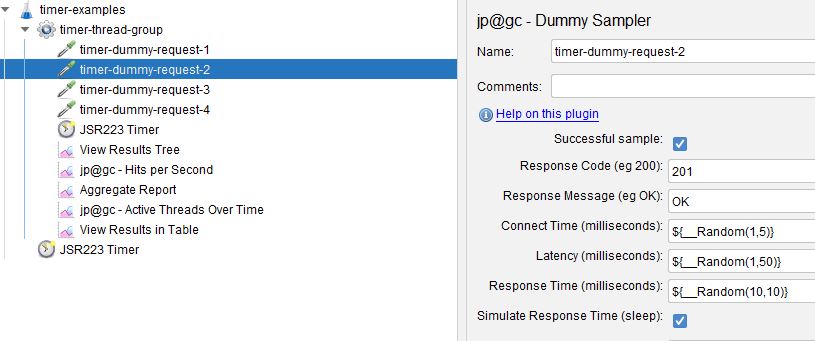
We have updated our second sampler to return 201 rather than 200.
If we look at our JSR223 Timer:
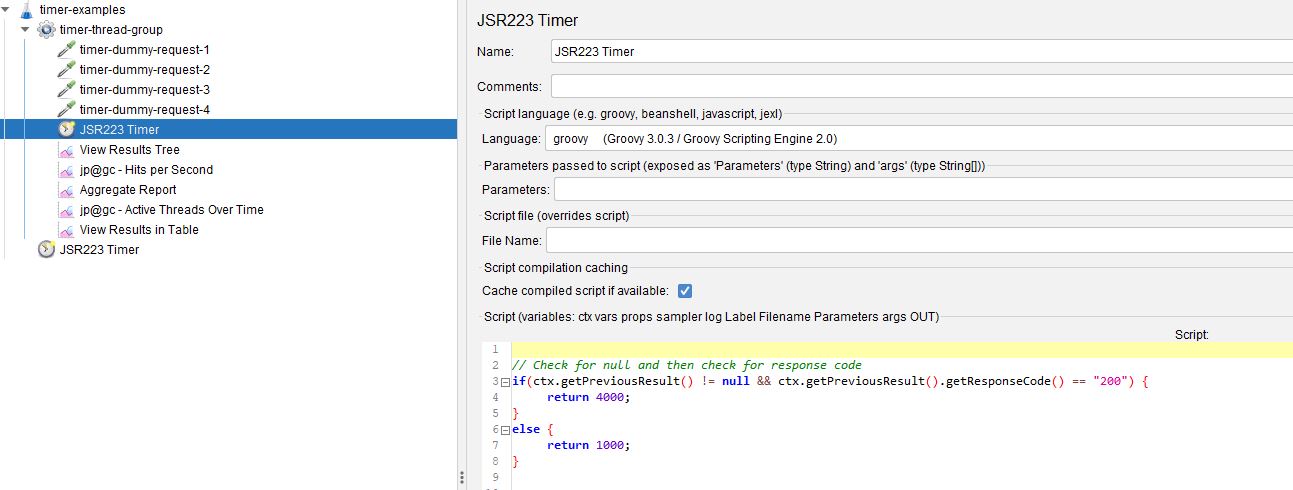
We are checking for the response code from the previous sampler and if it equals 200 then the Timer is set to 4000 milliseconds otherwise the Timer will be 1000 milliseconds.
We have to include the ctx.getPreviousResult() != null check as the first sampler that run timer-dummy-request-1 does not have a previous result.
If we run the test:

We can see that the duration between Sampler 2 and Sampler 3 is only 1000 milliseconds as we changed the response code to 201 on Sampler 2 with the remainder of delays at 4000 milliseconds.
Let’s look at another example using the JSR223 Timer:
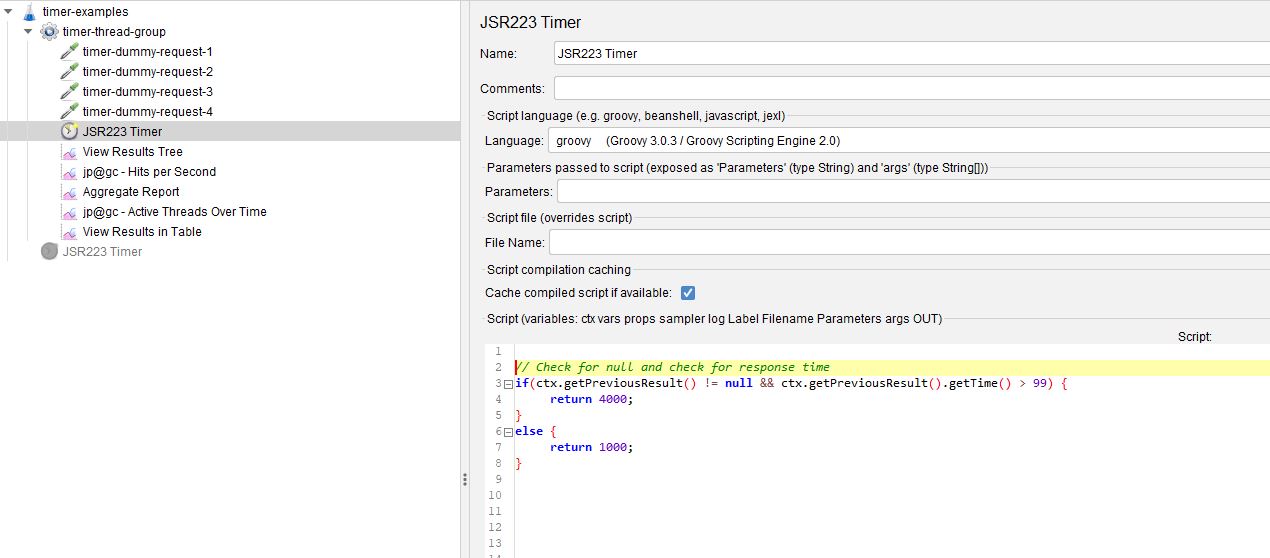
We are checking for the response time from the previous sampler and if it's greater than 99 then the Timer is set to 4000 milliseconds otherwise the Timer will be 1000 milliseconds.
As with the previous example we must check for a null.
We need to make a change to our test to increase the response time of one of our Dummy Samplers, we will update our third sampler to have a 100-millisecond response time.

If we run the test:

We can see that the duration between Sampler 3 and Sampler 4 is only 1000 milliseconds as we changed the response time to 100 milliseconds on Sampler 3 with the remainder of delays at 4000 milliseconds.
Let’s look at one final example using the JSR223 Timer.
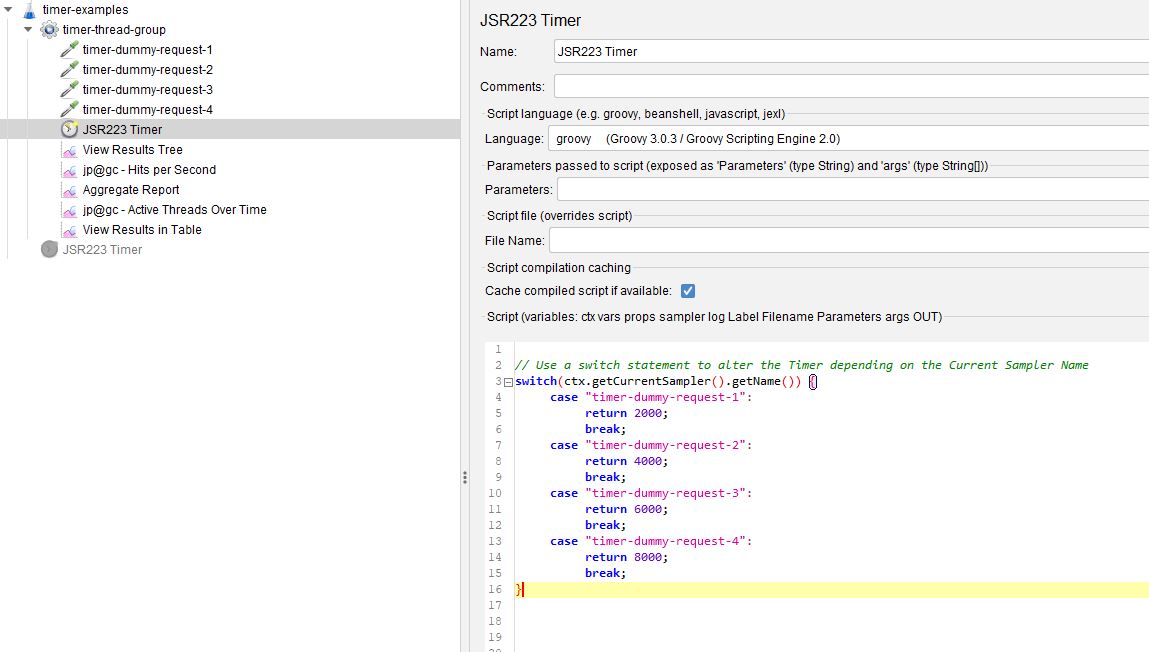
We are going to use a switch statement to alter the Timer depending on the Sampler Name, there is no need to check for null as with the previous samplers as this test is working on the Current Sampler and not the Previous one as in the earlier examples.
If we run the test:

We can see that the Timer between samples matches those in our Switch Statement, and we can see in the below image that the first Samplers was delayed for 2000 milliseconds before it started.
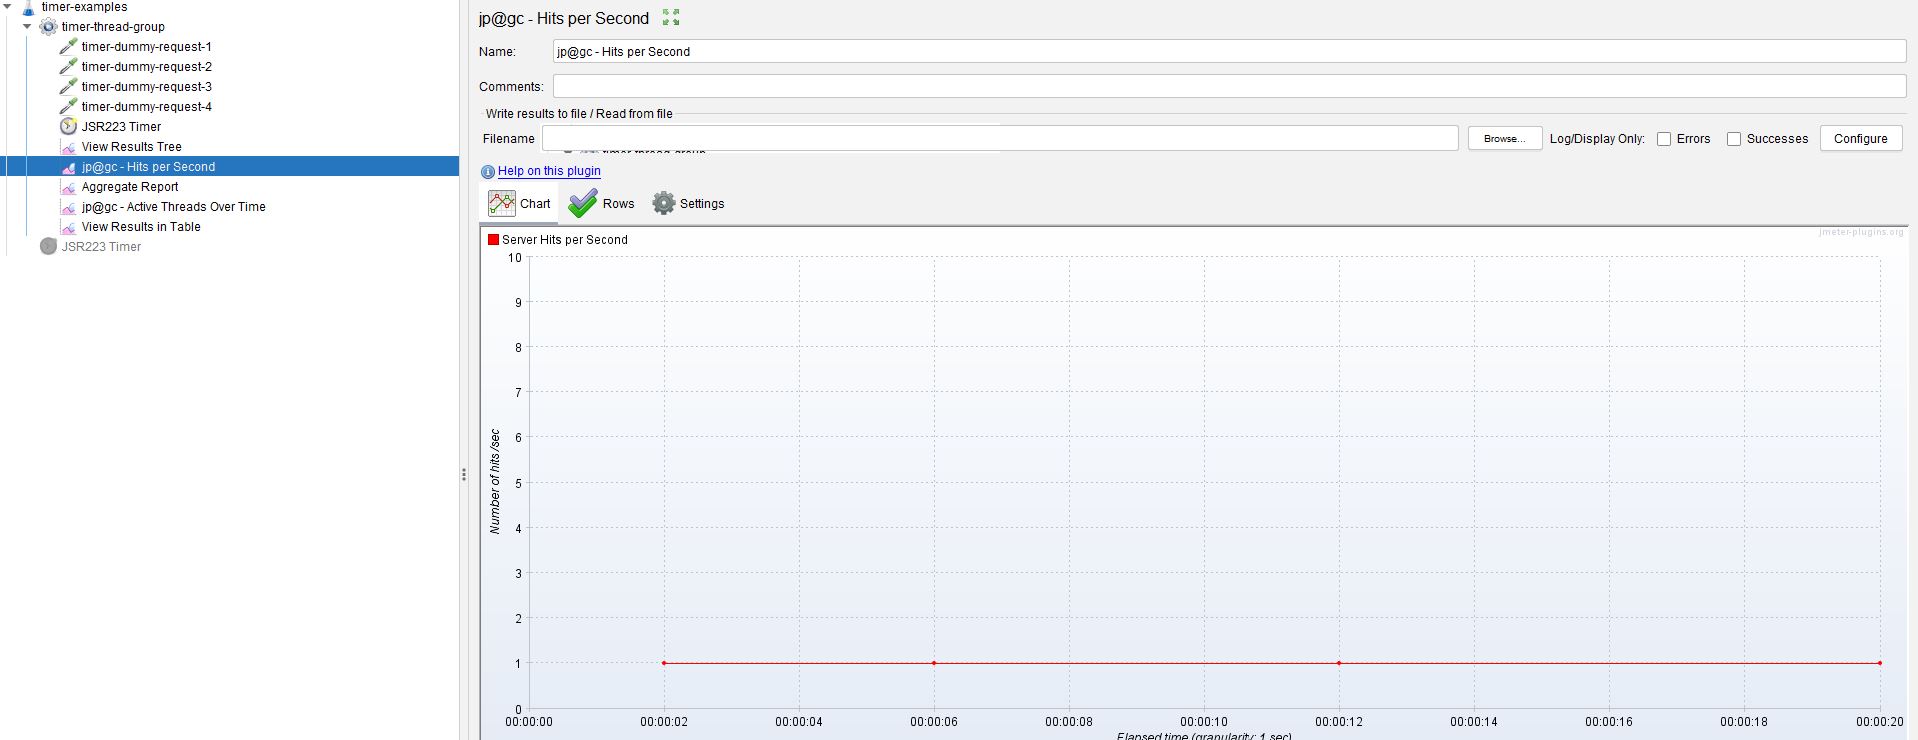
These examples have been simple but hopefully give you an idea of what is possible with a JSR223 Timer.
Synchronizing Timer
The Synchronizing Timer allows you to simulate multiple concurrent users executing a business transaction at the same time.
If you wanted to simulate a high volume of logons for example to simulate your users starting work or simulate a high volume of purchases on your web site or ticket sales, then this is the best way to emulate this activity in JMeter.
Let’s look at the Timer.
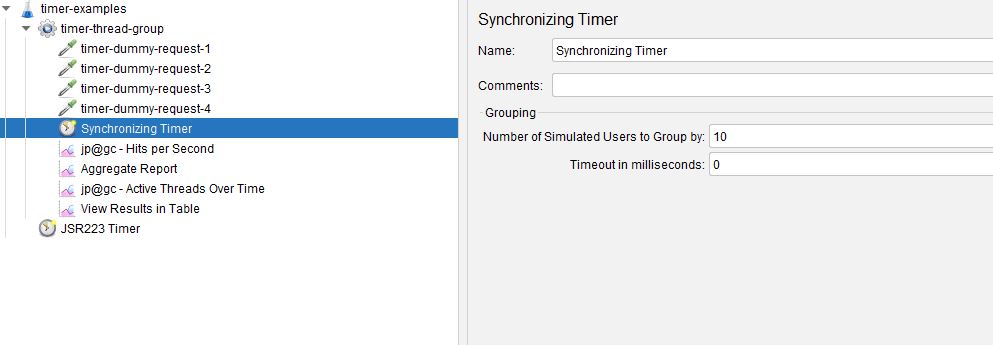
The Timeout in Milliseconds value if set to zero will wait indefinitely for the Number of Users to reached, if a value greater than 0 is in this field then it will wait a maximum of this duration for the Number of Users to be reached and then will start the test anyway.
In our example above we are going to wait for 10 Users before the test starts, we will need to make a few changes to our test for this to work.
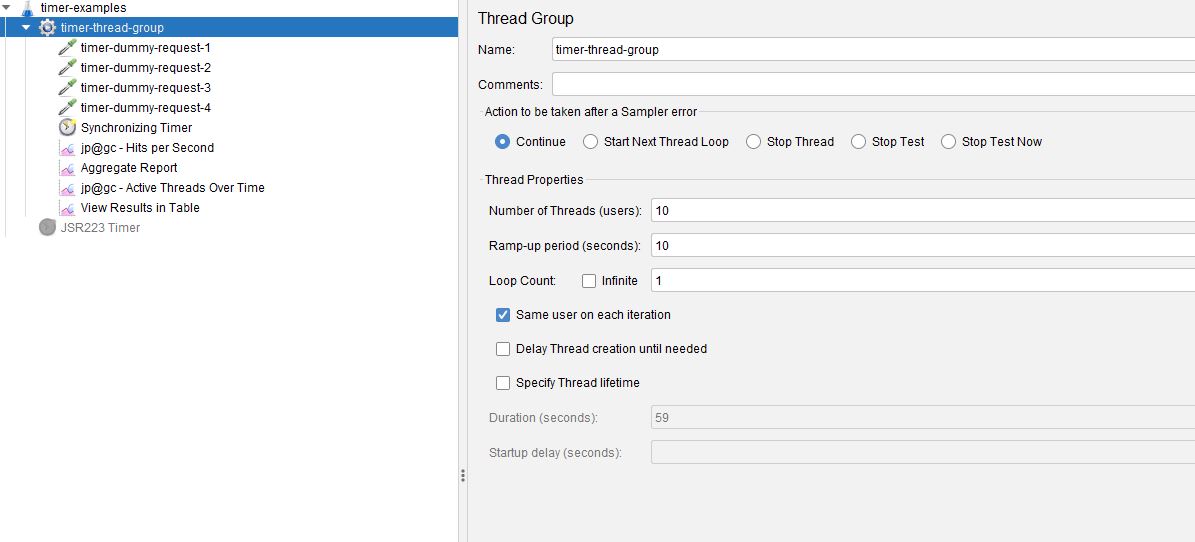
If we change our test to gave 10 threads and ramp up over 10 seconds and then run the test.
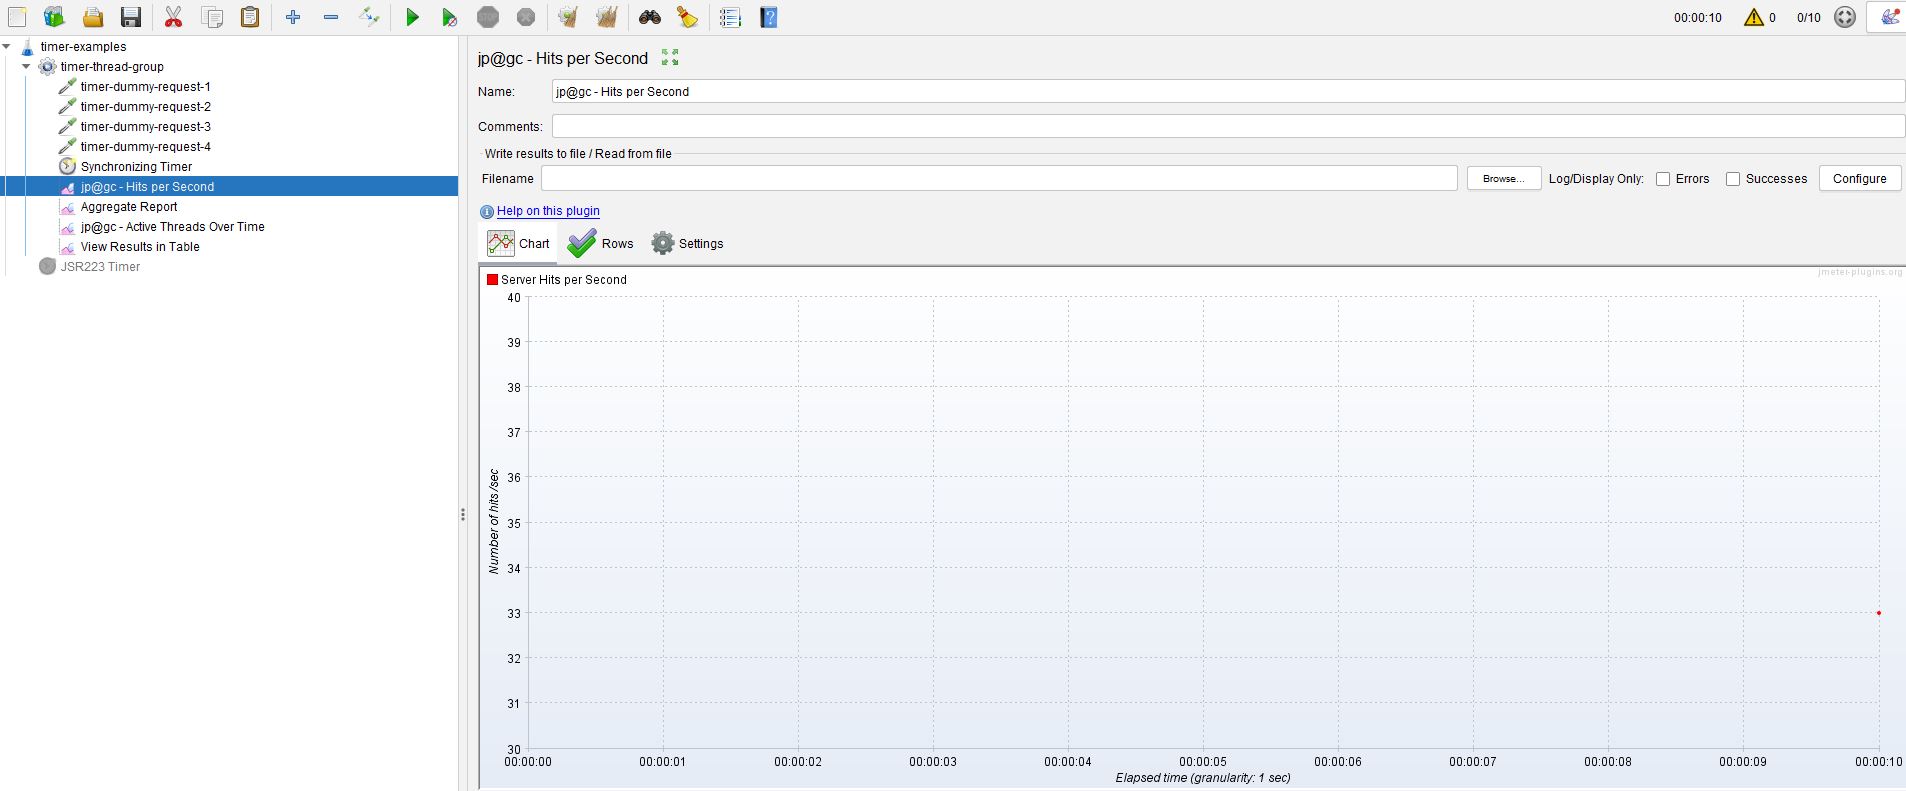
We can see that the test waits 10 seconds before executing anything as this is the point that all 10 users are available.
BeanShell Timer
The BeanShell Timer has been included but really should not be used anymore and the JSR223 Timer used in its place because of the performance benefits of using the JSR223 Timer.
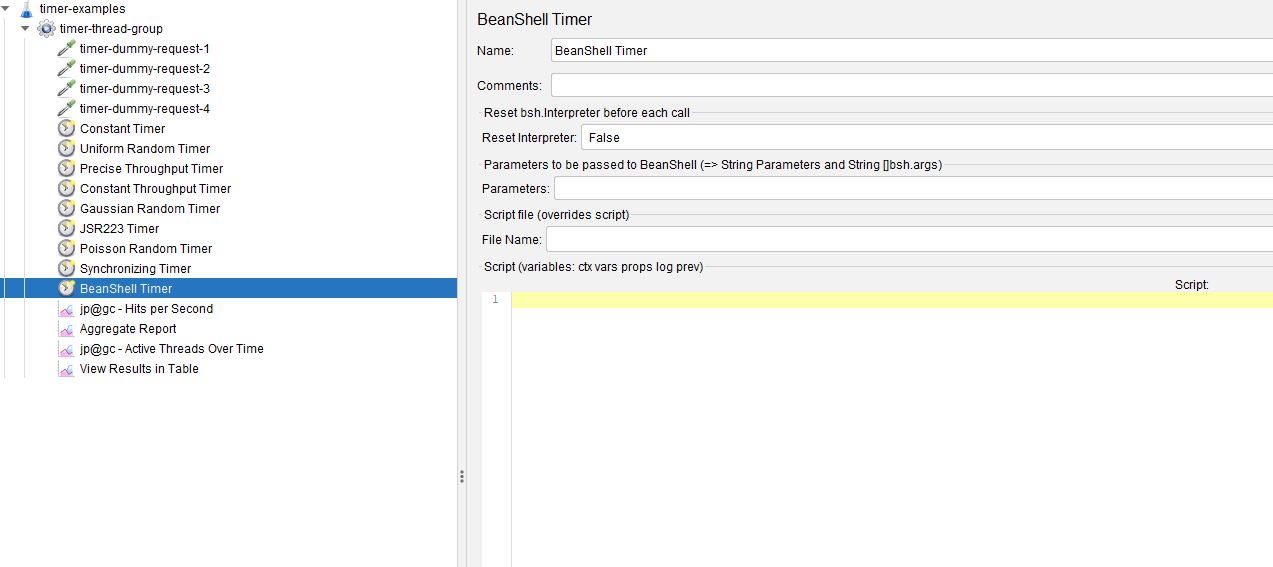
If you want to use the BeanShell Timer, then the examples in the JSR223 Timer section will also work with this one.
Conclusion
Timers are necessary in creating well balanced performance tests and hopefully this post has given you an insight into their use and will encourage you to learn more about them and their uses.
