
OctoPerf Spira Integration tutorial
Summary
This guide shows** how to connect Spira and OctoPerf to streamline load-testing workflows**. The integration lets teams launch OctoPerf scenarios directly from Spira test cases and automatically receive results back in Spira. Setup involves enabling the OctoPerf app, configuring server credentials, and adding custom properties to Spira test cases.
Running a test from Spira triggers an OctoPerf execution using the referenced scenario ID. A webhook combined with OctoPerf notifications pushes the final test results into Spira for centralized reporting. The process improves collaboration by keeping performance test execution and results within the same toolset used for QA management.
Table of Contents
Introduction
We've recently been working with folks at Inflectra to develop an integration between Spira and OctoPerf. If you don't know about Inflectra and Spira they offer a very cool test management solution (among other things), you should check it out.
In this blog post we will highlight all the steps to follow in order to setup this integration. This way you'll be able to see the benefits of working with both tools in your organization.
Launch an OctoPerf test from Spira
Most of the following info has been taken from Spira's documentation page dedicated to OctoPerf.
Activate OctoPerf in Spira apps
The first step is to activate the OctoPerf integration from your Administration > SpiraApps page:

Configure integration
The next step is to provide information relative to the OctoPerf server and account you're using:
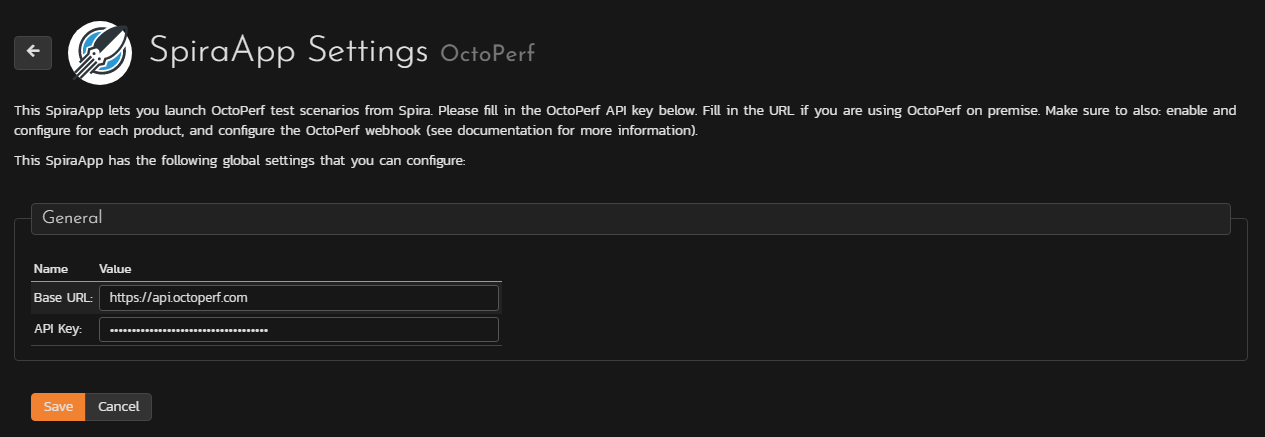
Typically for OctoPerf SaaS, the base URL is https://api.octoperf.com and your API key can be found on your profile page.
Enable integration in product
Now that this is taken care of, we need to enable the integration inside the product where we want to use it:

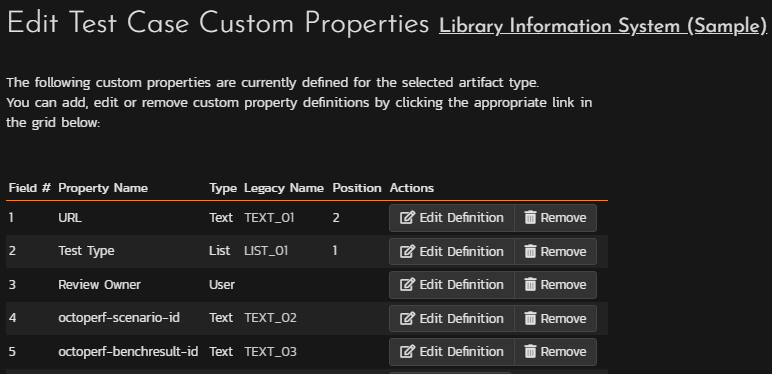
Custom properties on Test Case
And the final step before launching the test is to add two Custom properties related to Test Cases inside your product:
- octoperf-scenario-id : This one should contain the Id of the OctoPerf runtime scenario you want to execute.
- octoperf-benchresult-id: This one will be used to temporarily store the OctoPerf benchresultid in order for Spira to listen to its results.
Setup the test case
As a final step we need to fill the OctoPerf Scenario Id in our test case:
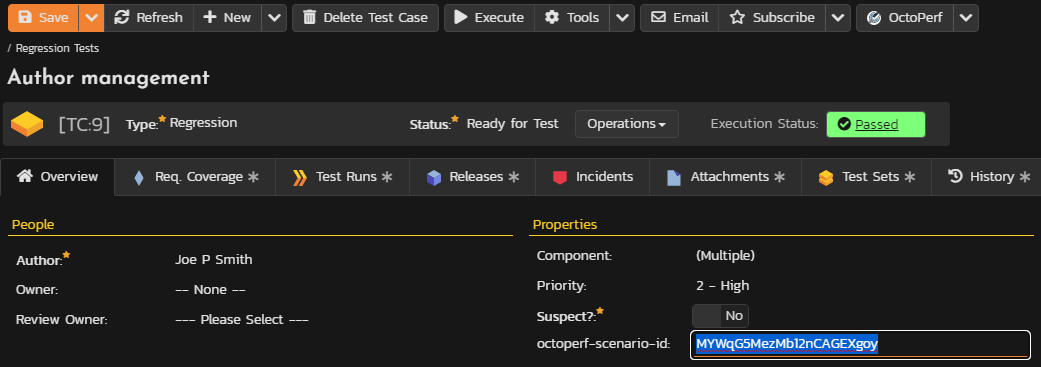
The only thing that remains is to click on the OctoPerf button located at the upper right and start the test. This will trigger a test in OctoPerf and if you want to receive the results in Spira look at the next section.
Report the test results back in Spira
To that end we will use the new Spira webhook combined with OctoPerf notifications.
Create webhook
First we need to create an HTTP notification in OctoPerf:
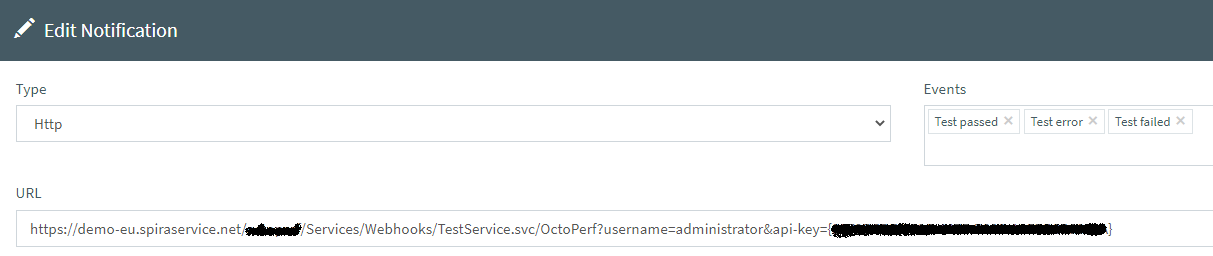
The webhook URL should look like this:
https://mysite.spiraservice.net/XXXXX/Services/Webhooks/TestService.svc/OctoPerf?username=myuser&api-key={11111111-1111-1111-1111-111111111111}
To that end you must create a RSS/API key from your profile page inside Spira:
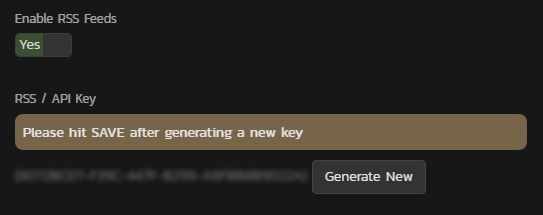
Make sure to Enable RSS Feeds and hit Save before leaving the page otherwise the API key will not be saved.
OctoPerf Scenario
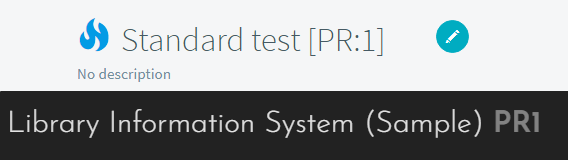
The last step is to specify the Spira Product token in the OctoPerf runtime scenario name like this:
Test results
This time when you execute an OctoPerf test you will get a Test Result containing the output of the OctoPerf test:
