
Performance Testing Web Sockets with JMeter
In this post we are going to look at WebSockets, specifically how JMeter can be used to test them.
Web Sockets are not supported natively by JMeter but there are a couple of Plugins that you can use that work very nicely.
One of them is called JMeter WebSocket Sampler by Maciej Zaleski and information on the library can be found here.
The second and the one we will use for our post is also called JMeter WebSocket Sampler and is by Peter Doornbosch, more information on this Plugin can be found here.
Installation of Plugin
The best way to install these Plugins is to use the Plugins manager, search for WebSockets and select Apply Changes and Restart JMeter
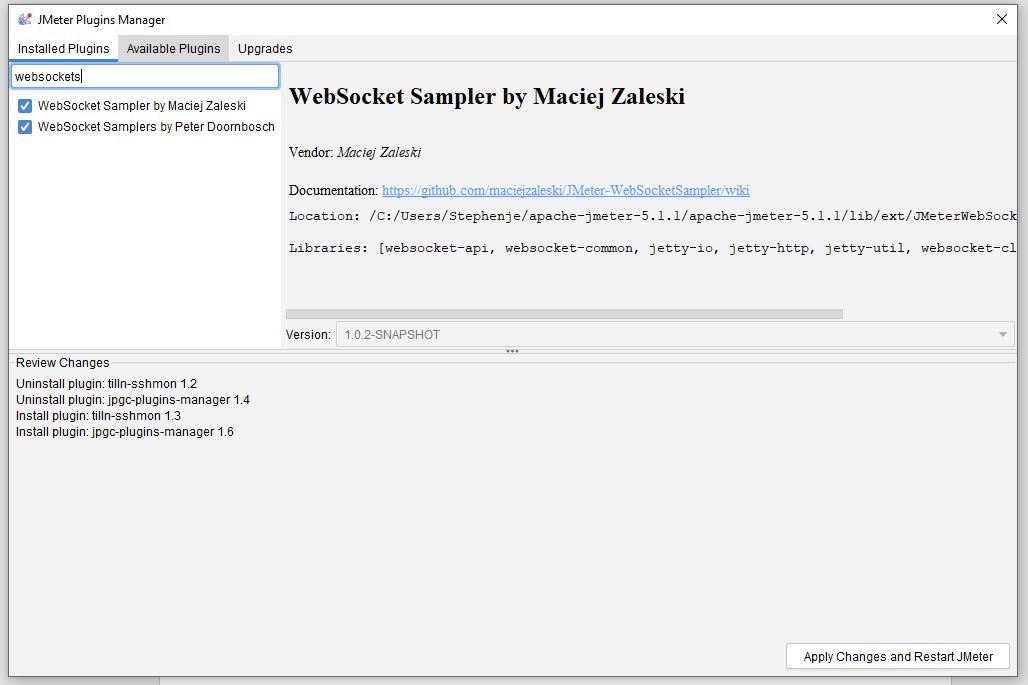 Plugin Manager
What are WebSockets
Before we start to look at the samplers for testing WebSockets with JMeter lets quickly provide an overview of what WebSockets are. From the WebSockets definitions online:
WebSocket is a communications protocol for a persistent, bi-directional, full duplex TCP connection from a user’s web browser to a server.
WebSocket communication consists of “frames” – data fragments, that can be sent from either side, and can be of several kinds: “text frames” – contain text data that parties send to each other. “binary data frames” – contain binary data that parties send to each other.
So essentially, it’s a 2-way communication protocol where frames of data in either plain text or binary are exchanged. It is a lot more efficient at exchanging a lot of small payloads compared to pure HTTP/S where every request requires a large amount of headers. Typically you can end up having more than 100 kb of headers for a 2 bytes request.
Setup
If you have a need to test WebSockets then you will have a test application you can use, for the purposes of the blog post we are going to need a dummy site so we can demonstrate how the JMeter samplers’ work.
We are going to use a site called Pie Socket as this provides a very simple WebSocket server for us to run some very simple tests against which will be enough for use to provide a good overview of how JMeter can be used to test.
If you go to the Pie Socket site which can be found here.
You are presented with a simple endpoint interface.

If we click on the Connect button, we can see a connection being made to the WebSocket server.

A connection request to this test server results in this response
{“info”:”You are using a test api key”}
Now we know how to establish a connection to the Pie Socket test server we can start to look at the Samplers and Config Elements that the PlugIn provides.
JMeter Samplers
The samplers we will be looking at are:
-
WebSocket Open Connection
-
WebSocket Ping/Pong
- WebSocket Single Read Sampler
- WebSocket Single Write Sampler
- WebSocket Close
- WebSocket request-response Sampler
- WebSocket Binary Frame Filter
- WebSocket Ping-Pong Frame Filter
- WebSocket Text Frame Filter
Just to reiterate that we are building a very simple test to demonstrate how the Samplers and Config Elements can be used to test a WebSocket server.
WebSocket Open Connection
Let’s start by looking at the WebSocket Open Connection sampler

We can see that it consists of Server URL section where we provide the Protocol we are using, the options being:
- ws for unencrypted WebSocket,
- wss for encrypted WebSocket.
The Server URL section also allows you to provide a Server or IP Address, Port and Path.
The timeout values are self-explanatory where the defaults have a Connection timeout of 20 seconds and a Read timeout of 6 seconds.
Let’s add in the values into the connection sampler we saw when we tested the Pie Socket test server these were:
wss://demo.piesocket.com/v3/channel_1?api_key=oCdCMcMPQpbvNjUIzqtvF1d2X2okWpDQj4AwARJuAgtjhzKxVEjQU6IdCjwm¬ify_self

For information, the notify_self part of the query string is included because of the following reason from the Pie Socket documentation:
By default, the WebSocket server does not publish a message to its original sender. For example, if three members A, B, and C are connected to a channel. Messages sent by A, will only be delivered to B and C. To enable receiving self messages, add ¬ify_self=1 to your server connection URL as shown below.
Let’s add this Sampler to a Test Plan and see it working, we are going to add WebSocket Single Read Sampler to the test as this will allow us to capture the response, we will discuss this Sampler in more detail later in this post so don’t worry.
Let’s look at our test:

If we execute the test:

We can see a successful connection request and our WebSocket Single Read sampler has picked up the response frame from the server which matches the one we saw when we ran the connection request against the test server from the Pie Socket web site.
WebSocket Ping/Pong
A Ping is a control frame sent from either the client or the server to ensure the connection is still open. Its frequency is determined by your application under test and should be used in our JMeter tests as a way of ensuring a connection remains open especially when running longer running tests.
Let’s look at the sampler:

We have the option to only send a Ping and not expect a Pong or the default is to wait for the Pong response which is managed with a timeout value which by default is 6 seconds.
We will add a Ping/Pong Sampler and another Single Read Sampler and execute our test:

We can see that our Ping request has had a response frame from the server which we have captured in our Single Read Sampler.
WebSocket Single Write Sampler
We will move on now to look at the Single Write Sampler which effectively sends a single frame of data to the server.
Let’s look at the sampler:

Let’s look at the options, firstly you can choose between using an existing connection or opening one as part of this request.
If you have already included an Open Connection sampler in your test you can use the existing connection otherwise the values we look at when discussing the Open Connection sampler as added to this one.
The structure of the request frame being sent can either be Text or Binary and the value can either be typed into the Request data field as we have done in our example or read from a file containing the data.
The Request data value can also be a JMeter variable in the form ${variable-name}.
Let’s add a Single Write Sampler to our test and execute it, we will also add a Single Read Sampler as the test service we are using just responds with the same value we sent to the server so we can capture the response.
Clearly your application under test will not just echo back the request but this demonstrates the process of sending a request frame and capturing the response, if any from the server.

We can see the request frame being sent and if we look at the response:

We can see that there is nothing returned which is correct.
If we look at the Single Read sampler, we can see the response frame sent by the server contains the data we sent.

WebSocket Single Read Sampler
We have been using this throughout the test so far but its worth looking at in a bit more detail.

As with the Single Read Sampler we specify whether we are using an already open connection or want to define one in this sampler, we also define whether we expect the response to be Text or Binary and we set a timeout for the response.
There is an Optional read checkbox which if selected will not show as a sampler error if the timeout is exceeded.
We have already seen this in use on several occasions in this blog post so there is no benefit in showing an example here.
WebSocket Close
The Close Sampler properly closes the WebSocket connection, it’s a simple as that.
Here is the sampler:

You can set the Close Status to any binary value and set the timeout value.
If we add this to our test and execute it.

We can see our connection has been closed.
WebSocket request-response Sampler
This sampler behaves in a way comparable with a HTTP Request sampler where you can test a request-response exchange with a Web Socker server.
If you remember before we showed how to send a Single Write and then captured the response with a Single Read with this sampler you can combine the two.
Let’s look at the sampler:

We have already discussed all the elements you see in this blog post so we will not re-iterate them here.
Let’s run the test:

We can see the request being made to the server which is the same as we saw in the Single Write Sampler, if we check the response though we can see the echo response from our test server, which did not exist in the Single Write Sampler and needed the Single Read Sampler to capture the frame response.

WebSocket Binary Frame Filter
The WebSocket Plugin also comes with three Config Elements which all allow the filtering of responses frames from the server, let’s discuss starting with the Binary Frame Filter.
Let’s look at the config element:

We start by building our condition starting with selecting
- that
- that does NOT
from the first selection field and then
- contains
- starts with
- equals
- ends with
from the second selection field
You then provide binary sequence of bytes for your condition and finally you can specify a position in the response for the condition to start matching from, if this is left blank it starts from the beginning. If the Binary data is left blank then all Binary frames are discarded.
Essentially, if your server responds with unsolicited messages and their frequency is hard to predict then you will want to discard them and this Binary frame filter discards any binary frame, if the Binary data field is left blank, or binary frames that match a given sequence of bytes.
WebSocket Ping/Pong Frame Filter
If you want to discard any Ping/Pong frames then this config element will do this, it has the option to ignore just a Ping or just a Pong or both.
The filter also has the option to automatically respond to a Ping frame with a Pong frame.

Web Socket Text Frame Filter
Let’s start by looking at the config element:

We start by building our condition starting with selecting
- that
- that does NOT
from the first selection field and then
- contains
- starts with
- equals
- ends with
from the second selection field and then we select whether we want to match Text or a Regular Expression.
There is also a Regular Expression tester you can use to check if the given Regular Expression will match a set of test strings.
Conclusion
Hopefully this post has given you enough information to help you in getting started with WebSockets performance testing using JMeter and while the examples in this blog post are very simple the principles remain consistent regardless of the complexity of your application under test.