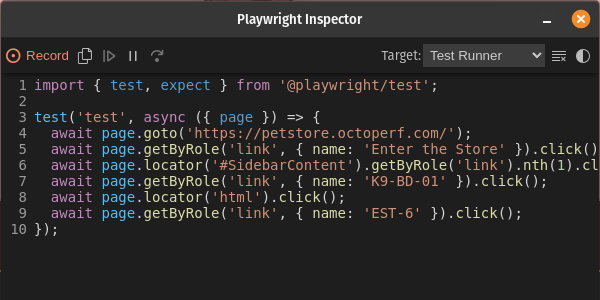
Playwright Test Generator
Playwright Test Generator is a powerful tool that simplifies the process of creating and maintaining end-to-end tests for web applications. Whether you're a developer or a QA engineer, Playwright Test Generator can save you time and effort by generating test scripts that ensure the reliability and functionality of your web applications.
In this blog post, we'll walk you through the process of using Playwright Test Generator to create and manage automated tests effectively.
TL;DR head straight to Recording a Script With Playwright Codegen if you already have Playwright for Node.js environment installed and want to record a new script.
What is Playwright Test-Generator Codegen?
Playwright Codegen is a convenient and time-saving tool provided by the Playwright framework, designed to streamline the process of generating code for browser automation and testing. This tool is particularly useful for developers and quality assurance engineers who want to create automation scripts but prefer not to write every line of code manually. Playwright Codegen simplifies this process by automatically generating code snippets based on user interactions with a web page.
Key Features of Playwright Codegen:
Recording User Actions: Playwright Codegen allows users to interact with a web page in a browser, such as clicking buttons, filling out forms, navigating through pages, and more. It records these interactions in real-time as users perform them.
Code Generation: After recording user actions, Playwright Codegen generates code snippets that replicate these actions programmatically. It produces code in multiple programming languages, including TypesScript, Python, and Java. Users can choose the language they are most comfortable with or that best suits their project requirements (We will use TypeScript for this blog post).
Element Selection: Playwright Codegen assists in identifying web page elements (e.g., buttons, input fields, links) by generating code to select these elements using appropriate selectors like CSS selectors, XPath, or text content.
Customization: Users have the flexibility to customize the generated code to add assertions, conditions, loops, and other logic to meet specific testing or automation needs. This allows for fine-tuning the scripts for complex scenarios.
Playwright Codegen is a valuable asset for accelerating the development and maintenance of browser automation scripts and tests. It empowers both newcomers and experienced professionals in the field of web automation, allowing them to focus on test case logic and functionality while reducing the overhead of writing repetitive interaction code. By automating the code generation process, Playwright Codegen contributes to efficient and effective web application testing and browser automation.
Prerequisites
Playwright Codegen is included as part of the Playwright package, so you don't need to install it separately.
Please refer to our previous blog post on Getting Started with Playwright to install the Playwright testing environment.
The Application under Test: JPetStore
JPetstore is a sample and educational e-commerce web application that is often used as a reference for learning and practicing various web development and software engineering concepts. Originally inspired by the popular "Petstore" application used in the Java EE (Enterprise Edition) world, JPetstore is implemented using a variety of technologies and frameworks, making it a versatile and comprehensive project for aspiring developers.
Key Features of JPetstore:
User Registration and Authentication: Users can create accounts on JPetstore, providing their personal information, such as name, address, and contact details. Once registered, users can log in securely, ensuring a personalized shopping experience.
Product Catalog: JPetstore allows users to browse through a wide range of pets. The product catalog is well-organized, making it easy for users to find the items they need.
Shopping Cart: JPetstore features a shopping cart system that enables users to add products to their carts while continuing to browse. Users can review and modify the contents of their carts before proceeding to checkout.
In this blog we are going to simulate the journey of a user that logs in, browse the products catalog, and add a item to his cart. Let's go!
Recording a Script With Playwright Codegen
Run the command npx playwright codegen petstore.octoperf.com to start Playwright Codegen tool.
As it starts, two windows are displayed.
First the Codegen application.
Here you can select your targeted programming language (TypeScript, Python, etc.), pause, resume, clear your recording, and see the generated code.
Leave the Target value to 'Test Runner' so you can use the generated script in the .spec.ts files of a Node.js Playwright project.

Playwright Codegen will generate code snippets based on your recorded actions. Si the second windows displays a chromium webpage opened at petstore.octoperf.com:

With the browser open, interact with the web page just like a user would. Perform actions such as clicking buttons, filling out forms, navigating to different pages, or any other actions relevant to your testing or automation scenario. The script in the Codegen app is automatically updated accordingly.
Start by clicking on the Enter the store link.
Step 1: Sign In
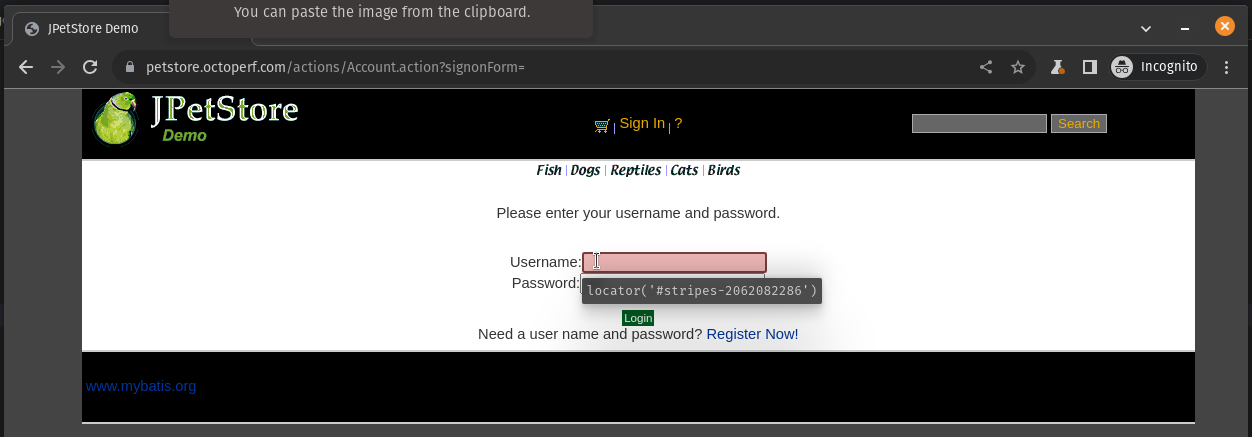
Notice that a tooltip displays the selector recorded by Playwright. So by clicking on the Sign In link ...

... you can automatically update the generated script:
import { test, expect } from '@playwright/test';

test('test', async ({ page }) => {
  await page.goto('https://petstore.octoperf.com/');
  await page.getByRole('link', { name: 'Enter the Store' }).click();
  await page.getByRole('link', { name: 'Sign In' }).click();
});
Continue by clicking on the username input and type user1.
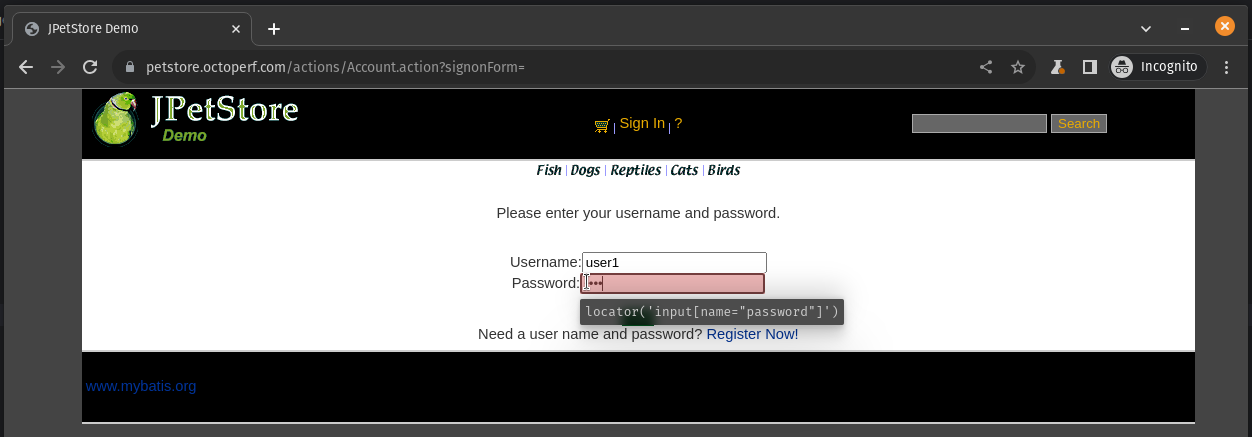
Select the password input and type pass.
Click on the green Login button.
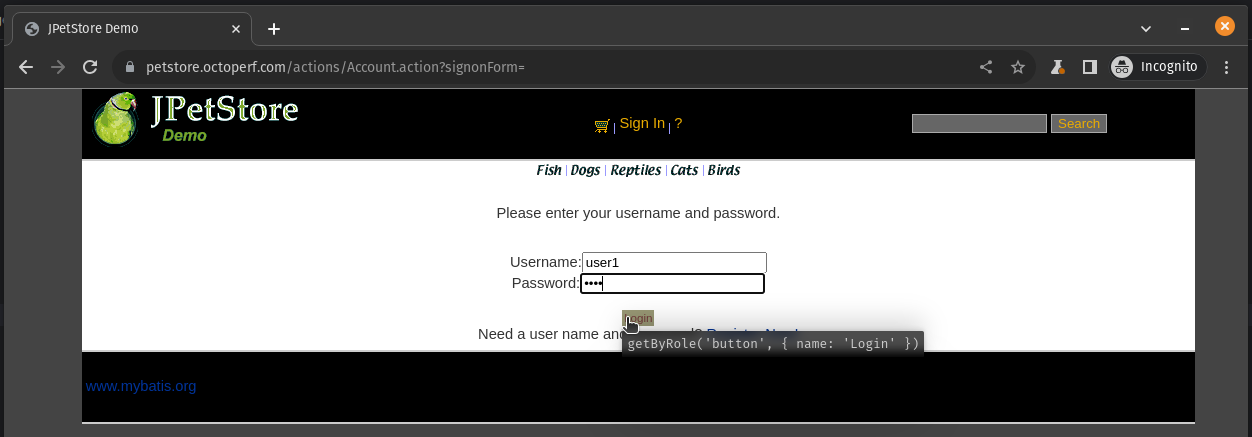
You are now connected to the JPetStore and automatically redirected to the store root page.
Step 2: Browse Catalog
The script is automatically update to this:
import { test, expect } from '@playwright/test';

test('test', async ({ page }) => {
  await page.goto('https://petstore.octoperf.com/');
  await page.getByRole('link', { name: 'Enter the Store' }).click();
  await page.getByRole('link', { name: 'Sign In' }).click();
  await page.locator('#stripes--1962445802').click();
  await page.locator('#stripes--1962445802').fill('user1');
  await page.locator('input[name="password"]').click();
  await page.locator('input[name="password"]').fill('pass');
  await page.getByRole('button', { name: 'Login' }).click();
});
Let's continue by browsing the pets store just like a normal user would do.

- Click on the Fish category,
- Click on the FI-SW-01 link (Angelfish),
- Click on the EST-1 link.
Step 3: Add Item to Cart
Finish the recording by adding the selected fish to your cart.
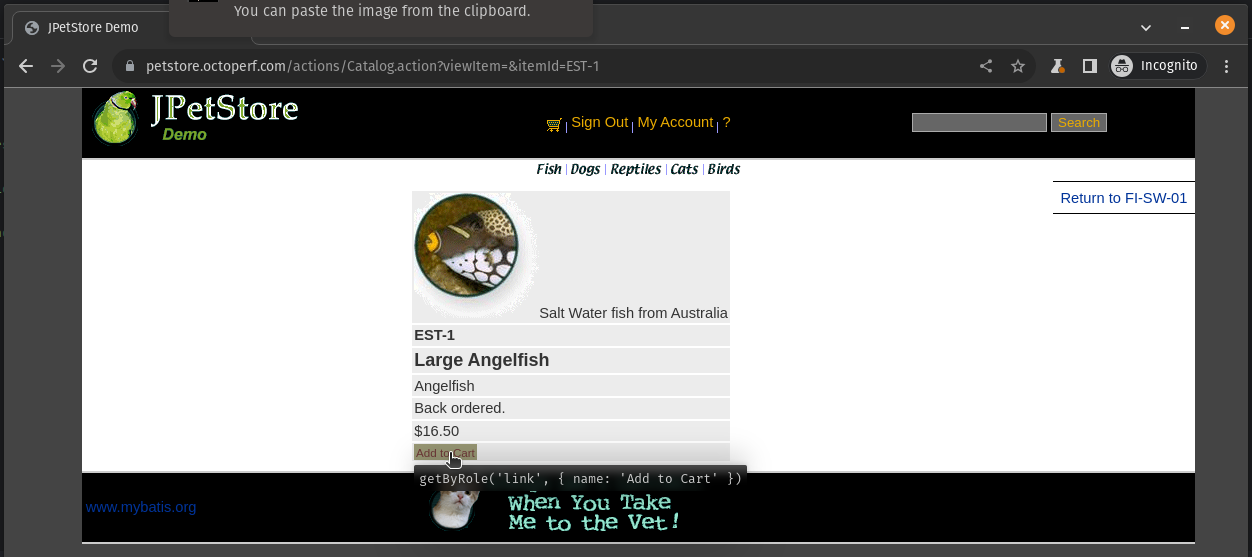
You are automatically redirected to your shopping cart:
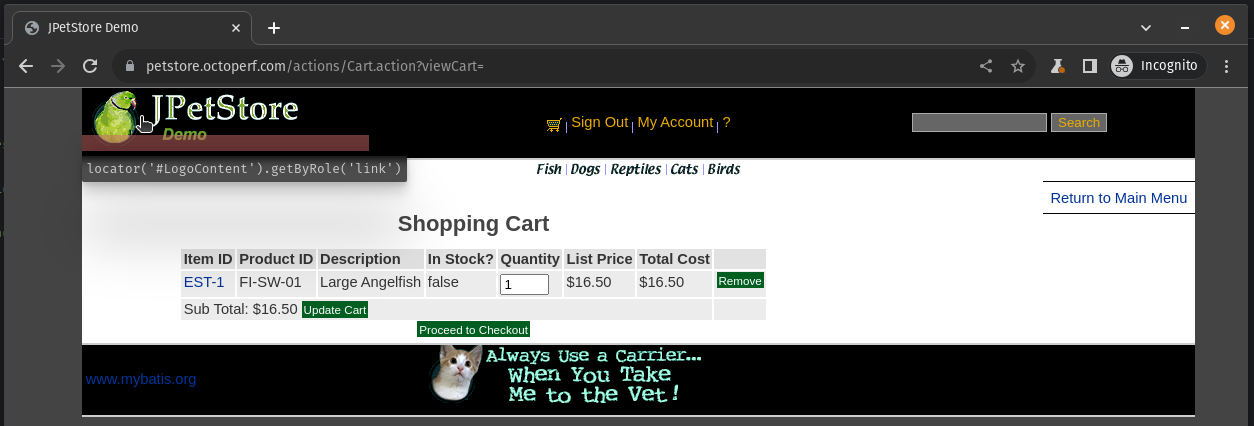
Let's end our code generation here and check the content of the recorder App:
import { test, expect } from '@playwright/test';

test('test', async ({ page }) => {
  await page.goto('https://petstore.octoperf.com/');
  await page.getByRole('link', { name: 'Enter the Store' }).click();
  await page.getByRole('link', { name: 'Sign In' }).click();
  await page.locator('#stripes--1962445802').click();
  await page.locator('#stripes--1962445802').fill('user1');
  await page.locator('input[name="password"]').click();
  await page.locator('input[name="password"]').fill('pass');
  await page.getByRole('button', { name: 'Login' }).click();
  await page.locator('#SidebarContent').getByRole('link').first().click();
  await page.getByRole('link', { name: 'FI-SW-01' }).click();
  await page.getByRole('link', { name: 'EST-1' }).click();
  await page.getByRole('link', { name: 'Add to Cart' }).click();
});
You can click on the Copy button and paste the generated script into the file tests/petstore.spec.ts in your Playwright project.
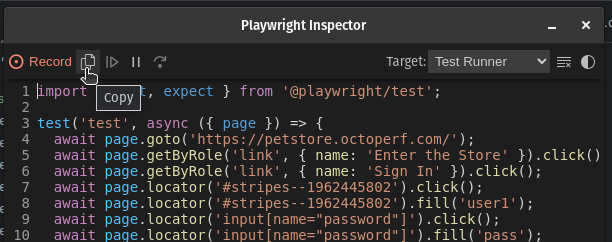
Run Your Script
Run the command npx playwright test tests/petstore.spec.ts in a terminal at the root your of your Playwright project.
This will open the browser (headless), perform the recorded actions, and potentially carry out any additional logic you've added.
I updated the configuration file
playwright.config.tsto comment the projects 'firefox' and 'webkit' and kept only the 'chromium' one. This speeds up the execution time for our simple test case.
ubuntu@pop-os:~/Dev/workspaces/playwright-petstore$ npx playwright test tests/petstore.spec.ts

Running 1 test using 1 worker
  1) [chromium] › petstore.spec.ts:3:5 › test ──────────────────────────────────────────────────────

    Test timeout of 30000ms exceeded.

    Error: locator.click: Page closed
    =========================== logs ===========================
    waiting for locator('#stripes--1962445802')
    ============================================================

       5 |     await page.getByRole('link', { name: 'Enter the Store' }).click();
       6 |     await page.getByRole('link', { name: 'Sign In' }).click();
    >  7 |     await page.locator('#stripes--1962445802').click();
         |                                                ^
       8 |     await page.locator('#stripes--1962445802').fill('user1');
       9 |     await page.locator('input[name="password"]').click();
      10 |     await page.locator('input[name="password"]').fill('pass');

        at /home/ubuntu/Dev/workspaces/playwright-petstore/tests/petstore.spec.ts:7:48

    Pending operations:
      - locator.click at tests/petstore.spec.ts:7:48


  1 failed
    [chromium] › petstore.spec.ts:3:5 › test ───────────────────────────────────────────────────────

  Serving HTML report at http://localhost:9323. Press Ctrl+C to quit.
Unfortunately an error occurred during the replay of our recorded script. The following report is automatically opened (view it online) to help you find out what went wrong:
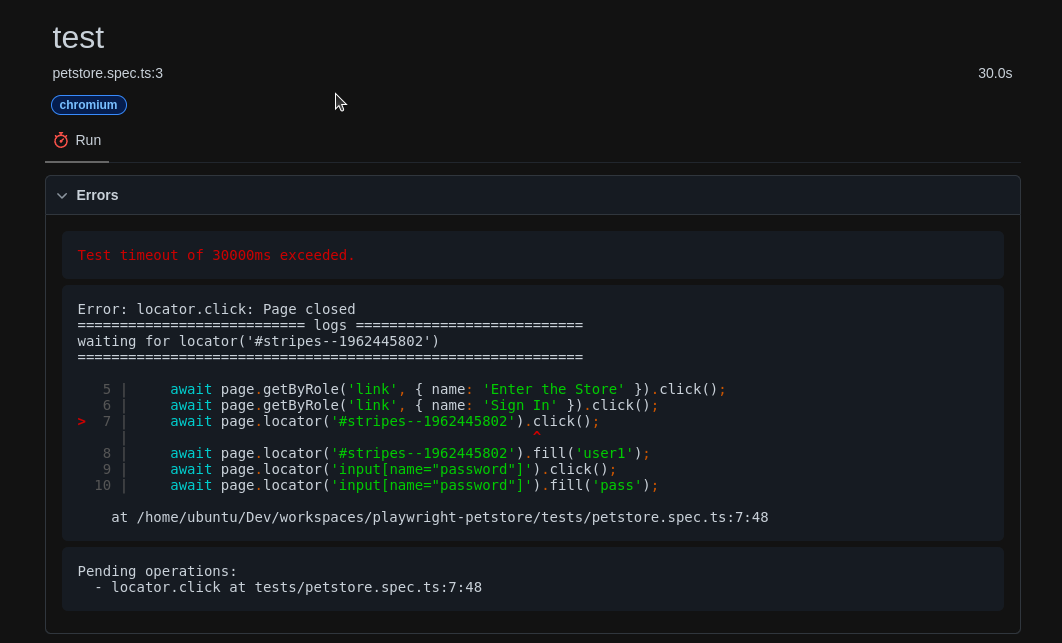
Here you can see that Playwright timed-out when trying to click on the element with ID stripes--1962445802.
Playwright provides mechanisms for handling timeouts during browser automation and testing. Timeouts are crucial in ensuring that scripts don't hang indefinitely and that web pages respond within expected timeframes. Playwright offers flexibility in configuring various timeout settings to accommodate different scenarios and requirements. Here's how Playwright handles timeouts:
- Page Load Timeout:
- Playwright allows you to set a timeout for page navigation using the
page.goto(url, { timeout })method. If the page doesn't load within the specified timeout, Playwright throws an error.await page.goto('https://example.com', { timeout: 10000 }); // 10-second timeout
- Timeouts for Actions:
- Actions such as
click(),type(), andwaitForSelector()can also have custom timeouts. If an action takes longer than the specified timeout, Playwright raises an error.await page.click('button', { timeout: 5000 }); // 5-second timeout for clicking
- Default Timeout Setting:
- Playwright has a default timeout for most actions. You can set the default timeout for a page by using
page.setDefaultTimeout(timeout).By providing these timeout-related options and configurations, Playwright ensures that your automation scripts can effectively handle various timing scenarios and gracefully recover from potential delays, making your browser automation more robust and reliable. Find ou more about Playwright timeouts in the official documentation.await page.setDefaultTimeout(8000); // 8-second default timeout
Fix your Script
Let's take a loot at the HTML of the username input of the login form to find out what is the issue with the script generated by Playwright Codegen.
By inspecting the HTML code (right click -> Inspect in the contextual menu), you can see the identifier id="stripes--XXX".

Refreshing the page (F5) will show a different ID. So this identifier is dynamically generated by the application: we should use another selector for the username input.
Using the code generated for the password input as an example, we can set the locator value to page.locator('input[name="username"]'):
import { test, expect } from '@playwright/test';

test('test', async ({ page }) => {
  await page.goto('https://petstore.octoperf.com/');
  await page.getByRole('link', { name: 'Enter the Store' }).click();
  await page.getByRole('link', { name: 'Sign In' }).click();
  await page.locator('input[name="username"]').click();
  await page.locator('input[name="username"]').fill('user1');
  await page.locator('input[name="password"]').click();
  await page.locator('input[name="password"]').fill('pass');
  await page.getByRole('button', { name: 'Login' }).click();
  await page.locator('#SidebarContent').getByRole('link').first().click();
  await page.getByRole('link', { name: 'FI-SW-01' }).click();
  await page.getByRole('link', { name: 'EST-1' }).click();
  await page.getByRole('link', { name: 'Add to Cart' }).click();
});
Running the updated code should now display a passed test:
ubuntu@pop-os:~/Dev/workspaces/playwright-petstore$ npx playwright test tests/petstore.spec.ts

Running 1 test using 1 worker
  1 passed (2.0s)

To open last HTML report run:

  npx playwright show-report
You can open the generated HTML report with the command npx playwright show-report to confirm this result:

Congratulations! You have successfully run your first Playwright test generated using Codegen!
Read this blog post about Playwright Trace Viewer if you want to know more options for debugging you scripts. You can also customize the generated code further by adding assertions, loops, or other logic to suit your specific needs: This post explains how to parameterize your Playwright tests.
Conclusion
Playwright Codegen is a game-changer for simplifying browser automation and testing. With its intuitive recording capabilities and code generation features, it empowers developers and testers to focus on testing scenarios and application functionality while minimizing the effort required to write interaction code from scratch.
By using Playwright Codegen, you can significantly expedite your web testing efforts, improve the quality of your applications, and ensure a smoother user experience for your customers. Whether you're new to automation or an experienced developer, Playwright Codegen is a valuable tool in your toolkit for efficient and effective web automation. Give it a try and experience the benefits firsthand!
