
Updating JMeter Performance Tests with an XML parser
When building performance tests, we all understand the value of using properties or variables to store static values outside of our tests. This ensures that any changes to these values need only be made in one place rather than having to make these changes in many tests.
Sometime though you may have inherited a suite of JMeter tests, or you were ** under pressure to develop these tests** and in order to do so you hardcoded values in your tests. This means that if anything changes, an endpoint or the server-name or even the payload of a sampler then you need to make changes to these static values in your tests.
It is possible that you have many tests to update, or you have decided that you are going to update the static values with properties or variables so that in the future any changes can be made in your input file rather than in each test. Updating many tests or samplers can be time consuming but because a JMeter test is just XML you can make updates to your test in an automated way by parsing the XML and updating in code.
In this post we are going to look at how we can do this as well as discussing techniques that you should be adopting should you wish to use this process to update your tests. If you want to follow along the JMeter project and java code can be found here.
Using an Integrated Development Environment (IDE)
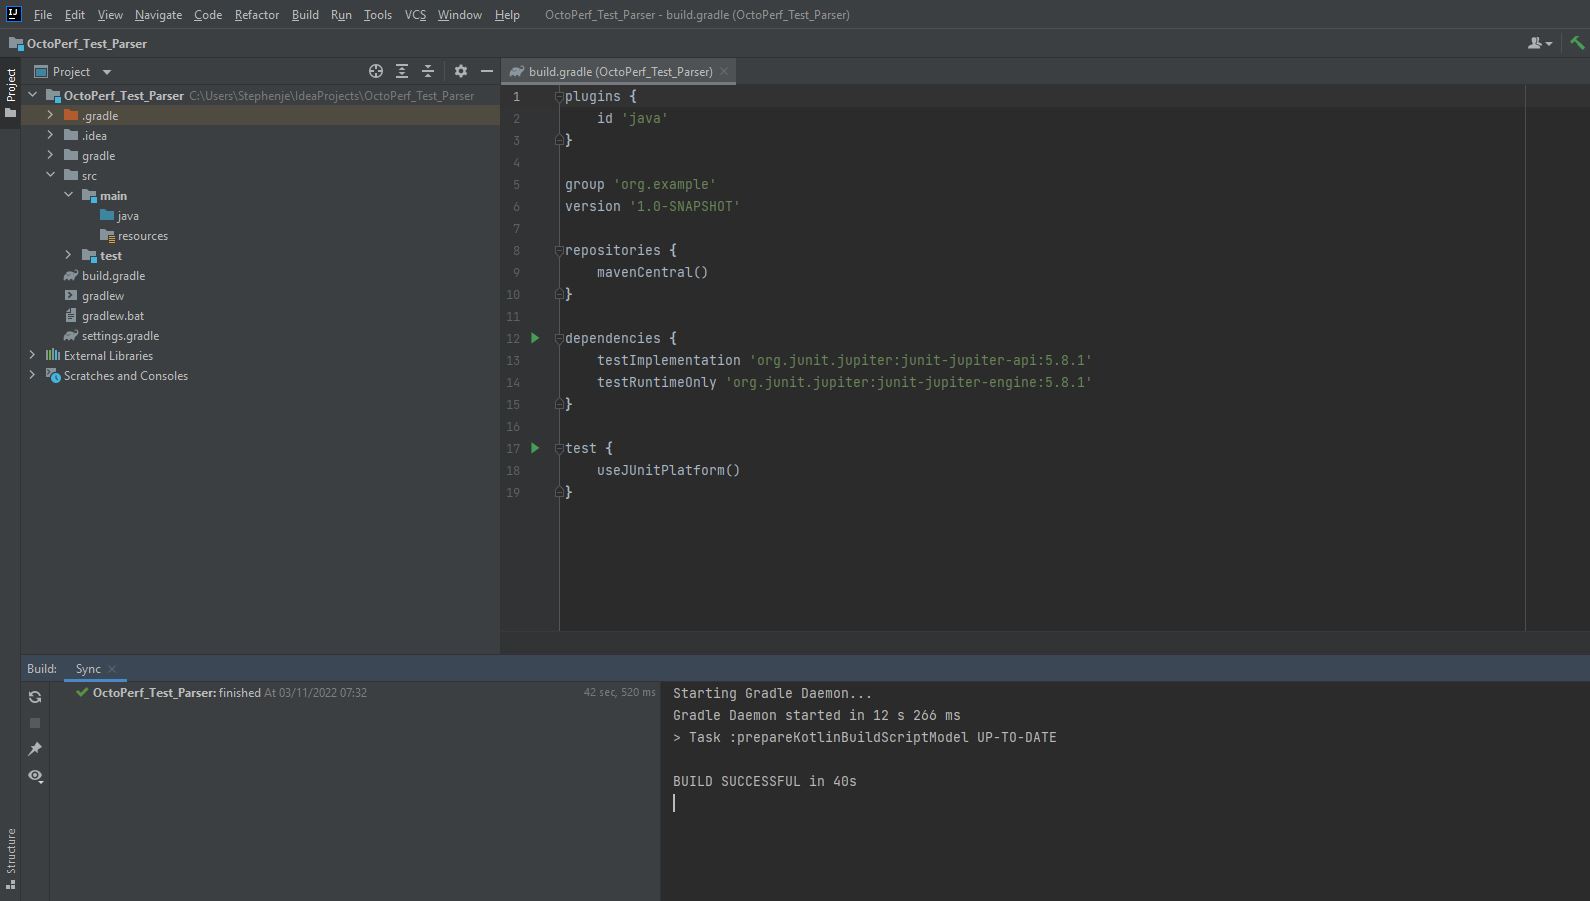
In order to write the code to parse and update your JMeter tests you are going to need a Integrated Development Environment (IDE), for the purposes of this post we are going to use IntelliJ. The community edition of IntelliJ can be downloaded and used for free from here. We are going to use Java to write our parser so when creating a new project make sure it is a Java project.
Building a dummy test
We will now build a test for us to parse which will include:
- 4 samplers
- 2 pre-processors
- 1 post-processor
- Query parameters
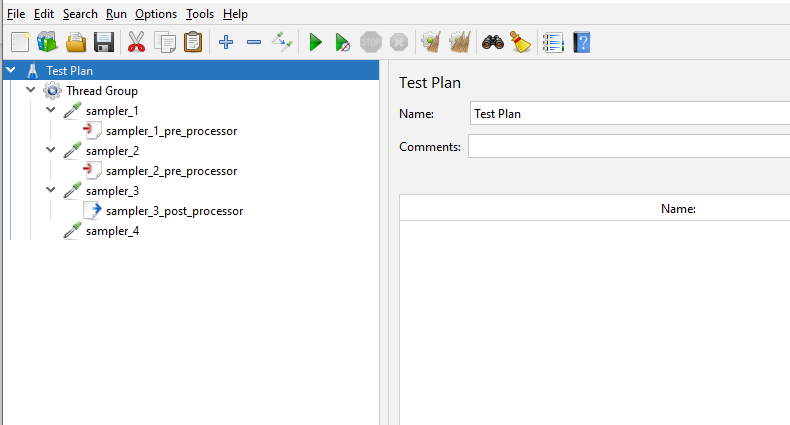
We have included a number of different elements to the test to show how each one can be updated using a XML parser.
Let’s look at each sampler to see the data they contain.


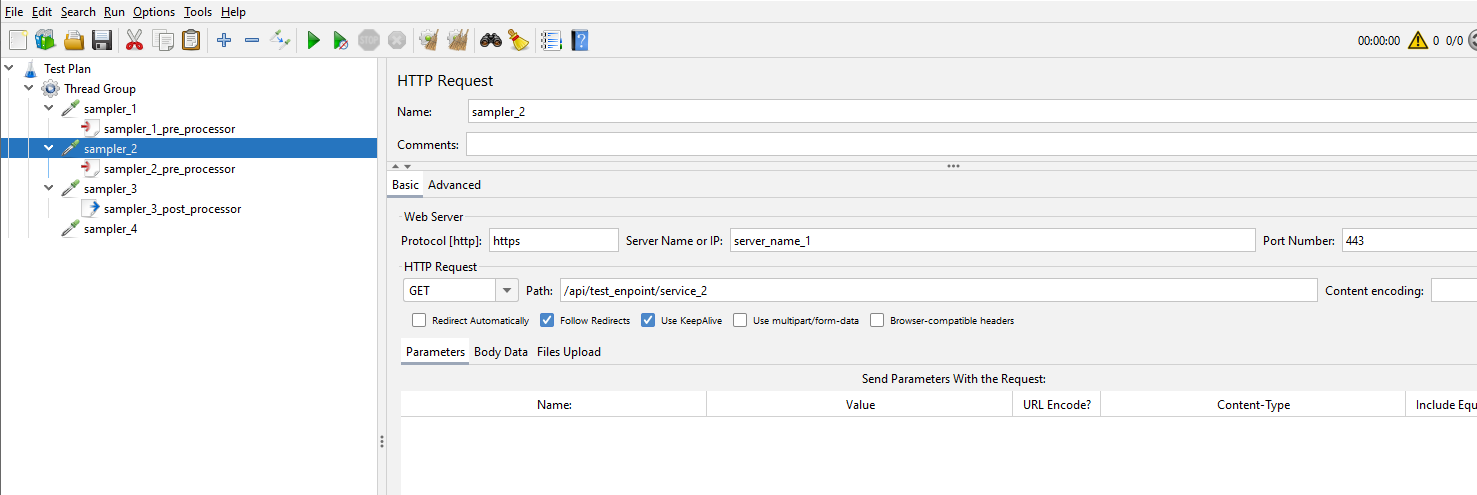
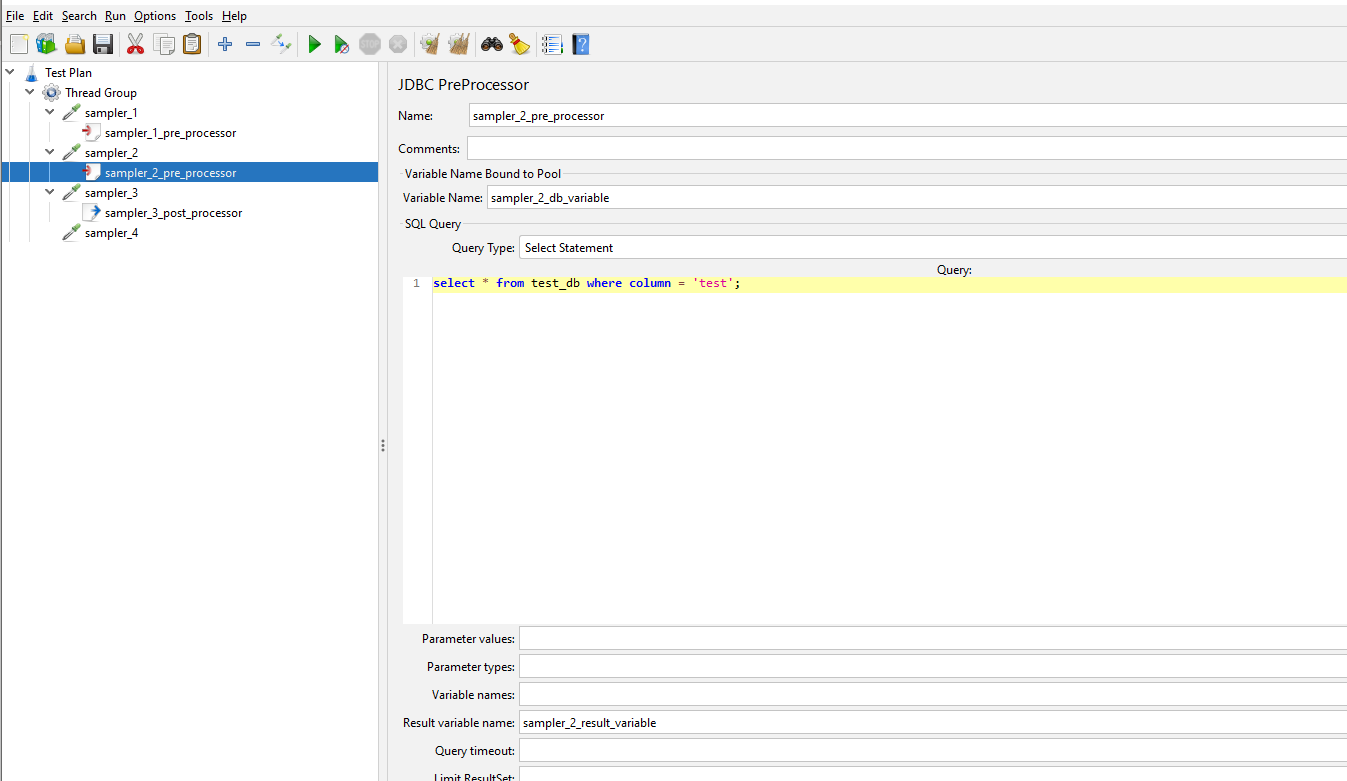
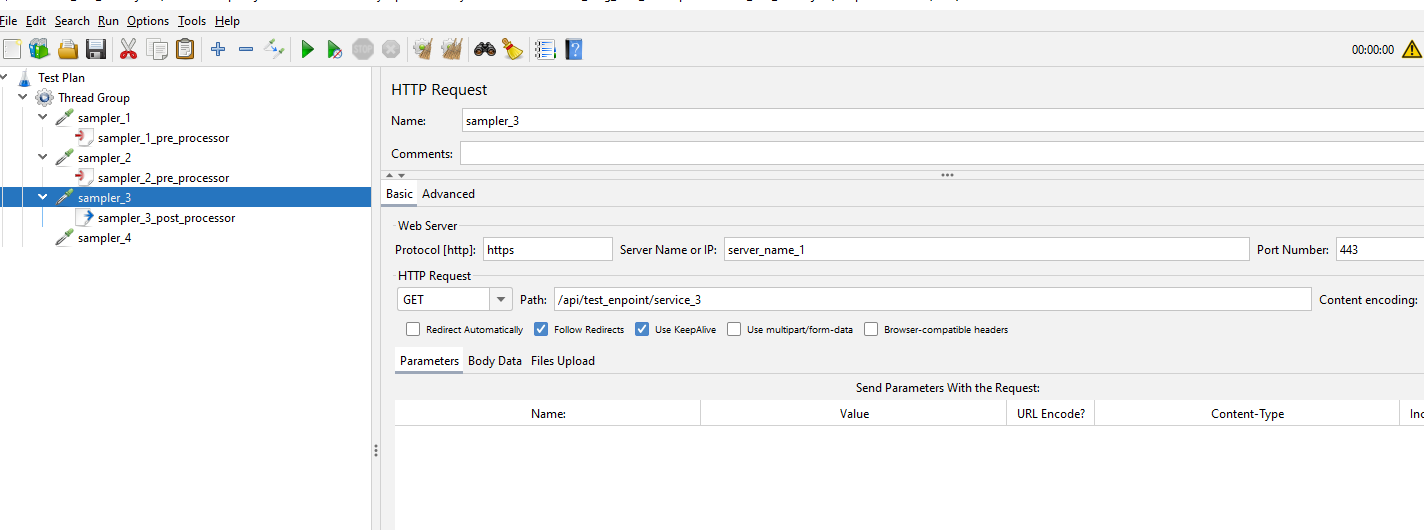
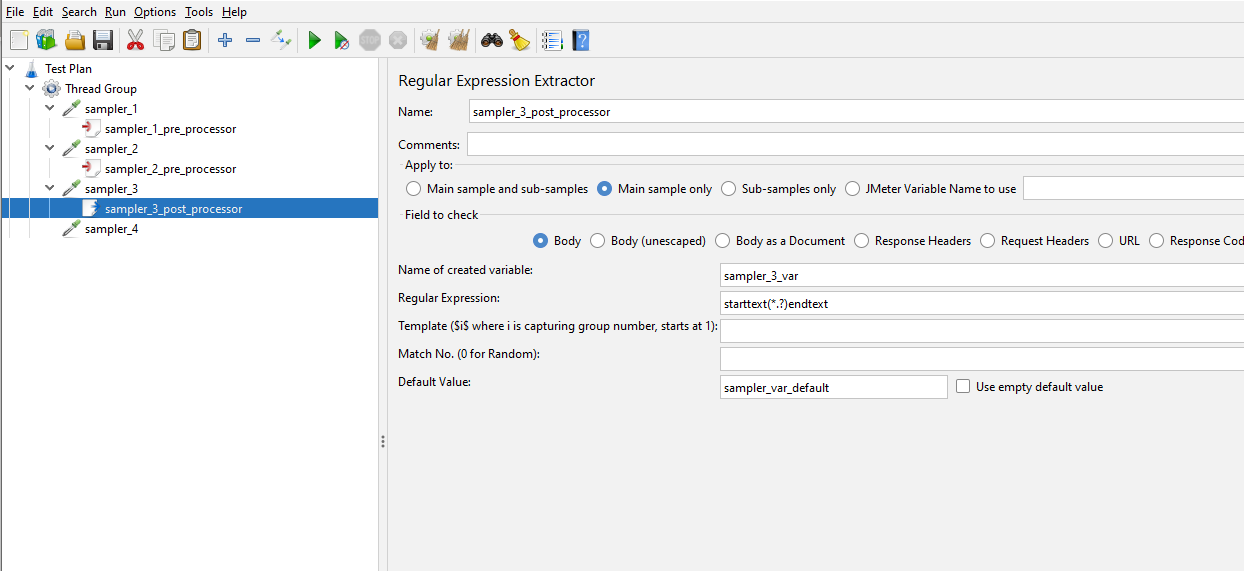
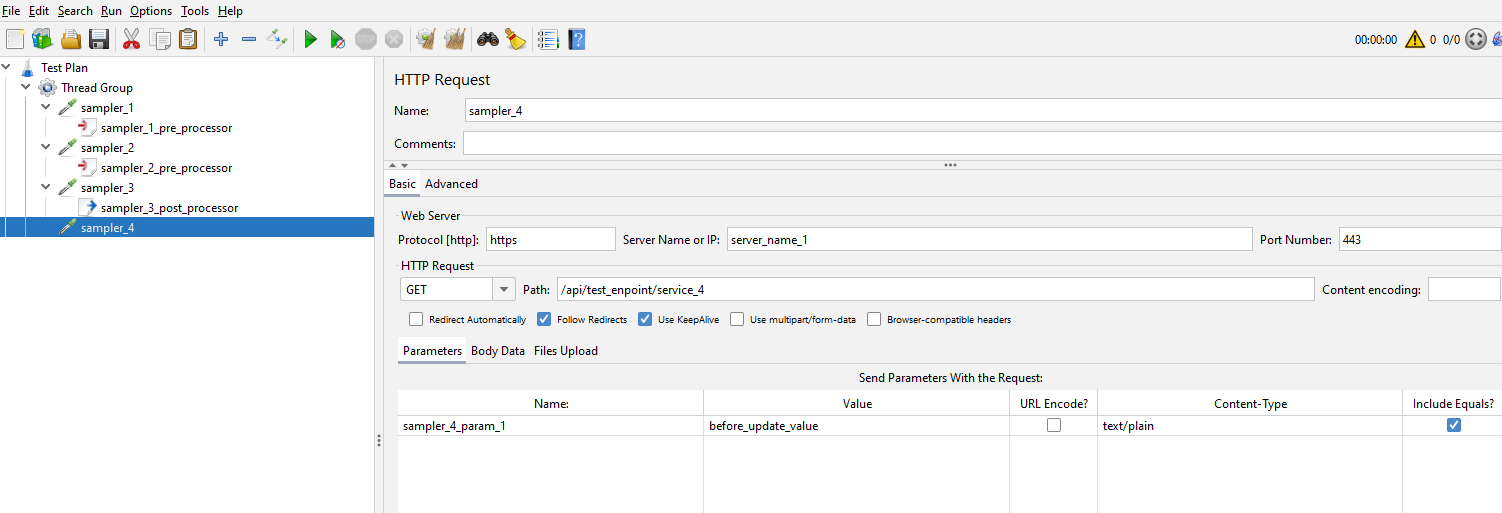
We’ll look at them in more detail and discuss how we will update these later in the post.
Simple parsing of test
To start with let’s look at how we might start parsing this test. We will start by creating a directory called script in our IntelliJ project and copying our test we have created into this directory.
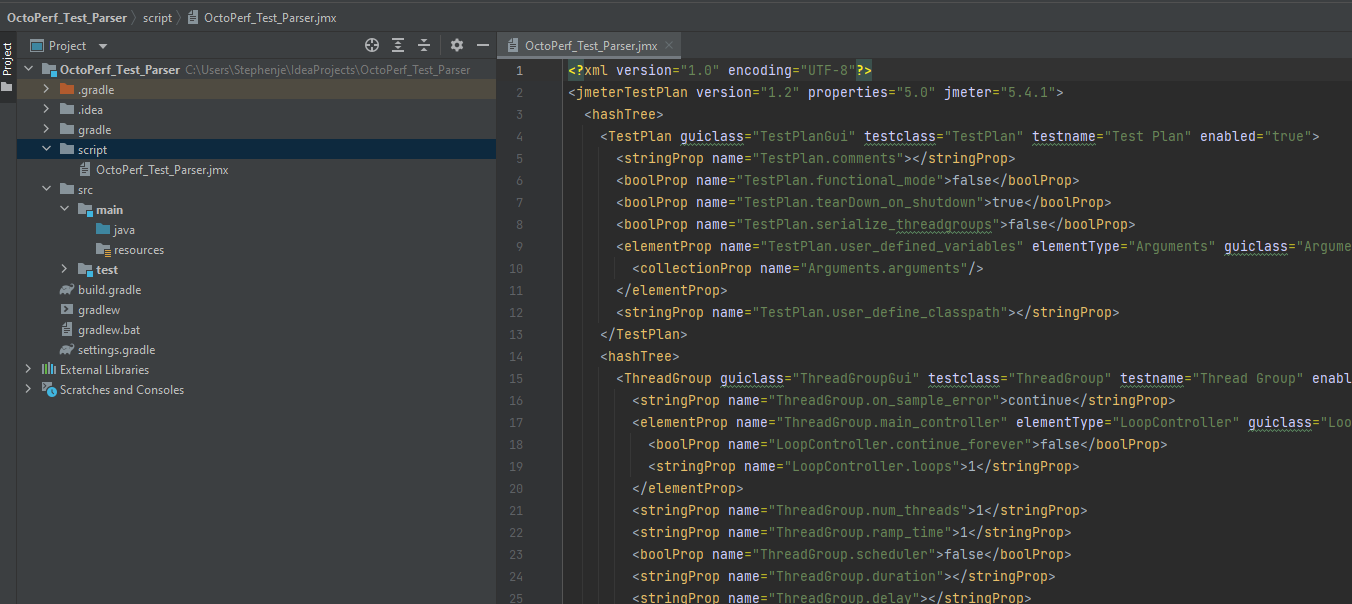
We can see that our test is displayed as XML. We are now going to create a Java Class under the Java directory called ExtractJMeterTestDetails.
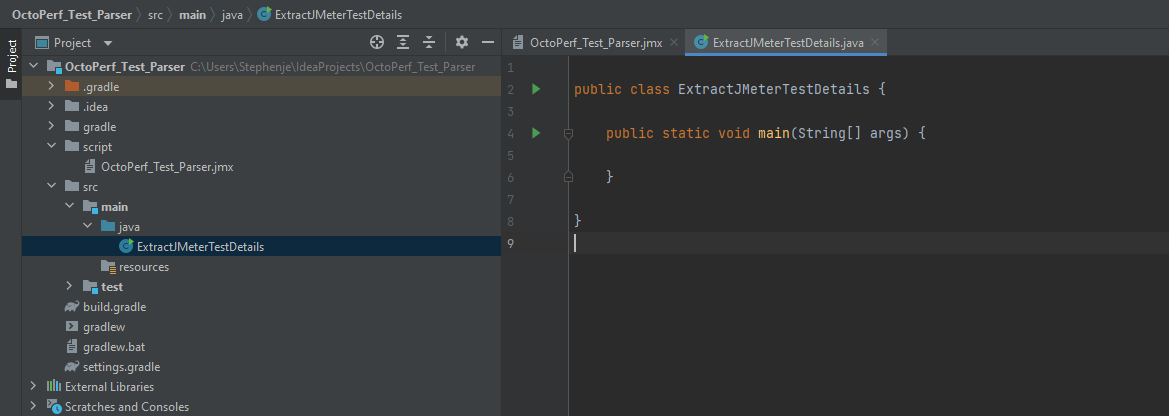
Let’s build a very simple parser to return the top level nodes in the JMeter test. Here is the Java code:
import org.w3c.dom.Document;
import org.w3c.dom.NodeList;
import org.xml.sax.SAXException;

import javax.xml.parsers.DocumentBuilder;
import javax.xml.parsers.DocumentBuilderFactory;
import javax.xml.parsers.ParserConfigurationException;
import java.io.File;
import java.io.IOException;

public class ExtractJMeterTestDetails {

    public static void main(String[] args) throws ParserConfigurationException, IOException, SAXException {

        // Instantiate the Factory
        DocumentBuilderFactory dbf = DocumentBuilderFactory.newInstance();

        // Create document builder
        DocumentBuilder db = dbf.newDocumentBuilder();

        // Load the test from the script directory
        Document doc = db.parse(new File("script/octoperf-test-parser.jmx"));

        // Optional, but recommended
        doc.getDocumentElement().normalize();

        // Get the top level node and iterate all nodes
        NodeList topLevelNodeList = doc.getElementsByTagName("**");
        for (int i = 0; i < topLevelNodeList.getLength(); i++) {
            System.out.println(topLevelNodeList.item(i).getNodeName());
        }
    }
}
Let’s pick out the main parts from this code
What we are doing here is loading the test into a document
Document doc = db.parse(new File("script/octoperf-test-parser.jmx"));
Getting all the top level nodes and iterating through them
NodeList topLevelNodeList = doc.getElementsByTagName("**");
        for (int i = 0; i < topLevelNodeList.getLength(); i++) {
            System.out.println(topLevelNodeList.item(i).getNodeName());
        }
If we run this, we see in the output console a list of all the nodes at the top level of our test.
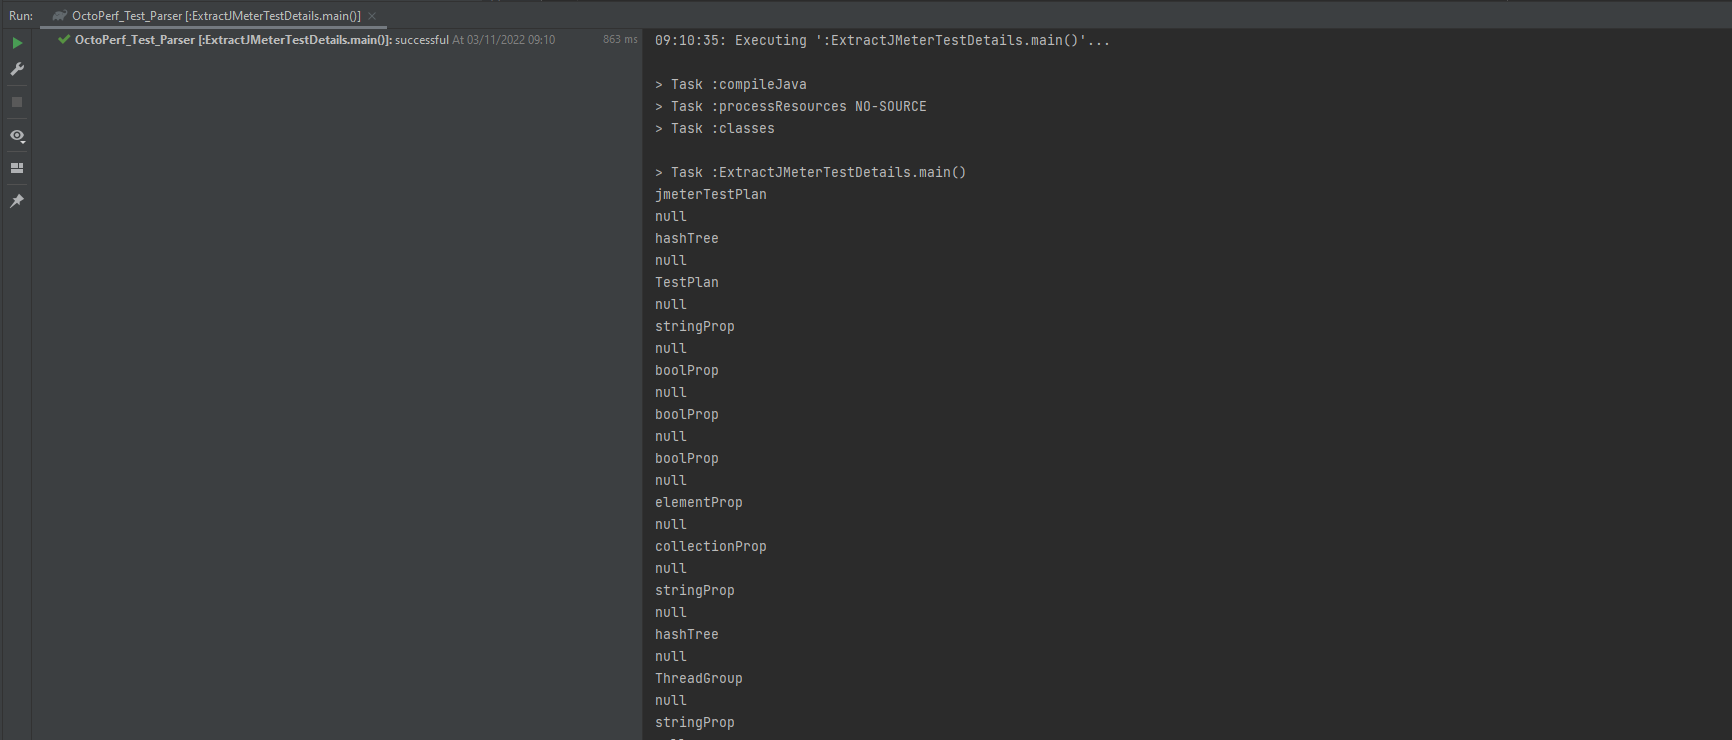
Now this is not particularly useful yet, but it demonstrates that we can load the test and access all the nodes. Let’s make some updates to the code. In our for-loop above we replace the System.out.println() method call with
Node nodeTop = topLevelNodeList.item(i);
NodeList nodeChildren = nodeTop.getChildNodes();
for(int a=0; a < nodeChildren.getLength(); a++) {
    Node node = nodeChildren.item(a);
    System.out.println(node.getNodeName());
}
So, for each of the top-level nodes we are now getting their children and outputting these. Let’s run this again.
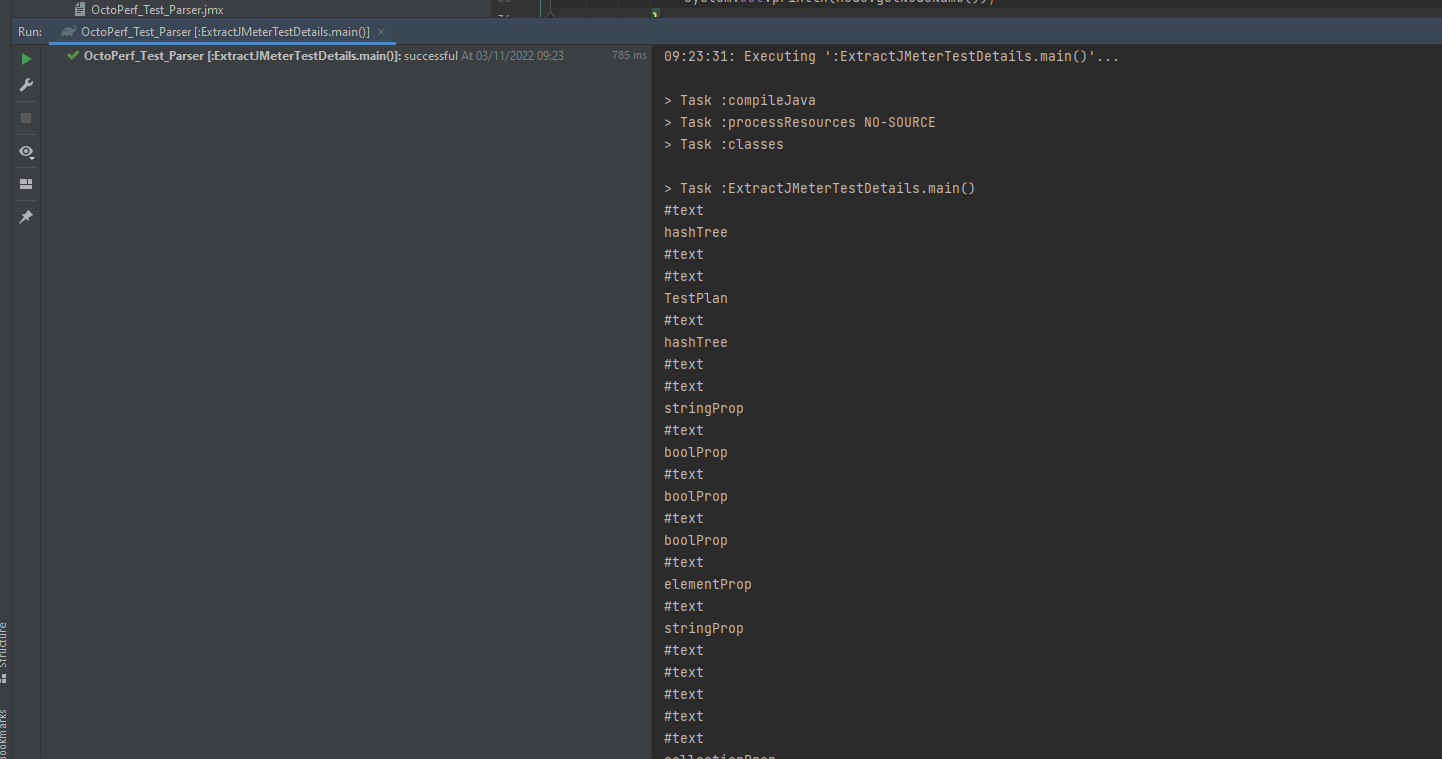
Again, this is not particularly useful, but we now have visibility of all the nodes in the test. Let’s now make our code more useful and look at outputting something meaningful. If we look at one of the HTTP Samplers in XML we see:

So, we can see the structure of the HTTPSampler. Let’s update our parser to only look for HTTPSamplerProxy nodes and get the attributes from each of these nodes, we will then iterate through the attributes and output to the console. We will add this code to our parser, this goes in the location the System.out.println() method call from above was located.
if(node.getNodeName().equals("HTTPSamplerProxy")) {
    NamedNodeMap samplerMainAttributes = node.getAttributes();
    for (int j = 0; j < samplerMainAttributes.getLength(); j++) {
            System.out.println("NODE-NAME: " + samplerMainAttributes.item(j).getNodeName());
            System.out.println("NODE-VALUE: " +samplerMainAttributes.item(j).getNodeValue());
    }
}
If you are not sure where this fits in to the code, you can find the full class code here. Let’s run our parser again:
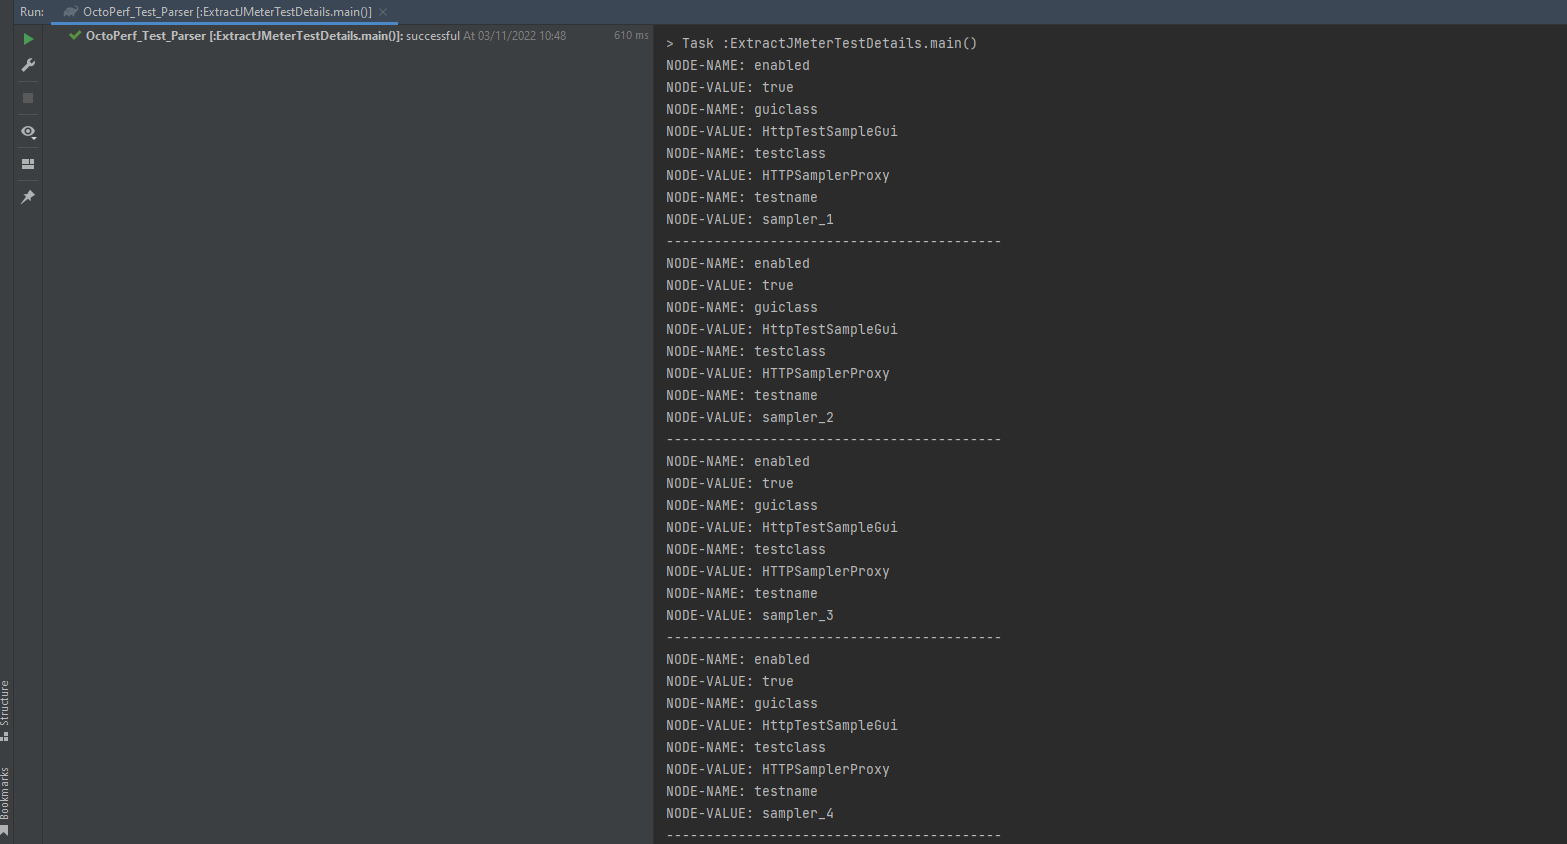
We are now starting to return meaningful data from our test, we can see for each sampler we are returning the attributes. If we go back and look at the test we can see there are a number of stringProp and boolProp nodes that contain the server and request details in their attributes.

What we need to do now is get the child nodes of the sampler and iterate through them and for each node we get the attributes and check for these:
HTTPSampler.domain HTTPSampler.path HTTPSampler.port HTTPSampler.protocol HTTPSampler.method
When we find them, we print the values to the console. If we add this code to our parser:
NodeList childNodes = node.getChildNodes();
for (int k = 0; k < childNodes.getLength(); k++) {
    if (childNodes.item(k).hasAttributes()) {
        NamedNodeMap samplerChildAttributes = childNodes.item(k).getAttributes();
        for (int l = 0; l < samplerChildAttributes.getLength(); l++) {
            if (samplerChildAttributes.item(l).getNodeName().equals("name")) {
                if (samplerChildAttributes.item(l).getNodeValue().equals("HTTPSampler.domain")) {
                    System.out.println("Server Name of IP = " + childNodes.item(k).getTextContent());
                }
                if (samplerChildAttributes.item(l).getNodeValue().equals("HTTPSampler.path")) {
                    System.out.println("Path = " +childNodes.item(k).getTextContent());
                }
                if (samplerChildAttributes.item(l).getNodeValue().equals("HTTPSampler.port")) {
                    System.out.println("Port Number = " + childNodes.item(k).getTextContent());
                }
                if (samplerChildAttributes.item(l).getNodeValue().equals("HTTPSampler.protocol")) {
                    System.out.println("Protocol = " + childNodes.item(k).getTextContent());
                }
                if (samplerChildAttributes.item(l).getNodeValue().equals("HTTPSampler.method")) {
                    System.out.println("Method = " + childNodes.item(k).getTextContent());
                }
            }
        }
    }
}
Let’s execute the parser:
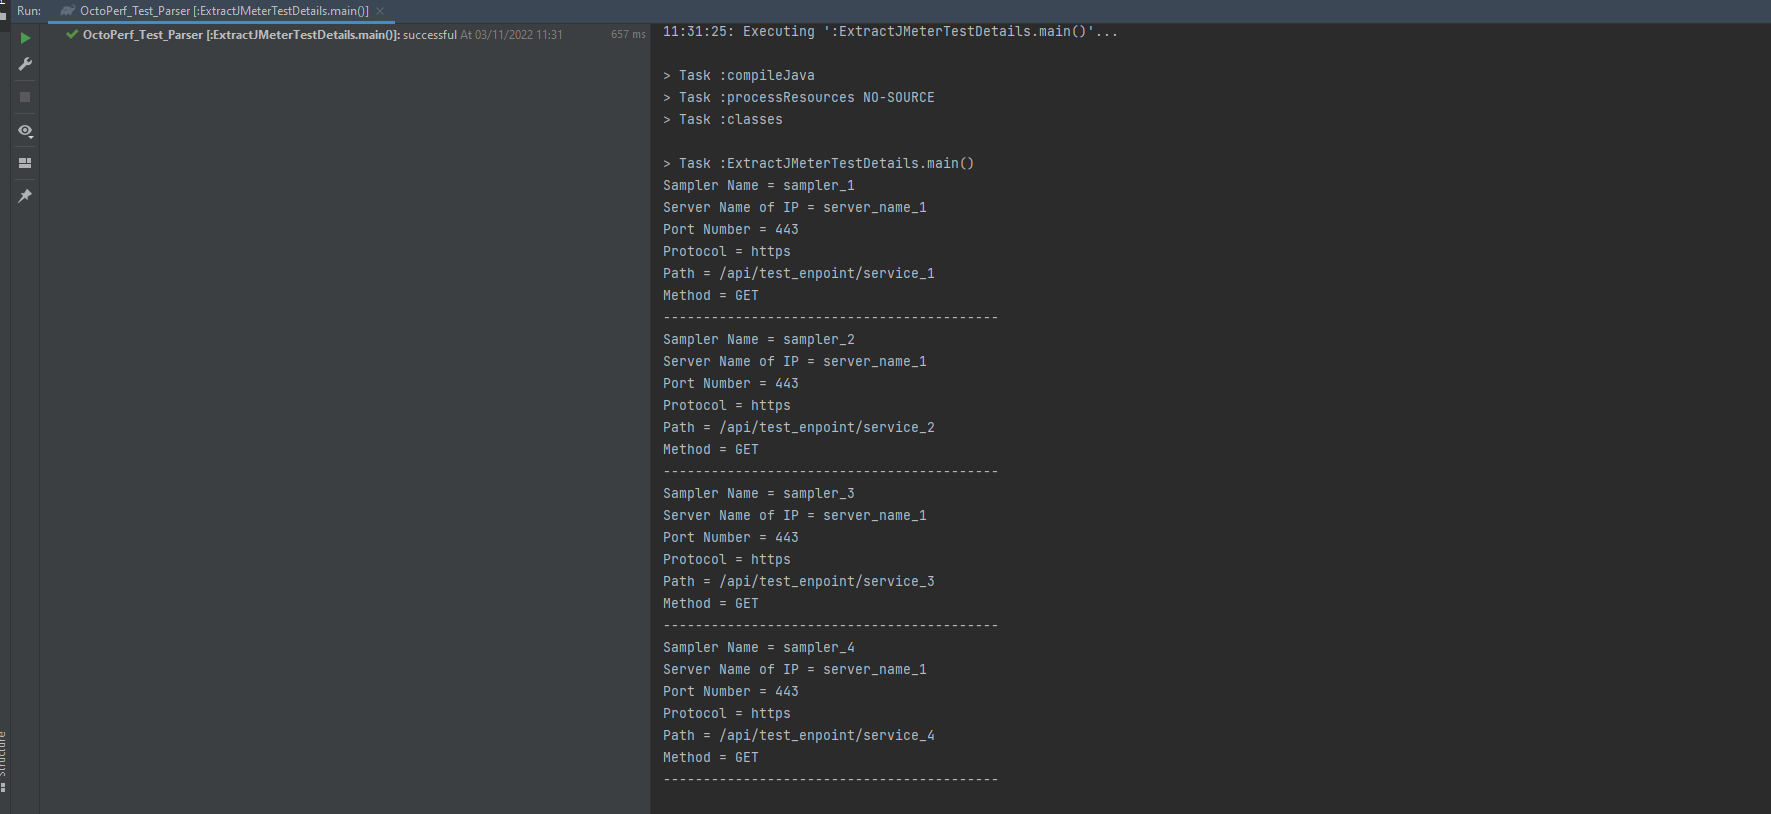
As you can see, we are now extracting all the details of each sampler.
Sampler Pre and Post Processors
Now we can parse our Test XML and pick out each sampler let’s look at how we can extract the pre and post processor data and the parameters we added in sampler_4. We will start with the pre-processors and post-processors we added in sampler_1, sampler_2 and sampler_3 as these follow a similar pattern and then we will look at the parameters in sampler_4 afterwards.
We have already looked at the XML for sampler_1 but in order to see the pre-processor associated with it we need to look outside of the HTTPSamplerProxy that we have been looking at so far.
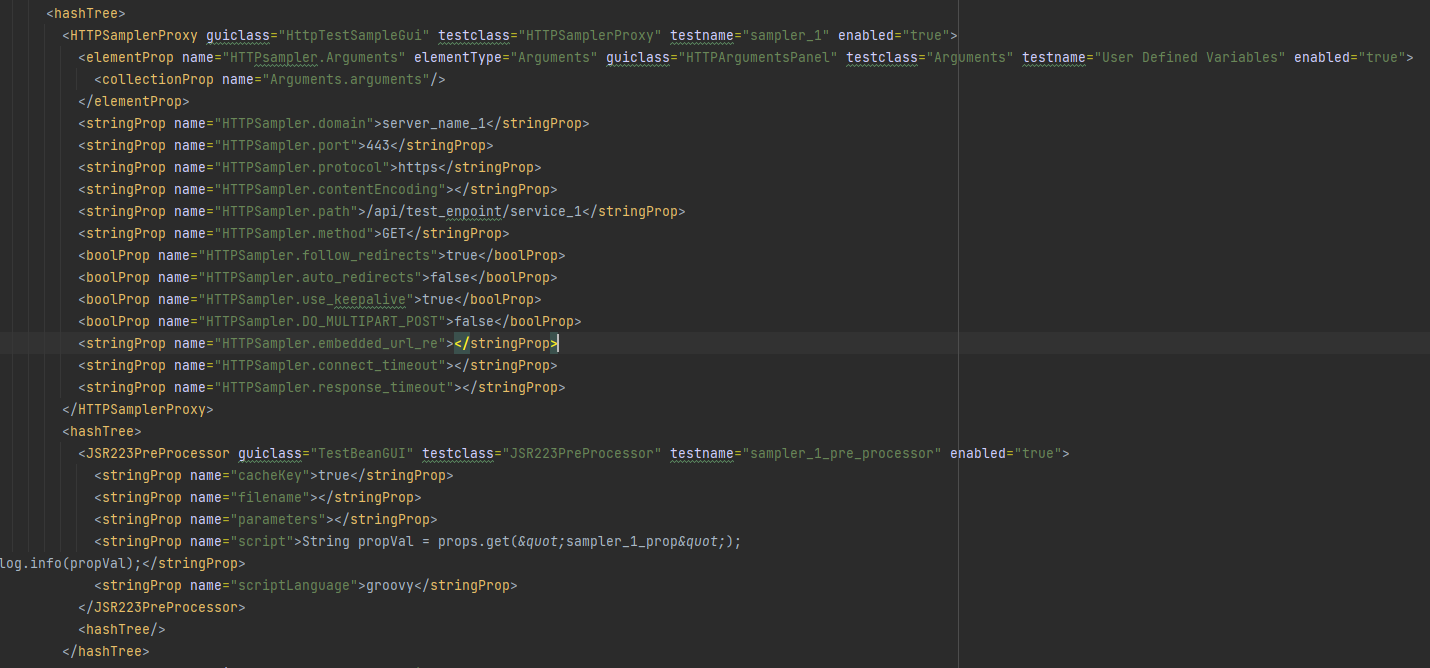
We can see the JSR223PreProcessor node which sits outside of the HTTPSamplerProxy node but grouped together by an encompassing HashTree node. This is the same for all the sampler_2 and sampler_3 so we will look at extracting data from sampler_1 as part of this blog post as you should be able to use the same techniques to extract data from the others.
We are now going to create another Java Class under the Java directory called ExtractJMeterPreProcessorDetails, if we copy the existing one, we have already created we will have all the foundation work we have done. What we are going to do is remove the block of code we added to grab the details of the HTTPSamplerProxy node leaving us with this.
public class ExtractJMeterPreProcessorDetails {

    public static void main(String[] args) throws ParserConfigurationException, IOException, SAXException {

        // Instantiate the Factory
        DocumentBuilderFactory dbf = DocumentBuilderFactory.newInstance();

        // Create document builder
        DocumentBuilder db = dbf.newDocumentBuilder();

        // Load the test from the script directory
        Document doc = db.parse(new File("script/octoperf-test-parser.jmx"));

        // Optional, but recommended
        doc.getDocumentElement().normalize();

        // Get the top level node and iterate all nodes
        NodeList topLevelNodeList = doc.getElementsByTagName("**");
        for (int i = 0; i < topLevelNodeList.getLength(); i++) {
            Node nodeTop = topLevelNodeList.item(i);
            NodeList nodeChildren = nodeTop.getChildNodes();
            for(int a=0; a < nodeChildren.getLength(); a++) {
                Node node = nodeChildren.item(a);
                if(node.getNodeName().equals("HTTPSamplerProxy")) {
                    NamedNodeMap samplerMainAttributes = node.getAttributes();
                    for (int j = 0; j < samplerMainAttributes.getLength(); j++) {
                        if(samplerMainAttributes.item(j).getNodeName().equals("testname")) {
                            System.out.println("Sampler Name = " + samplerMainAttributes.item(j).getNodeValue());
                        }
                    }
                    System.out.println("------------------------------------------");
                }
            }
        }
    }
}
This is basically searching for all the HTTPSamplerProxy nodes and outputting their name to the console.
We know that the JSR223PreProcessor node it at the same level as the HTTPSamplerProxy node therefore we can add some code to grab this as it’s a case of searching for the JSR223PreProcessor nodes in the test.
Remember there is only one JSR223PreProcessor node as the ones in sampler_2 and sampler_3 are JDBCPreProcessor and RegexExtractor so we will include these in our parser code as well. This is the code we are adding:
if(node.getNodeName().equals("JSR223PreProcessor")) {
    NamedNodeMap samplerMainAttributes = node.getAttributes();
    for (int j = 0; j < samplerMainAttributes.getLength(); j++) {
        if (samplerMainAttributes.item(j).getNodeName().equals("testname")) {
            System.out.println("PreProcessor Name = " + samplerMainAttributes.item(j).getNodeValue());
        }
    }
}
if(node.getNodeName().equals("JDBCPreProcessor")) {
    NamedNodeMap samplerMainAttributes = node.getAttributes();
    for (int j = 0; j < samplerMainAttributes.getLength(); j++) {
        if (samplerMainAttributes.item(j).getNodeName().equals("testname")) {
            System.out.println("PreProcessor Name = " + samplerMainAttributes.item(j).getNodeValue());
        }
    }
}
if(node.getNodeName().equals("RegexExtractor")) {
    NamedNodeMap samplerMainAttributes = node.getAttributes();
    for (int j = 0; j < samplerMainAttributes.getLength(); j++) {
        if(samplerMainAttributes.item(j).getNodeName().equals("testname")) {
            System.out.println("PostProcessor Name = " + samplerMainAttributes.item(j).getNodeValue());
        }
    }
    System.out.println("------------------------------------------");
}
As before, if you are not sure where this fits in to the code, you can find the full class code here.
Let’s execute the parser again:

We can see that the samplers and the pre and post processor names have been captured and written to the console. As discussed above we will look at extracting the values from sampler_1 as the techniques for sampler_2 and ** sampler_3** is the same. We are going to use a similar process to that used in the first Java Class file we created to get the values from the sampler_1 JSR223PreProcessor node.
We will add this code to our parser:
NodeList childNodes = node.getChildNodes();
for (int k = 0; k < childNodes.getLength(); k++) {
    if (childNodes.item(k).hasAttributes()) {
        NamedNodeMap samplerChildAttributes = childNodes.item(k).getAttributes();
        for (int l = 0; l < samplerChildAttributes.getLength(); l++) {
            if (samplerChildAttributes.item(l).getNodeName().equals("name")) {
                if (samplerChildAttributes.item(l).getNodeValue().equals("script")) {
                    System.out.println("Script = " + childNodes.item(k).getTextContent());
                }
            }
        }
    }
}
Which is a case of us getting all the child nodes under the JST223PreProcessor and extracting the details of the script by iterating over all the children.
If we run our parser.

We can see that we have captured the script we entered in our sampler when we created the JMeter test.
Sampler Parameters
We will now look at how we would capture the parameters we added into sampler_4 as this uses a different technique and then we can look at how we might update these values in the test using the parser. Let’s take a look more closely at sampler_4 in the XML.
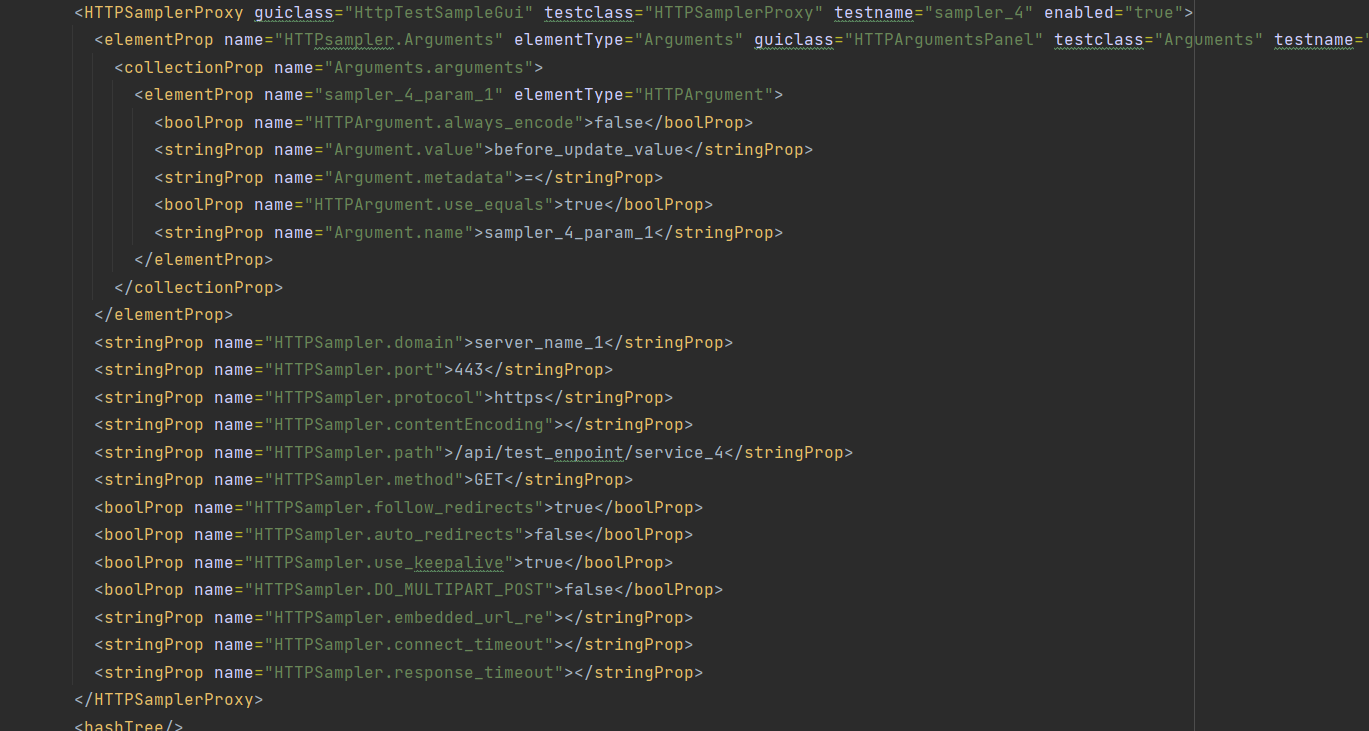
We can see that the parameter we added to the sampler is under a elementProp node where there is a collectionProp which is where we would see all our parameters if we had added more. Under the collectionProp there is the parameter we created along with the value we gave the parameter.
Let’s make some changes to the code to capture the parameter data. To do this we will again make a copy of the class file and call this one ExtractJMeterParameterDetails, the full class file is available here. We will, like last time leave the code that gets us to iterate the HTTPSamplerProxy nodes and then add the following code.
if(node.getNodeName().equals("HTTPSamplerProxy")) {
    NamedNodeMap samplerMainAttributes = node.getAttributes();
    for (int j = 0; j < samplerMainAttributes.getLength(); j++) {
        if(samplerMainAttributes.item(j).getNodeName().equals("testname")) {
            if(samplerMainAttributes.item(j).getNodeValue().equals("sampler_4")) {
                NodeList childNodes = node.getChildNodes();
                for (int k = 0; k < childNodes.getLength(); k++) {
                    if(childNodes.item(k).getNodeName().equals("elementProp")) {
                        NodeList childchildNodes = childNodes.item(k).getChildNodes();
                        for (int l = 0; l < childchildNodes.getLength(); l++) {
                            if(childchildNodes.item(l).getNodeName().equals("collectionProp")) {
                                NodeList childchildchildNodes = childchildNodes.item(l).getChildNodes();
                                for (int m = 0; m < childchildchildNodes.getLength(); m++) {
                                    if(childchildchildNodes.item(m).getNodeName().equals("elementProp")) {
                                        if (childchildchildNodes.item(m).hasAttributes()) {
                                            NamedNodeMap samplerChildAttributes = childchildchildNodes.item(m).getAttributes();
                                            for (int n = 0; n < samplerChildAttributes.getLength(); n++) {
                                                if (samplerChildAttributes.item(n).getNodeName().equals("name")) {
                                                    System.out.println("Parameter = " + samplerChildAttributes.item(n).getNodeValue());
                                                    NodeList childchildchildchildNodes = childchildchildNodes.item(m).getChildNodes();
                                                    for (int o = 0; o < childchildchildchildNodes.getLength(); o++) {
                                                        if (childchildchildchildNodes.item(o).hasAttributes()) {
                                                            NamedNodeMap elementChildAttributes = childchildchildchildNodes.item(o).getAttributes();
                                                            for (int p = 0; p < elementChildAttributes.getLength(); p++) {
                                                                if (elementChildAttributes.item(p).getNodeValue().equals("Argument.value")) {
                                                                    System.out.println("Value = " + childchildchildchildNodes.item(o).getTextContent());
                                                                }
                                                            }
                                                        }
                                                    }
                                                }
                                            }
                                        }
                                    }
                                }
                            }
                        }
                    }
                }
            }
        }
    }
}
There are more elegant ways to recursively iterate through the nodes, but we wanted to show you how you must drill into each node and extract the information you need through a series of node and attribute checks. If we execute the parser:

You can see that we have captured the parameter values.
Updating our tests
The purpose of this blog post was to show you how you could update tests using a parser written in Java in order to save you time if you needed to make updates to many tests and so far, we have not looked at this at all. We have in fact done all the hard work already as updating the values we have captured is easy.
Let’s take our first example where we listed out the
Server Name or IP Port Number Protocol Path Method
If you remember the part of the class that captured the data was:
if (samplerChildAttributes.item(l).getNodeName().equals("name")) {
    if (samplerChildAttributes.item(l).getNodeValue().equals("HTTPSampler.domain")) {
        System.out.println("Server Name of IP = " + childNodes.item(k).getTextContent());
    }
    if (samplerChildAttributes.item(l).getNodeValue().equals("HTTPSampler.path")) {
        System.out.println("Path = " +childNodes.item(k).getTextContent());
    }
    if (samplerChildAttributes.item(l).getNodeValue().equals("HTTPSampler.port")) {
        System.out.println("Port Number = " + childNodes.item(k).getTextContent());
    }
    if (samplerChildAttributes.item(l).getNodeValue().equals("HTTPSampler.protocol")) {
        System.out.println("Protocol = " + childNodes.item(k).getTextContent());
    }
    if (samplerChildAttributes.item(l).getNodeValue().equals("HTTPSampler.method")) {
        System.out.println("Method = " + childNodes.item(k).getTextContent());
    }
}
Where we were iterating the child nodes and their attributes. In order to update these values, we simply use the ** setTextContent** method rather than the getTextContext method and we need to save the document in order to persist the data. Let’s start by updating the node value of all the HTTPSampler.port values, they currently vary depending on the sampler and are set to
/api/test_enpoint/service_1 /api/test_enpoint/service_2 /api/test_enpoint/service_3 /api/test_enpoint/service_4
What we will do is replace /test_endpoint/ with /new_test_endpoint/ in all samplers. We do this by making this change in the code:
if (samplerChildAttributes.item(l).getNodeValue().equals("HTTPSampler.path")) {
    String currentPath = childNodes.item(k).getTextContent();
    childNodes.item(k).setTextContent(currentPath.replace("test_endpoint", "new_test_endpoint"));
    System.out.println("Path = " + childNodes.item(k).getTextContent());
}
So, we are capturing the current value and then replacing the string while setting the new value. We are doing the ** transformation of the node**, but we need to save the updated XML. We do this by using the TransformerFactory to create a new version of the XML in the same location as the original.
We use this code:
// Create a new test from the updated XML
TransformerFactory factory = TransformerFactory.newInstance();
Transformer transformer = factory.newTransformer();

DOMSource source = new DOMSource(doc);
StreamResult result = new StreamResult(new File("script/octoperf-test-parser-new.jmx"));
transformer.transform(source, result);
If we run the parser:

We can see we have a new test and the HTTPSampler.path value has been set to new_test_endpoint. We will do one more change as the approach is the same regardless of the sampler and regardless of whether you are updating the value of a node or one of its attributes. This time we will replace a value with a property value so we can pass this in from either a properties file or on the command line, this will obviously mean that you can handle any changes to static values outside of the test and not need to make updates by parsing the XML in the future.
What we will look to do is update the Server Name of IP field with a property, we’ll do that for all samplers. We’ll update the section where we get the HTTPSampler.domain with this code.
if (samplerChildAttributes.item(l).getNodeValue().equals("HTTPSampler.domain")) {
    childNodes.item(k).setTextContent("$P{__(serverName)}");
    System.out.println("Server Name of IP = " + childNodes.item(k).getTextContent());
}
Where we will set the value of the Server Name of IP to be $P{__(serverName)}. We’ll delete the new test file we
created and run our parser again.

We can now see that HTTPSampler.domain value has been updated. Just for completeness we will open up the test in JMeter and check the values of the sampler.
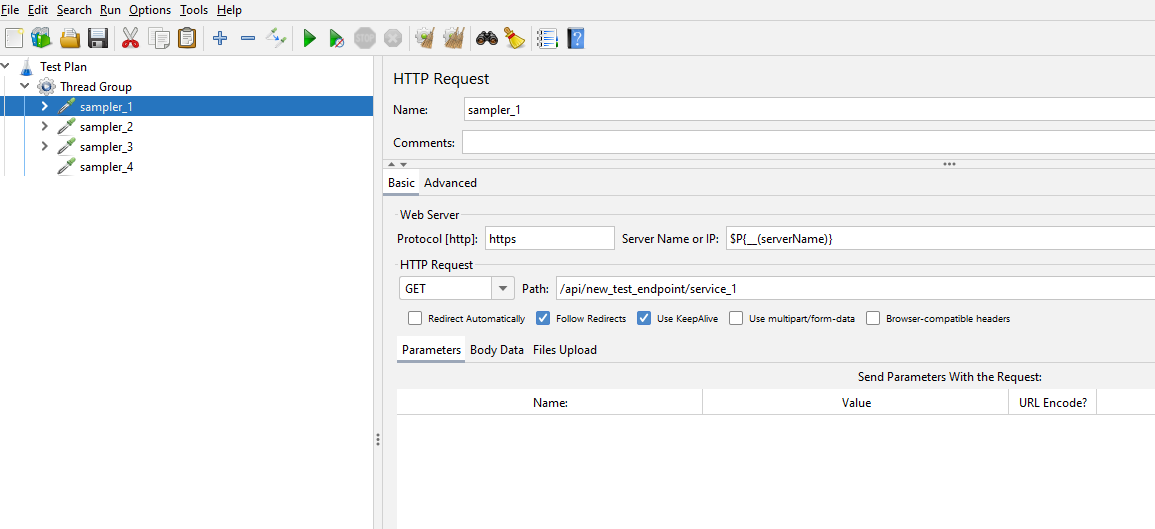
We can see our two changes we have made.
Making multiple updates
If you had one test to update you may feel that doing this manually would probably be the most effective way of doing this. But if you need to update multiple tests then this may be a good option.
We will finish this post by looking at how you can wrap your code in a loop to iterate over more than one file in the script directory that we created and that currently contains our single test. If we duplicate our test in the scripts directory:
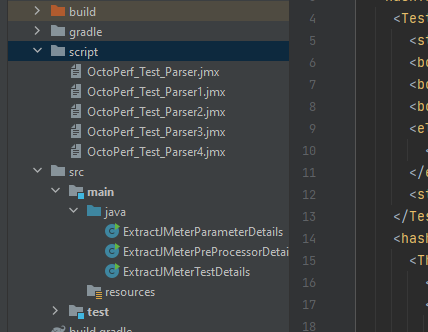
We will now update the first java class we created ExtractJMeterTestDetails to loop through the tests. If we use this code as an addition to our class file:
File dir = new File("script");
File[] directoryListing = dir.listFiles();
if (directoryListing != null) {
    for (File child : directoryListing) {
        System.out.println(child.getName());
    }
}
We see that this will iterate over the files in the script folder. If we execute our parser:

We see that we have listed the files in the script folder, if you place this around the code we have already written to parse the XML it will iterate over them.
Conclusion
Hopefully we have shown you how you could make multiple updates to you JMeter performance tests should you have many static values that need updating. Once you know how to manipulate your JMeter tests programmatically you may find other uses for the techniques we have looked at in this blog post.
