D3.js getting started: a first tutorial
D3.js (Data-Driver Documents) is an Open-Source JavaScript library for manipulating DOM elements based on data. D3 makes use of the standards SVG, HTML5, and CSS.
It is good at creating charts, maps, or any other visual representations of data. D3.js allows great control over the final visual result, at the cost of a steep learning curve.
Some concepts must be understood before using this powerful library. That is the exact purpose of this blog post: help you to get started with D3 code samples and animated graphics.
Installation
Installing D3.js is as simple as including the following script in your HTML page:
<script src="https://d3js.org/d3.v5.min.js"></script>
It gives you access to the d3 object globally in your JavaScript code.
Also the source code, various releases (this article uses the version 5.0) and documentations are available on github.com/d3.
How to use D3.js selectors
The first and most common concept is Selectors. Similar to the ones of JQuery and AngularJs, it's based on the W3C selectors API.
D3 has two selection methods: select to select one DOM element and selectAll to select many.
D3's functional style allows to chain selects. For example, you can call the following code to select all children div of the element whose id is
container.
d3.select("#container").selectAll("div")
The most simple selectors are:
d3.select("tag")where tag is the DOM element tag name like body or div,d3.select("#id")where id is the id of the element,d3.select(".class")where class is a CSS class of the element.
But you can do more advanced selections.
Select simple example
The following sample code selects the #select-div element bellow and sets its background color to blue. Click on the Try it button to check it out.
</div>
d3.select("#select-div").style("background-color", "#039BE5");
D3's functional style also allows to chain updates. For example, you can edit multiple style attributes by using the syntax
d3.select("body").style("key1", "value1").style("key2", "value2").
Select all dynamic properties example
This code sample changes the background color of all DIV elements with the css class select-all-div. Instead of a static value, it calls a function to compute a dynamic one:
d3.selectAll(".select-all-div")
    .style("background-color", function (d, i) {
        return "hsl(" + Math.random() * 360 + "," + 10 * (i + 1) + "%,50%)";
    });
The parameters for this function are:
dthe data. You can feed data to your selection. Take a look at the data binding chapter to know more.ithe index, starting from zero.
The complete code for these samples is available here.
The Enter / Update / Exit concept
How to use Data binding
D3.js allows you to bind data to your selections using the data function and dynamic values.
For the following example we want to update .item DIVs contained in a parent .selection DIV:
<div class="selection">
    <div class="item">1</div>
    <div class="item">2</div>
    <div class="item">3</div>
</div>
We want to set the color of each item using pre-defined values: our data. The syntax is pretty simple:
d3.select(".selection")
    .selectAll(".item")
    .data(["#039BE5", "#00897B", "#00ACC1"])
    .style("background-color", function (d) {
        return d;
    });
D3 loops over the data values and feeds it to the style() update method. The parameter d is the current data value.
Try it by yourself:
The complete code for these samples is available here.
The selection d3.select(".selection").selectAll(".item") contains exactly 3 DIV elements, and our data 3 values. What happens if we have more data than selected elements?
Adding DOM elements to match extra data
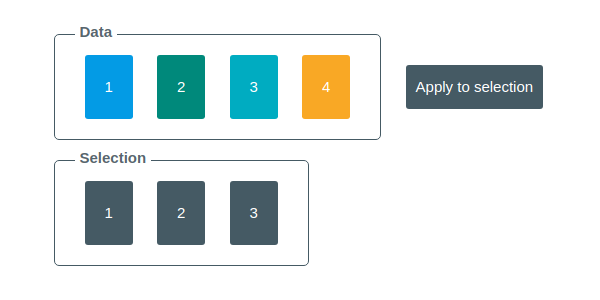
Let's find out what happens if we have more data than selected items using a live example (Click on "Apply to selection").
The answer is that our extra data is simply ignored.
To create a new DOM element we must use the enter() method that handles data entering the selection.
First let's save our selection and data into a div variable:
var div = d3.select(".selection")
    .selectAll(".item")
    .data(data);
Then let's use the enter() method followed by append() to create a new DIV for each extra data. Then set its class to item using the classed() method and update its text().
Finally we can update every created item background color with style();
 div.enter()
    .append("div")
    .classed("item", true)
    .text(function (d, i) {
        return i + 1;
    })
    .transition()
    .duration(500)
    .style("background-color", function (d) {
        return d;
    });
Don't forget to also update the existing DIVs background color.
div.transition()
    .duration(500)
    .style("background-color", function (d) {
        return d;
    });
Try it using the live sample (a new colored div is created this time):
The complete code for this sample is available here.
You can also use the
enter()method without using a temporary variable:d3.select("#enter") .select(".selection") .selectAll(".item") .data(data) .style("background-color", function (d) { return d; }) .enter() .append("div") .classed("item", true) .text(function (d, i) { return i; }) .style("background-color", function (d) { return d; });But this approach makes your code a bit more complex and harder to read.
What happens if on the contrary, there is less data than selected item?
Removing DOM elements to match missing data
Let's find out what happens if we have less data than selected items using a live example:
This time the extra selection is ignored.
To remove extra DOM element we must use the exit() method that handles data exiting the selection.
First let's save our selection and data into a div variable:
var div = d3.select(".selection")
    .selectAll(".item")
    .data(data);
Then let's use the exit() method followed by remove() to delete extra DIVs.
div.exit().remove();
Once again don't forget to update the existing DIVs background color.
div.transition()
    .duration(500)
    .style("background-color", function (d) {
        return d;
    });
Try it using the live sample (the last div is removed this time):
The complete code for this sample is available here.
Conclusion
I hope you found this tutorial interesting and useful. If you need more information about D3.js I can suggest you a few books:
