Install OctoPerf in your company
Article Summary
Installing OctoPerf on-premise has become straightforward and flexible, even in highly constrained enterprise environments.
The platform runs entirely on containers and supports Docker, Kubernetes, and Rancher deployments.
SSO integration, fine-grained administration, and workspace isolation make it compatible with strict security policies.
Load generators can be managed on-premise or provisioned dynamically via cloud providers.
The setup scales from small teams to large organizations while keeping full control over data and infrastructure.
Table of Contents
Introduction
We have come a long way since the original release of the OctoPerf On-Premise Infra 30 months ago. We have added so many features since then that it felt important to regroup them in this blog post to highlight how easy it has become to install and manage your own OctoPerf server.
I will refer to our documentation a lot because all of these features are detailed there. But documentation can sometimes make the decision process more difficult just because of the sheer amount of information it gives. That's why the purpose of this post is to follow a simple use case and highlight all the possibilities on each step of the way.
Installation
Prerequisites
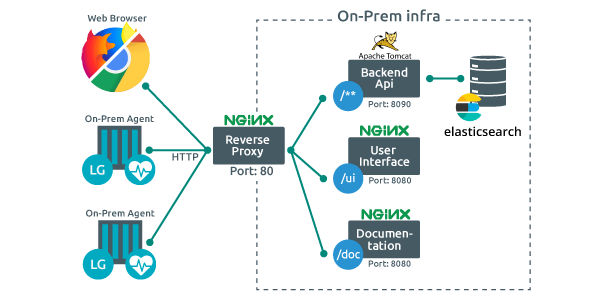
First we should look at the architecture diagram of the OctoPerf On-Premise Infra:

Every block in this diagram (except Web browser) is a docker container. Because of this, the main prerequisite is having a docker CE compatible machine. All of them can be installed on the same physical machine.
Another consequence of this is the installation procedure will require an access to a docker registry that provides the docker images. The default registry is docker hub but it is public and requires an internet access. You might want to either:
- Install your own registry and configure OctoPerf to point to it.
- Follow our offline installation guide.
Installation
OctoPerf On-Premise Infra can be installed using various methods, including:
- docker compose and with our standard installation guide,
- Kubernetes with our OctoPerf Helm Chart,
- And Rancher to abstract and manage the kubernetes cluster.
Single Sign-On (SSO)
To provide seamless integration with your company's account management, OctoPerf On-Premise Infra supports SSO authentication. In particular, to comply with security policies where you want to revoke user accounts quickly.
That's why you can integrate OctoPerf into your company's single sign on system using:
- LDAP: usually useful when your company login is based on Active Directory,
- Or Oauth 2.0 / OpenID Connect: new authentication standard based on token exchange.
Both can be easily configured here.
It is important to note that switching your OctoPerf server to SSO means you will no longer be able to login through login/password anymore. Make sure to backup your previous work or you will have to use an administrator account to transfer workspaces and providers to the new accounts.
Admin user
After the OctoPef On-Premise Infra is running, a good first step is to configure the default server admin account. Then, just create an account with this e-mail address and when you login the upper right menu should look like:
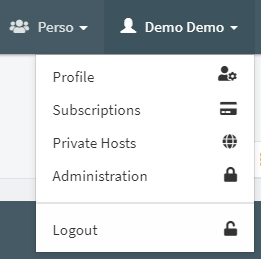
We'll have a look at all you can do with this menu later in this tutorial. For now we just want to make sure it will be available when we need it later.
Providers and Agents
Now that you have installed and configured the OctoPerf On-Premise Infra, we will look into what you can do to install load generators or as we call them On-Premise Agents. But first we must create a provider. Providers are groups of similar machines on which you will install your On-Premise agents. Each provider can have its own settings in terms of how many concurrent users can be placed per host:
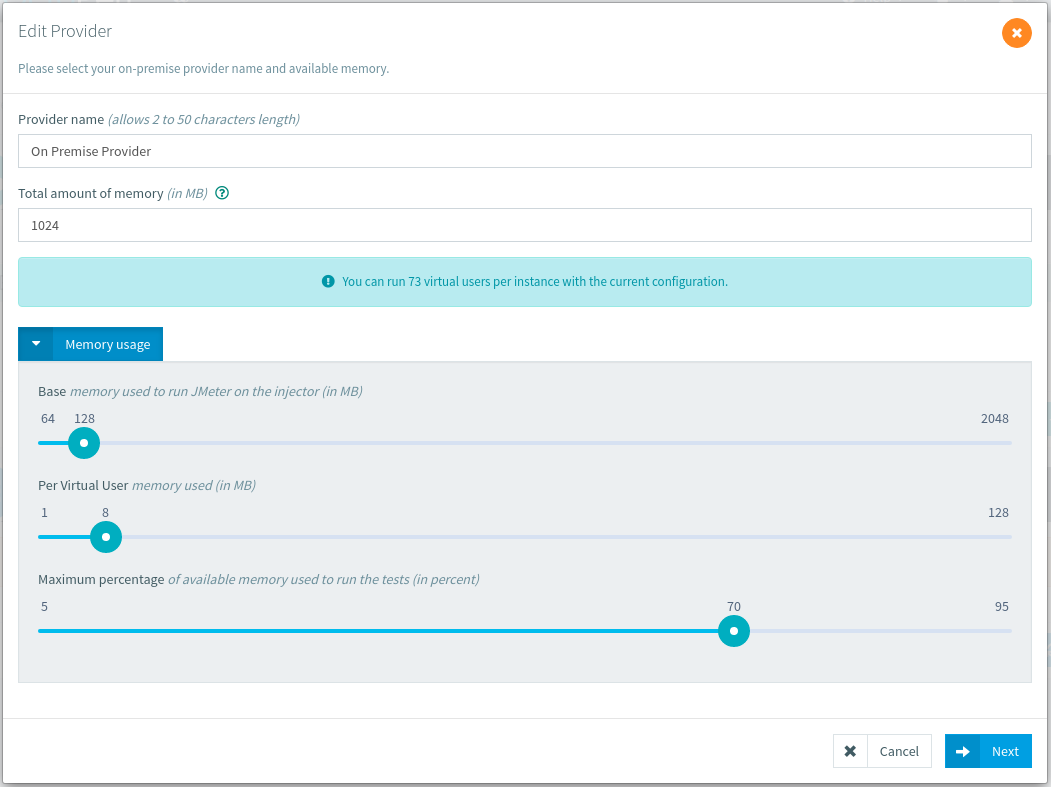
You can create as many providers as you want, for example to deal with different types of machines. Or to provision more or less concurrent users per machine. Note that you can also create regions inside a provider, this way you can attach On-Premise agents to different regions inside the same provider to differentiate them during your tests. Regions have coordinates that we use for display on the runtime screen:
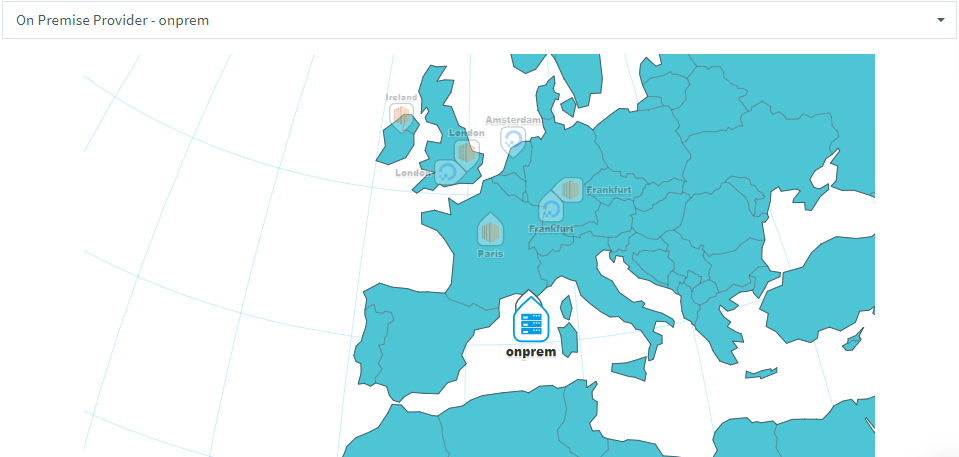
There are different types of providers depending if you wish to install your own load generation agents or use our AWS or Azure integration.
On-Premise Agents
On-Premise agents refer to load generators you install on your own hardware using the command line provided by OctoPerf. Agents can run on both Virtual Machines as well as bare-metal servers.
This command line contains a unique AGENT_TOKEN parameter that will link it to the provider where it was created. This command line is valid to install on any number of hosts, but you might want to change the --name for an easier maintenance.
You can automate the deployment on your side for example with Ansible scripts but contrary to AWS, DO & Azure providers we do not do it for you.
Cloud: AWS, DigitalOcean and Azure
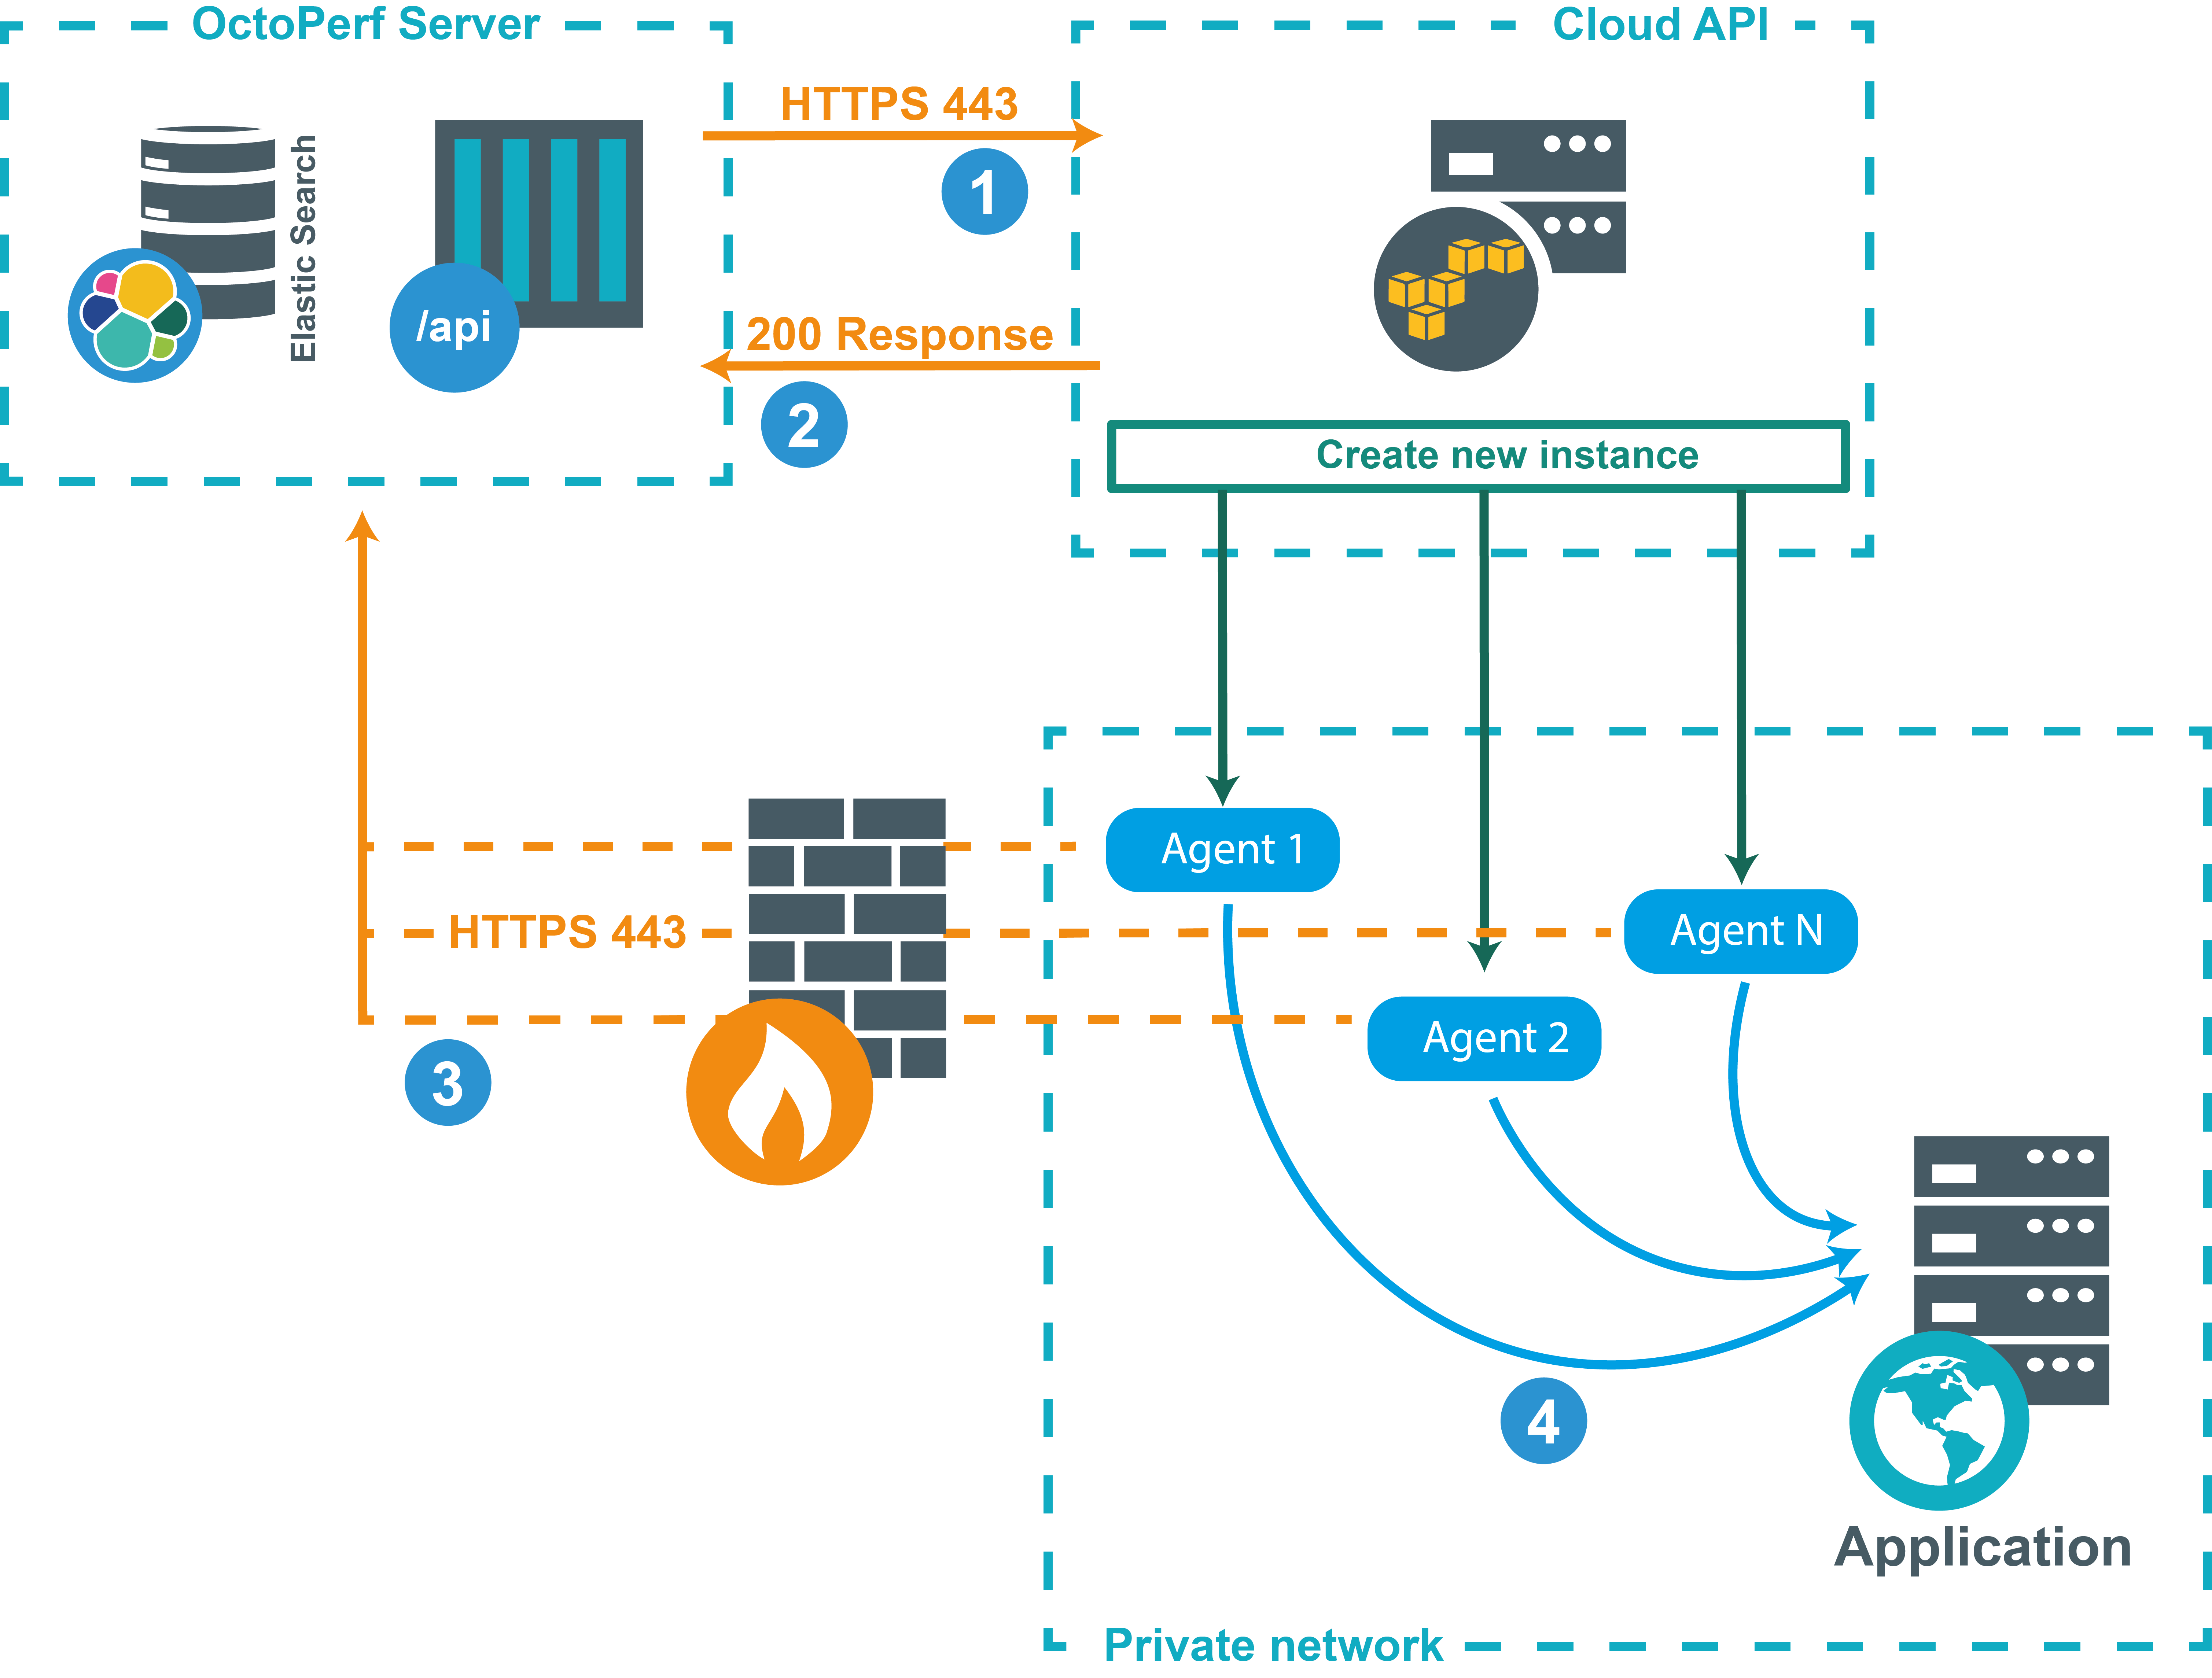
If you do not want to manage the load generators yourself, you can use our integrations with third party cloud platforms:
Each one of these will have different prerequisites but the principle is to use your own account with these services to start and stop load generators on the fly. That might be cost-efficient compared to maintaining permanent load generators. you can also benefit from large on-demand number of machines when required.
Sharing Providers
Once you have configured your provider you will notice that it is attached to the workspace in which you created it.
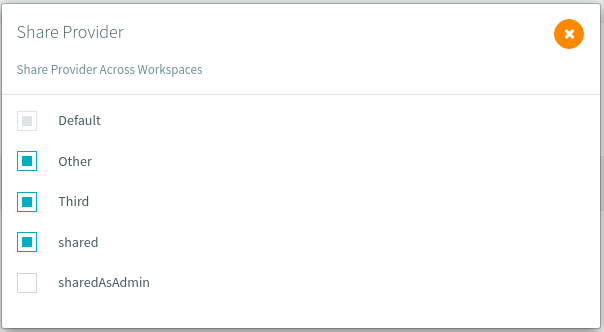
To share it with other workspaces, you can use the Share provider button.
Workspaces
We have just mentioned workspaces in the previous section. These allow you to create groups of projects to separate work from different teams. That way you can have several users working in different teams in total isolation. And also have several users working on the same projects by sharing access to the same workspaces:
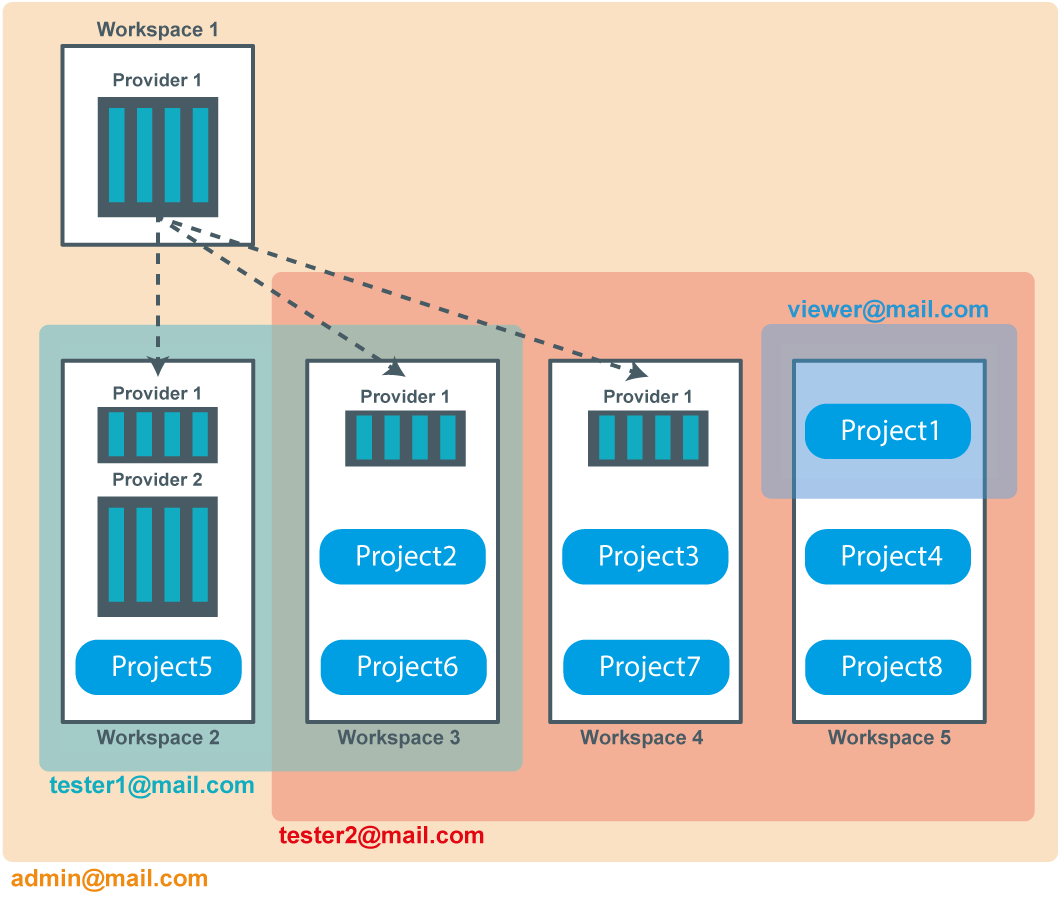
In this example we can see on top a separate workspace only accessible to the administrator. That way only he can edit/configure the provider installed in this workspace. It is then shared with other workspaces so that they can use ot for their tests.
Other workspaces are accessible by various users, one of the users only has access to one project, probably read-only. That way he can access test reports on his own but not edit the scripts or scenarios.
Add users
Only the workspace admin (by default its creator) or the server admin can give access to other accounts.
To add a member you need to provide an existing login in the Add member box at the bottom:
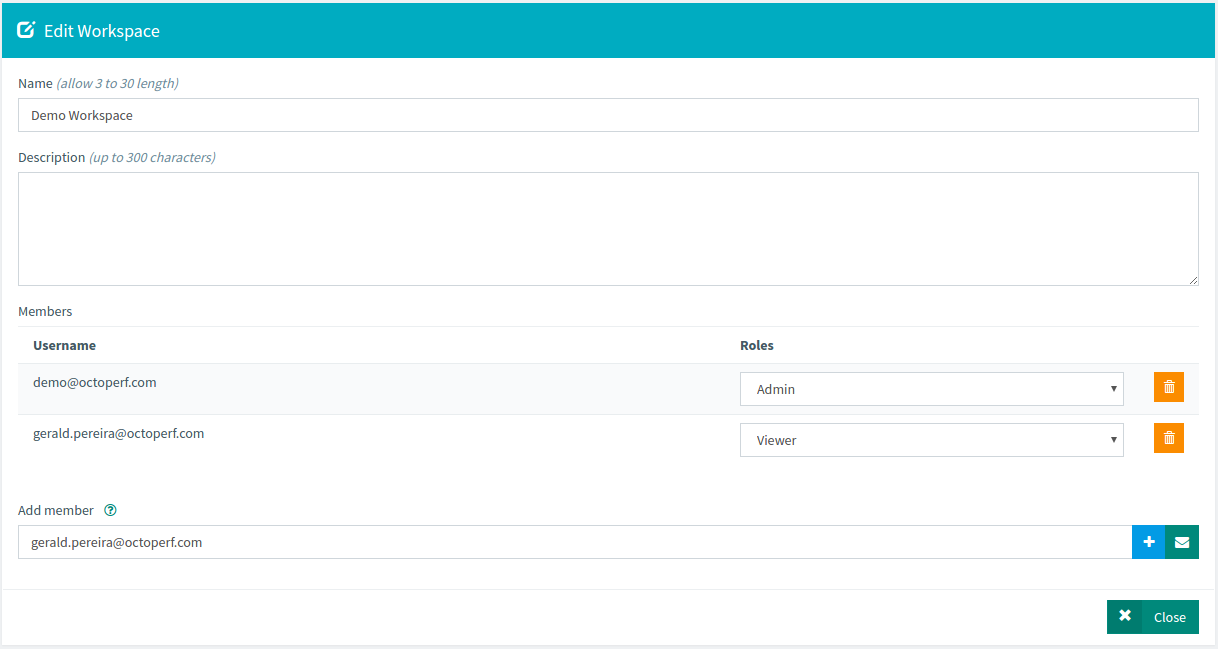
Note that when SSO is enabled the user must login once before you can add him to any workspace. His login is only stored in OctoPerf after this first login.
Add/remove workspace
Workspaces can be created by anyone simply by clicking the big plus button:
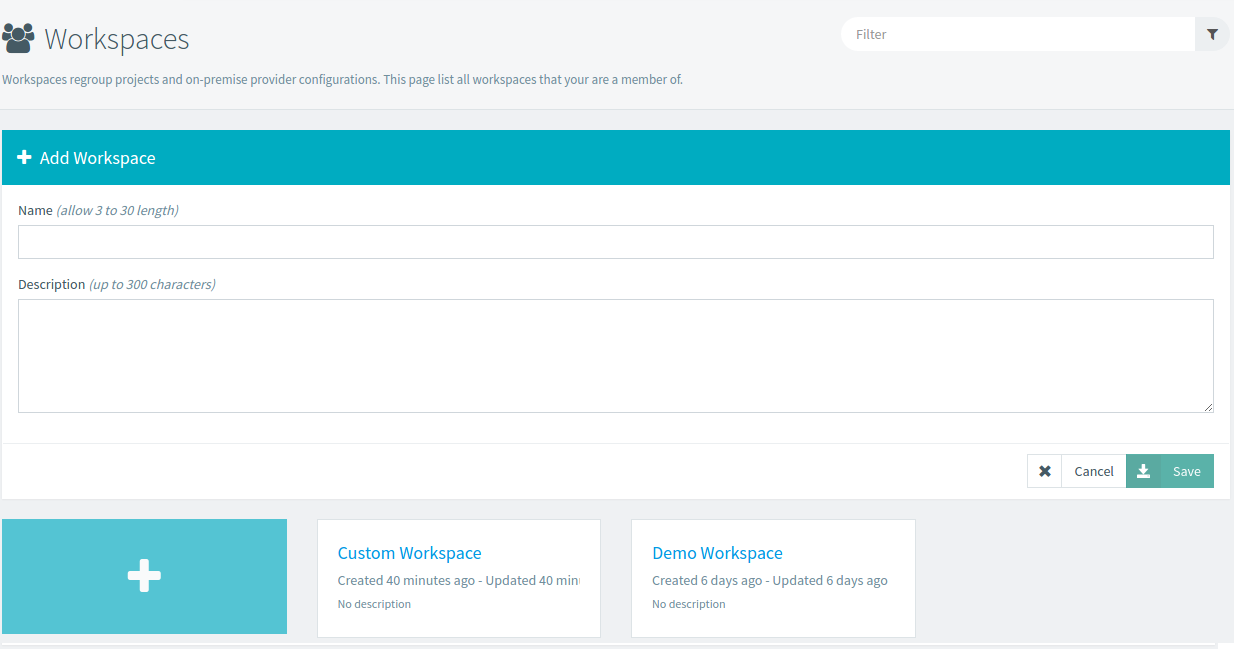
Removing a workspace will permanently remove all projects and providers from your database. To avoid any mistake only the server admin can remove a workspace.
Administration
The administration console offers many way to manage all the users/workspaces on your OctoPerf server.
Users
For every user registered to your OctoPerf server, the user management tab of this console allows you to:
- Disable,
- Remove,
- Promote as server admin,
- Login as.
This gives the admin, complete control over everything going on inside the OctoPerf server:

Workspaces
Since every user can create its own private workspace it is sometimes difficult to know what's going on. The workspace management tab is there to list them all:

It allows the administrator to remove a workspace, we strongly recommend renaming the workspace with something unique before that. Otherwise you may end up removing an otherwise important workspace.
From there you can also connect to the workspace admin page and manage access rights, that is especially usefull when the last workspace admin has left.
Agents
Another important topic for the administrator is to have a centralized view of all the agents running on the platform. From this screen you can see the list of cloud or local agents running but also how many active containers they have at the moment and their logs:
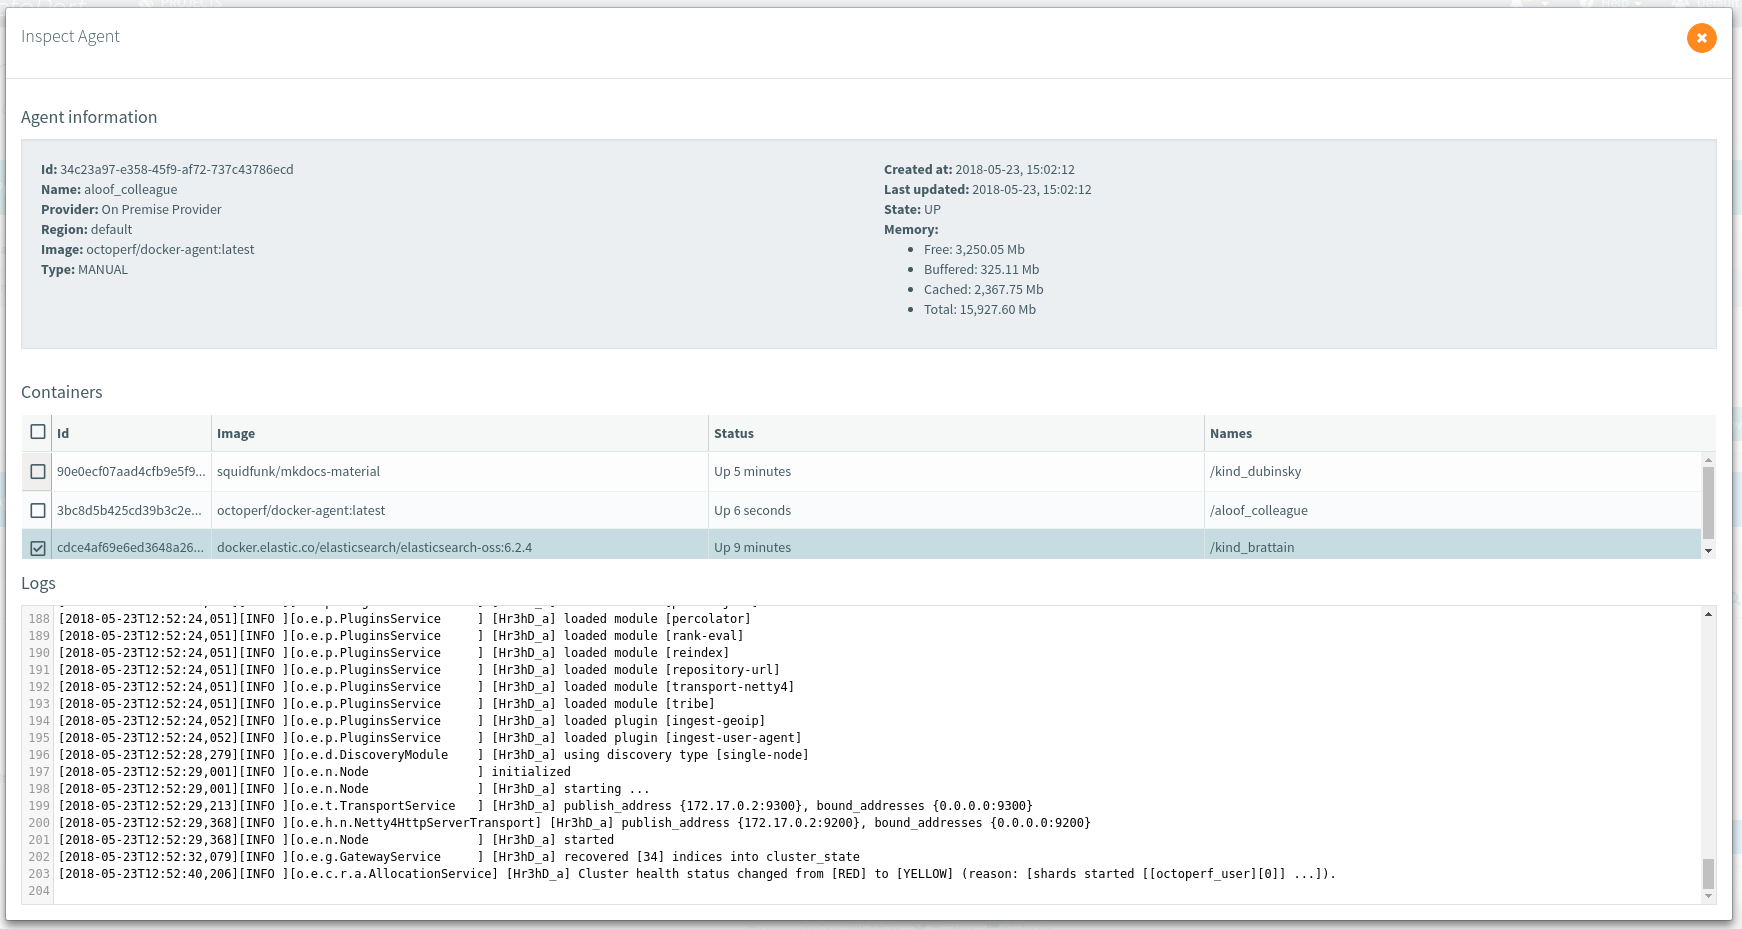
This is especially usefull to keep an eye on the platform usage, see if there's a resource shortage on one of the providers and why.
Conclusion
There is a lot more you can achieve with our On-Premise Infra that wouldn't fit in this guide. Drop us a message in the chat in case you have any question, it will help us update this post with the most relevant topics. And note that you can evaluate it for free, because every On-Premise Infra comes with a free, permanent 50 user license.
