
How to Record a Scenario with JMeter
So you started designing a scenario using JMeter manually. After working a while on this grueling task, you start wondering: Isn't there a way to record browser interactions with JMeter?
The short answer is yes! Jmeter's HTTP(s) Test Script Recorder is exactly designed to record test scenarios.
This tutorial teaches you:
- What a Proxy is and how the recorder works,
- How to intercept and record HTTP Requests automatically while using your web browser,
- How to record SSL-secured (
httpsrequests), - How to configure Proxy Settings with Google Chrome and Firefox,
- And the most important part: recording the script!
You'll see there are a few caveats but everything is well explained.
We assume you already:
- Have JMeter installed (See for Mac Setup and Windows Setup),
- And know How to use JMeter.
I know how impatient you are, so let's start now!
Recorder Setup
How a Proxy works

Before we configure JMeter, let me briefly explain how the recording process works. A Proxy is a component which inserts between you and the remote server. In some way, it's similar to a Man-In-The-Middle Attack, except you're spying on yourself!
As anything between the remote server and you goes through the Proxy, when JMeter acts like a Proxy, it can record all your browser interactions (given it's http or https).
How can JMeter act like a Proxy? By using Jmeter's HTTP(s) Test Script Recorder.
JMeter Recorder Template
The easiest way to get started right away is to use the Recorder Template:
- Launch JMeter,
- Click on
Files > Templates..., - Select
Recorderfrom Select Template dropdown, - Then click on
Create.

Once you click on Create, JMeter creates a bunch of elements required to properly record http and https traffic. Let's examine the elements being created.

Your JMX project should now contain the following elements.
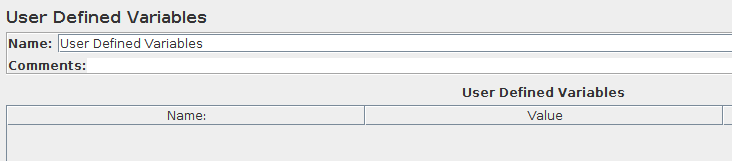
- User Defined Variables: lets you define an initial set of variables, just as in the Test Plan,
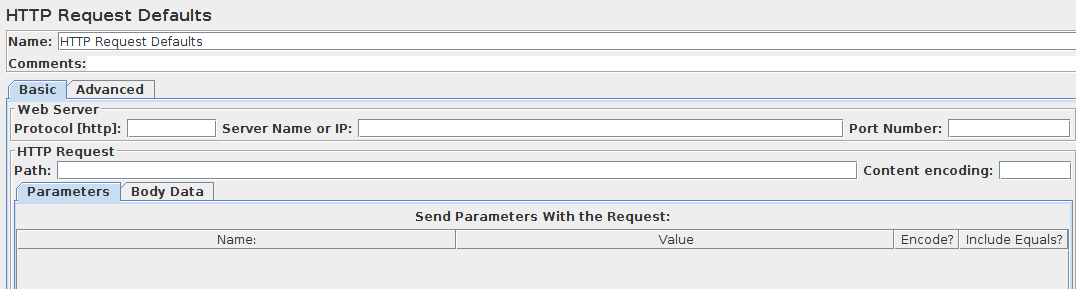
- HTTP Request Defaults: lets you set default values that your HTTP Request controllers use,
- HTTP Cookies Manager: stores and sends cookies just like a web browser,
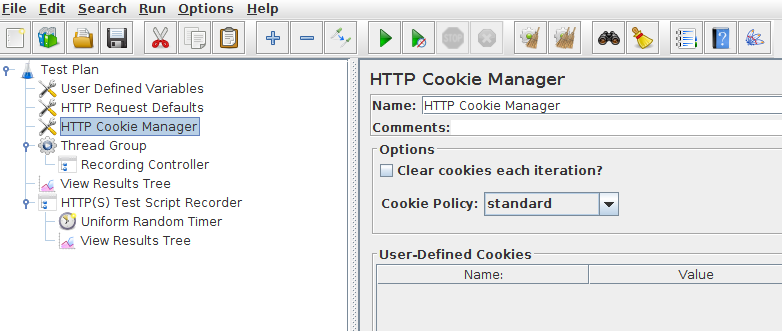
- Thread Group with a Recording Controller inside: it will contain the request being recorded by JMeter's proxy,
- And finally the HTTP(S) Test Script Recorder: controls JMeter's Proxy settings.
A few View Results Tree are located here and there for debugging purpose.
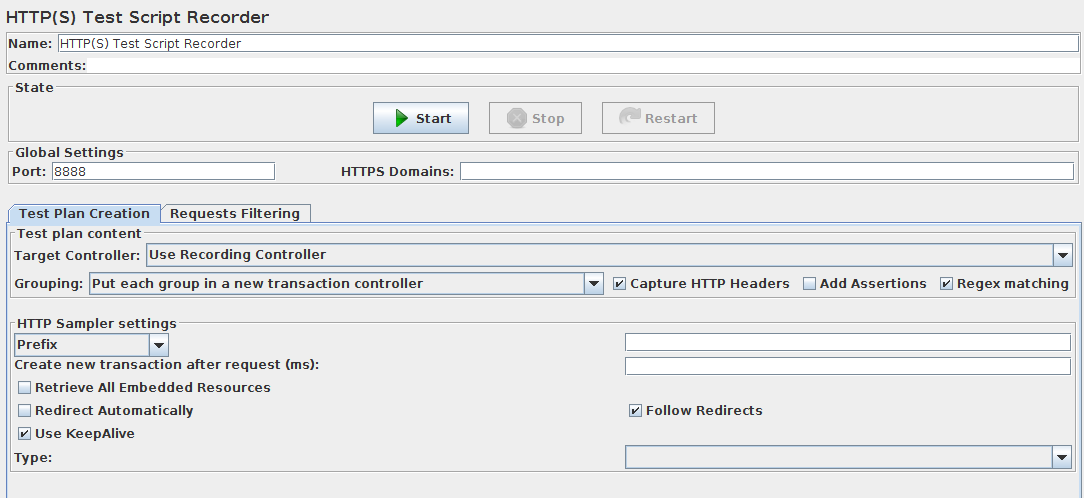
Test Script Recorder Settings
Let's now examine the most interesting Script Recorder Settings:
-
Global Settings
-
Port: HTTP and HTTPS proxy port. The proxy will be running on this TCP port, listening for http requests,
-
HTTPS Domains: List of domain (or host) names for HTTPS. Use this to pre-generate certificates for all servers you wish to record. Example:
httpbin.org, -
Test Plan Content:
-
Target Controller: by default, everything is recorded within
Recording Controller. But you can change it to whatever you want (like theThread Groupdirectly), - Grouping: groups http request by trying to determine which requests belong to the same page,
-
Capture HTTP Headers: creates HTTP Headers Manager as http request child, capturing the headers sent by the web browser. Leave checked as most http headers are important,
-
HTTP Sampler Settings:
-
Use Keep-Alive: enable HTTP Keep-Alive to signal that the connection should be kept open for further messages (by default for HTTP 1.1). Most sites are HTTP 1.1 compliant now,
- Follow Redirects: generates only a single HTTP Request when multiple HTTP redirections are detected, and enables Follow Redirects on it.

In addition to general settings, the recorder offers the ability to filter requests. How does it work? Based on inclusion and exclusion patterns, the recorder chooses if a request must be stored during the record or not.
What are filters for? Mostly for filtering out resources like images, CSS Stylesheets and/or Javascript files. But, that's not mandatory. In fact, it may be less realistic to filter those resources since they are part of the application anyway.
It's time to record http requests using JMeter's Proxy!
HTTPS Setup
Recording HTTPS websites requires a bit more work than plain HTTP websites. Let's see why.
Let's start JMeter's Proxy Recorder:
- Select
HTTP(s) Test Script Recorderwithin the tree on the left, - Click on
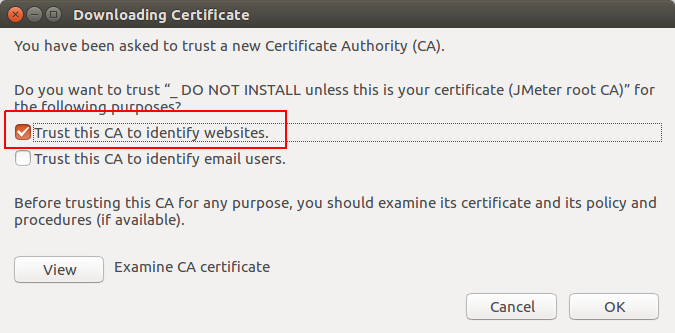
Startbutton: a dialog should show up asking to install CA Root Certificate. This certificate must be installed within the web browser to support recording HTTPs traffic.

It may look complex at first glance, but don't worry. Let me explain why you see this.
Root Certificate Authority
TLS/SSL (The S in HTTPS) guarantees that there are no spies between you and the server you are contacting (no proxies). Normally, you use an HTTP CONNECT to open up a TCP connection through the proxy. In this case, the proxy will not be able to decrypt the traffic and directly tunnel you to the remote server.
If you want the proxy to decrypt HTTPS Traffic, you need to take the following approach:
- Client starts an
HTTPSsession, - Proxy transparently intercepts the connection and returns a generated (and weak) SSL certificate, signed by a CA (Certificate Authority) that is unconditionally trusted by the client, (we'll see how)
- Proxy starts an
HTTPSsession to target, - Proxy verifies integrity of SSL certificate; failing if the certificate is invalid,
- Finally, Proxy streams content, decrypts it and re-encrypts it with intermediate certificate.
That's known as MITM Attack.

Said otherwise, we need to install and trust JMeter's Root Certificate to allow JMeter's Proxy to decrypt HTTPS traffic. Trust me, there is no risk unless you leak the Root certificate to a malicious third party.

JMeter generates a Root Certificate Authority within the <JMETER_HOME>/bin folder. You should find a file named ApacheJMeterTemporaryRootCA.crt in this folder. Let's see how to install it in common web browsers.
Root CA Validity
By default, JMeter generates a Root CA valid only 7 days. That's annoying since we need to redo the procedures below every week. But, there is a way to hack this.
Open <JMETER_HOME>/bin/jmeter.properties and locate the following lines:
# The default validity for certificates created by JMeter
#proxy.cert.validity=7
For example, to have certificates valid for a year, change it to:
# The default validity for certificates created by JMeter
proxy.cert.validity=365
Remember to:
- Stop JMeter,
- Change the
jmeter.properties, - Delete any existing
<JMETER_HOME> / bin / ApacheJMeterTemporaryRootCA.crt, - And restart JMeter.
That should save you from repeating the browser installation procedures below too often.
Firefox Setup
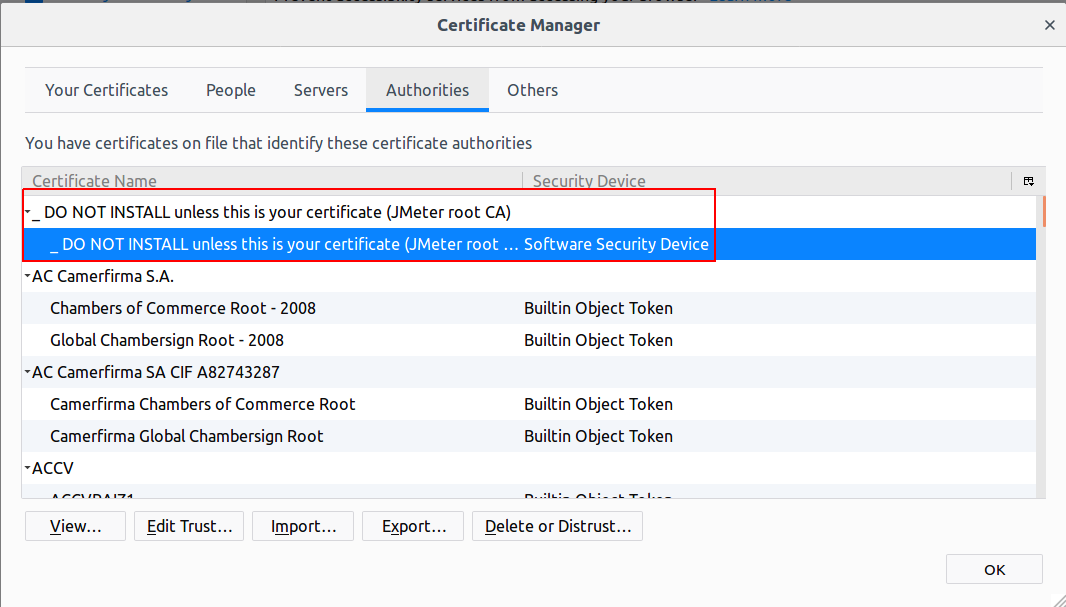
To install JMeter's Trusted Root Certificate Authority in Firefox:
- Open Firefox,

- Open main menu and select
Preferences,
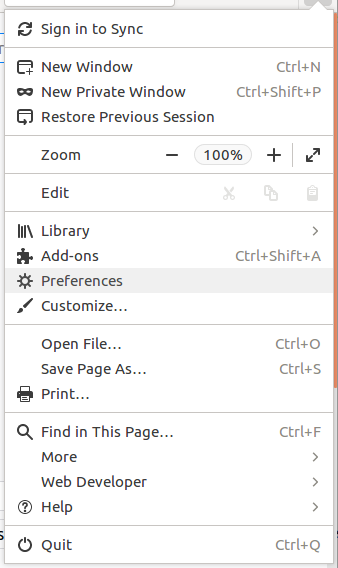
- Select
Privacy & Securitysettings and scroll-down to the bottom of the page,
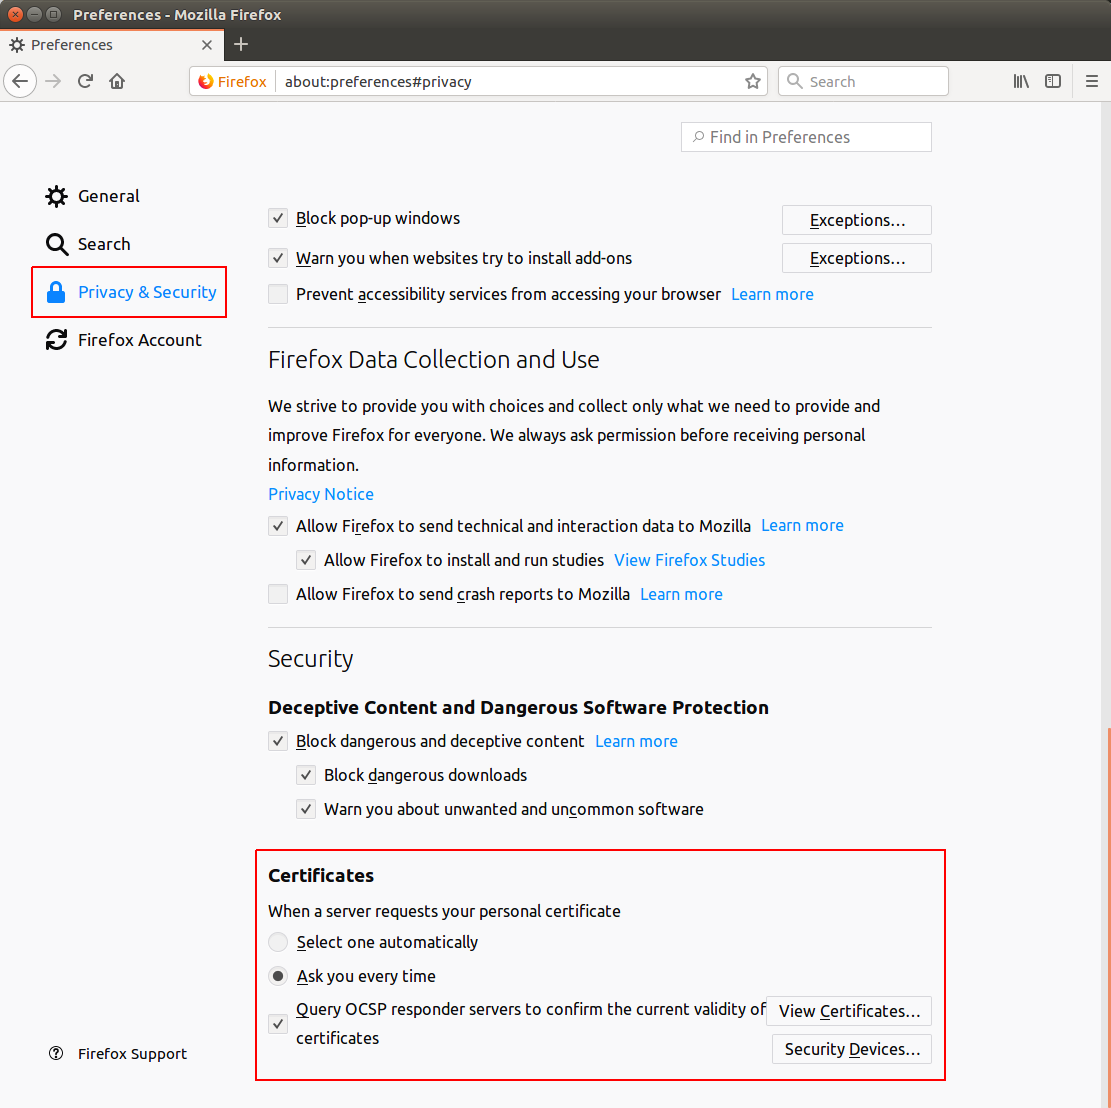
- Click on
View Certificatesthen click onImport,

- Select the
ApacheJMeterTemporaryRootCA.crtlocated in<JMETER_HOME>/binfolder. (<JMETER_HOME>is where JMeter is installed),
- You should see the certificate within the Certificate Manager.
That's it! It should take you only a few minutes to install it.
Google Chrome Setup
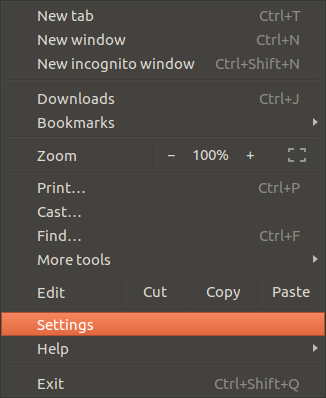
Let's see now how to install JMeter's Trusted Root Certificate Authority in Google Chrome:
- Open Google Chrome,
- Click on main
menu,

- Then click on
Settings,
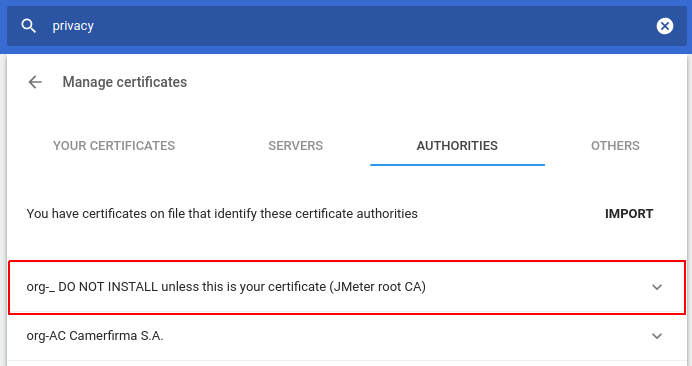
- In the search field, enter
privacyand scroll down toManage Certificates,
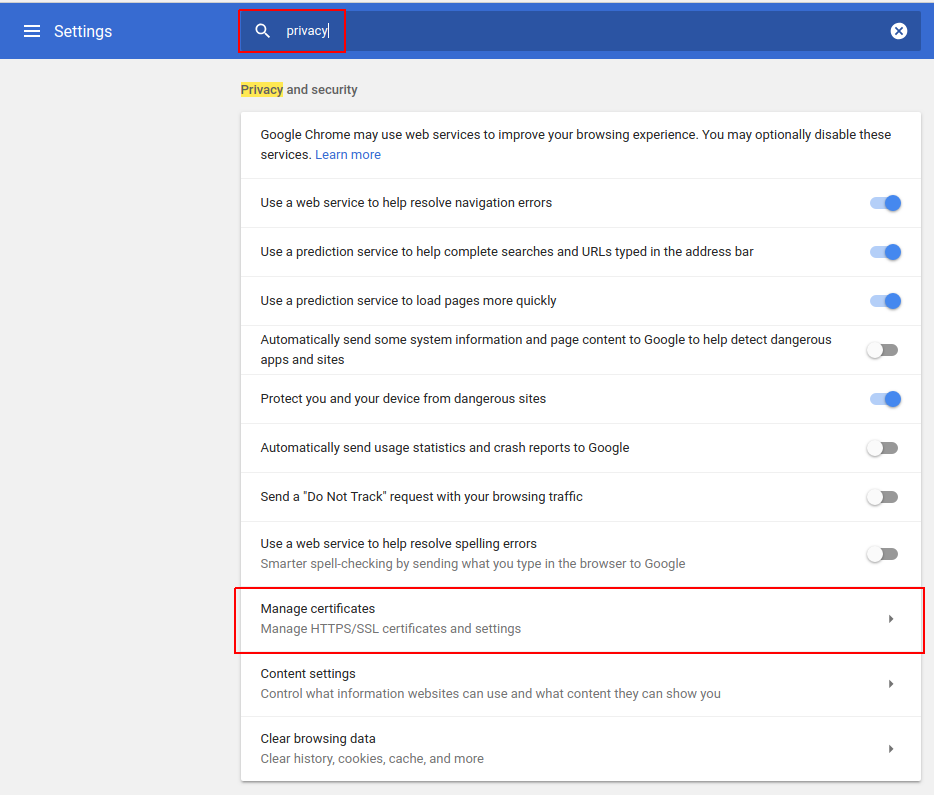
- Click on
Authorities, then click onImport, - Select the
ApacheJMeterTemporaryRootCA.crtlocated in<JMETER_HOME>/binfolder. (<JMETER_HOME>is where JMeter is installed),
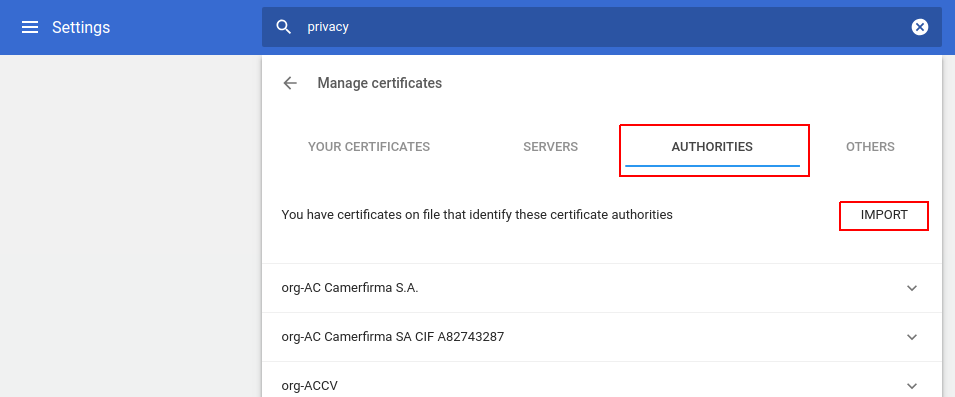
- Check
Trust this certificate for identifying websites,
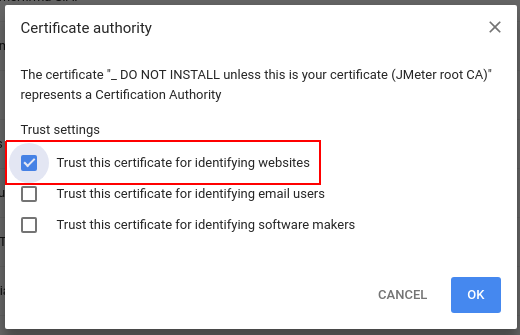
- Finally, you should see JMeter's Root Certificate Authority installed.
That required quite a bit of work to compile! But we have fully working HTTPS Recording in both web browsers.
Now, we're ready to configure those browsers with JMeter's Proxy settings.
Proxy Setup
Firefox Setup
To configure JMeter's Proxy in Firefox:
- Open Firefox,
- Open main menu and select
Preferences,
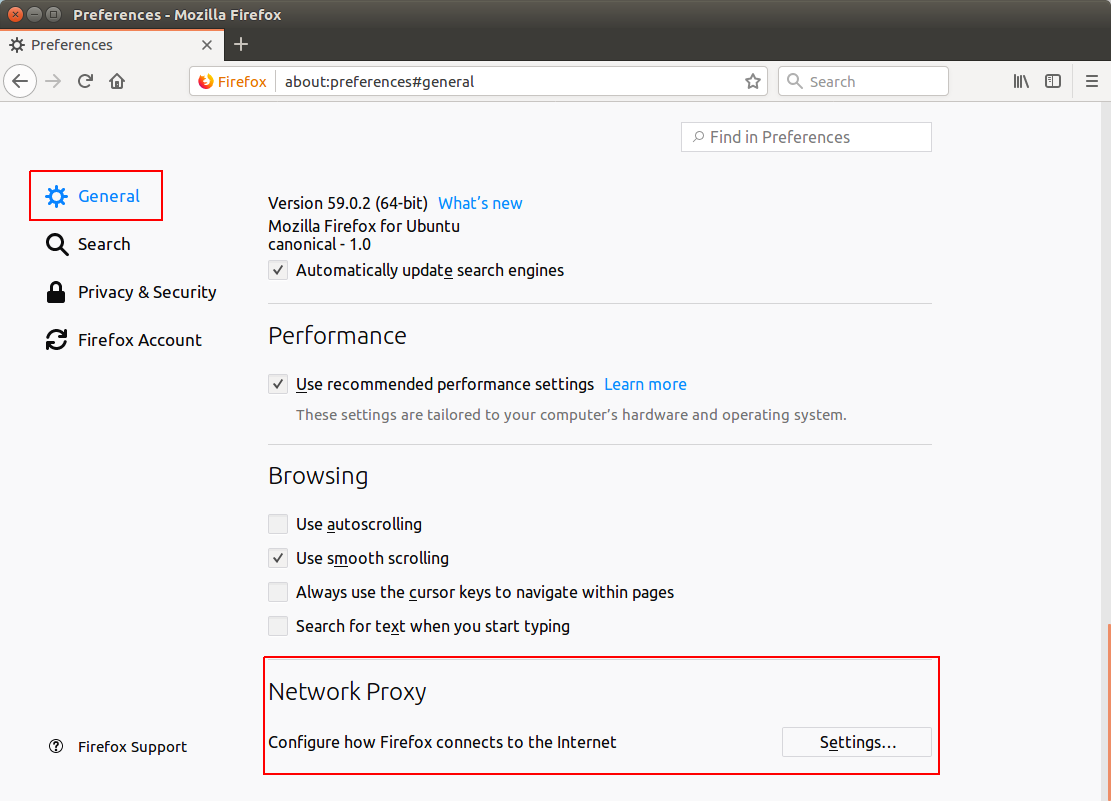
- Select
Generalsection, then scroll-down toNetwork Proxy,
- Finally enter both http and https proxies with hostname
localhostand port8888(default proxy port).
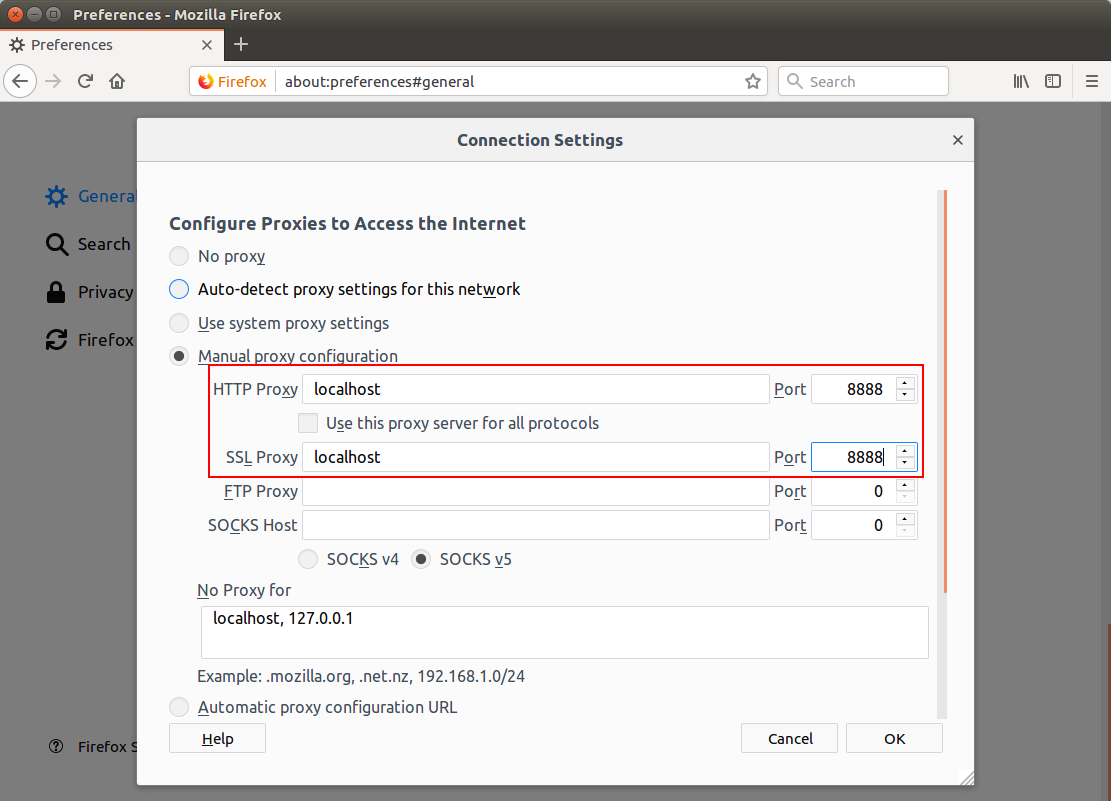
- Click on
OK.
Firefox is now configured with JMeter's proxy settings and ready to record http and https requests.
Google Chrome Setup
To configure JMeter's Proxy in Google Chrome:
- Open Google Chrome,
- Click on main
menu,
- Then click on
Settings,
- Enter
proxyand selectOpen Proxy Settings. It should open system wide proxy settings. (depends on operating system)
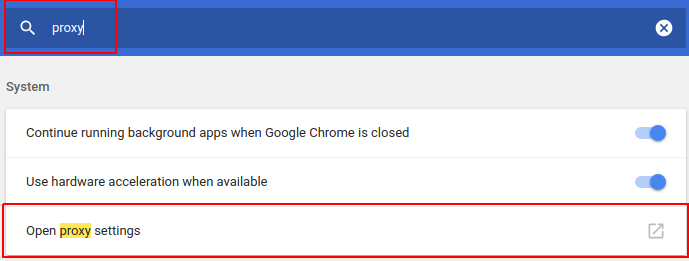
- Finally enter both http and https proxies with hostname
localhostand port8888(default proxy port).
Just beware that setting system wide proxy settings affects all applications sensitive to those settings (not just web browsers).
Recording The Scenario
We're finally reaching the most entertaining part of the tutorial: recording the script! If you're still there (and I won't mind if you're already sleeping), let's try to record HTTPBin.
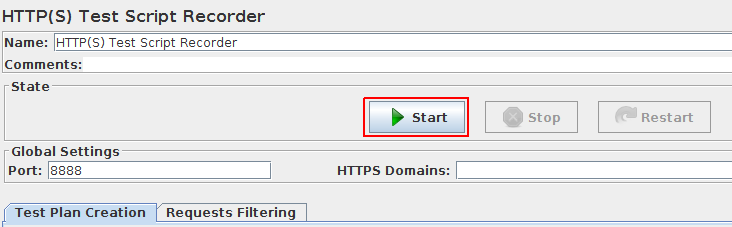
Click on the Start button within the HTTP(S) Test Script Recorder to start JMeter's proxy. Click on OK when the Root CA dialog appears as see previously. In this example, we'll use Firefox because its proxy settings are confined.
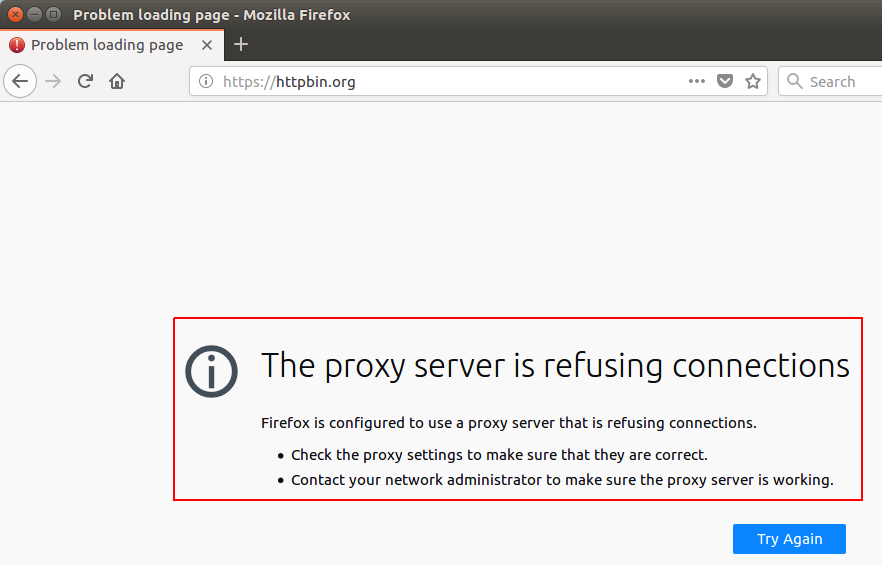
If you ever see the message The proxy is refusing connections within Firefox, please check:
- You have started the HTTP(S) Test Script Recorder by clicking on
Startbutton, - That proxy settings are properly set to the appropriate
hostnameandport.
It usually boils down to the points described above.
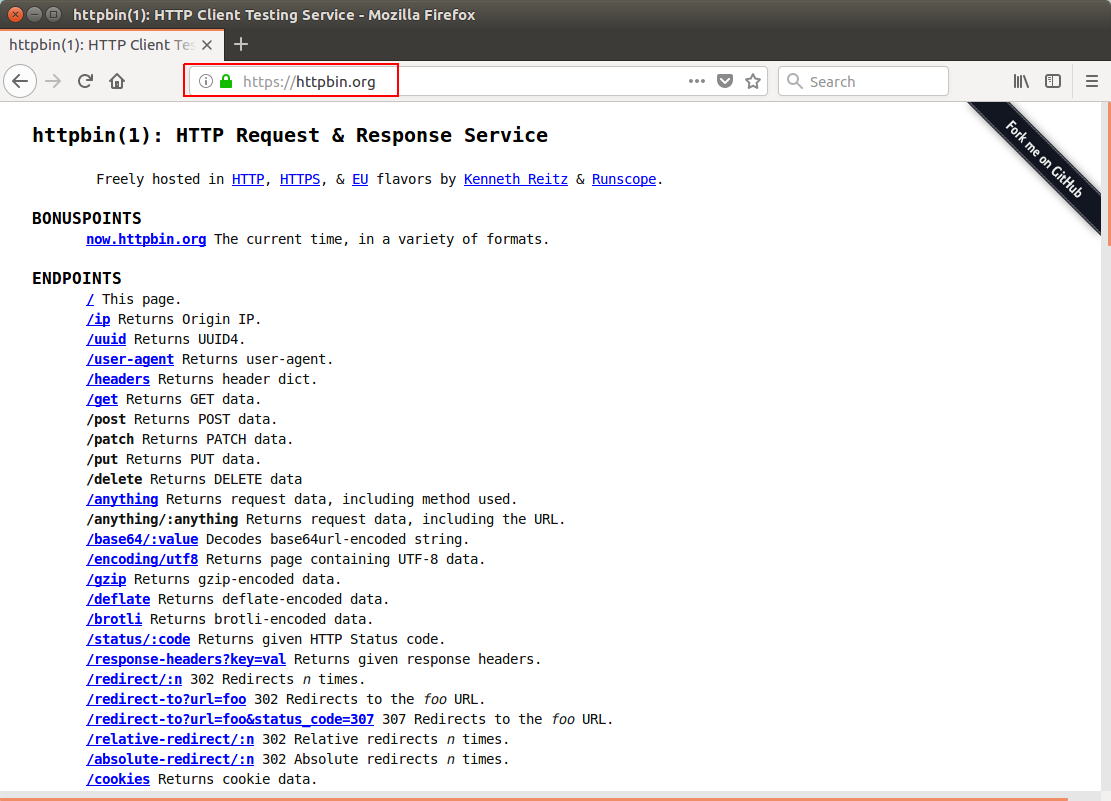
Now browse to https://httpbin.io. You should see requests filling in within the Recording Controller.
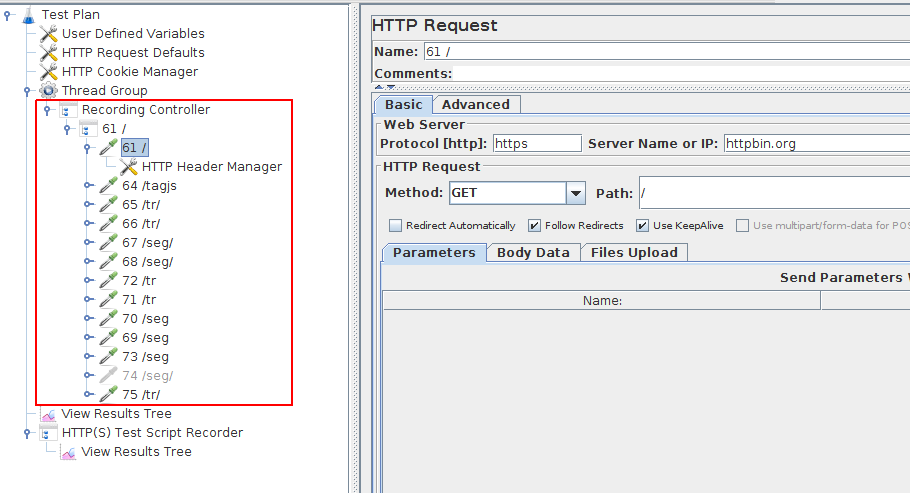
Congratulations! You've just recorded an SSL protected website using JMeter. Once you are finished, go back to JMeter's Recorder, and click on Stop to stop the recording. Remember proxy settings are still set within Firefox. Any attempt to browse while JMeter's proxy is stopped / not running will result in the The proxy is refusing connections error.
Additional resources
In case you find JMeter recording too cumbersome, you may want to use the HAR import feature of OctoPerf to get there. It's available even with a free account and you can export your script back as a JMX anytime.
After recording it's also time to rework the recorded script like explained in our JMeter REST API Testing guide:
- Handling dynamic parameters,
- making the script more realistic and random,
- etc.
You're new to JMeter? No worries. We have cooked a JMeter Tutorial for beginners too.