
Angular Workspaces: Multi-Application Projects
This blog post is a guide for every developer that would like to create an Angular Workspace with several applications and libraries.
It starts by explaining how to generate such project with Angular CLI, then continues with shared resources and unit testing, to finish by giving tips on deployment.
Angular Multi-Application Project Creation Tutorial
First, let's start by defining what is an Angular Workspace:
A workspace is a set of Angular applications and libraries. The
angular.jsonfile at the root level of an Angular workspace provides workspace-wide and project-specific (application or library) configuration defaults for build and development tools.
Hopefully, an Angular workspace and its configuration files can be generated using the Angular CLI. That's the subject of this chapter: how to use the Angular CLI to generate a workspace and its applications and libraries.
Please keep in mind that in Angular terminology, a project can be both an application or a library.
Both are stored in the projects folder of the workspace and configured in the central angular.json file.
Pre-requisites
Angular requires Node.js version 10.9.0 or later (run node -v to check the current version).
You can download NodeJS from nodejs.org or install it using a package manager.
The Angular CLI and generated Angular applications both depend on external libraries that are available as npm packages.
An npm package manager is included with Node.js.
Run npm -v to check the npm version.
I suggest to update npm to the latest available version (6.10.0 at the time of this blog post) with the command npm install -g npm@latest.
Finally, you need Angular Cli. Install it globally with the following command:
npm install -g @angular/cli
Create a Workspace
The ng new <name> command is used to generate workspaces:
ng new kraken --createApplication=false --directory=frontend --interactive=false
- The
--createApplication=falseparameter avoids the creation of an initial application (default value is true). Otherwise, the Angular CLI creates an application in thesrcfolder of the new workspace. It's cleaner to generate all applications in the sub-folderprojectsof the workspace. - The
--interactive=falseparameter is just here to avoid being prompted for useless parameter values such as whether the initial app (which we don't generate) should include a routing module or what CSS preprocessor to use. - The
--directory=frontendparameter is the directory name to create the workspace in. It defaults to the workspace name.
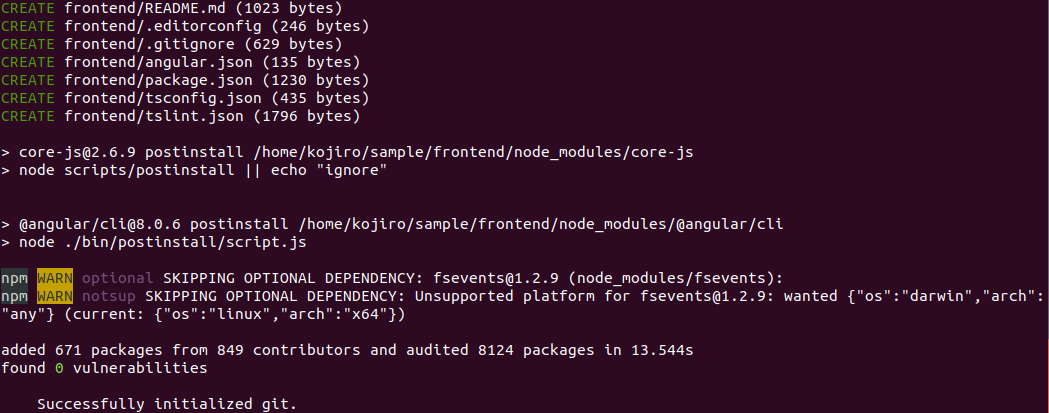
As we can see in the above screenshot, several files are generated by this command in the frontend folder.
The first one is the Angular Workspace configuration file angular.json.
For the moment it only contains information regarding the location of projects (applications and libraries).
It will be much complex once we have generated some.
{
  "$schema": "./node_modules/@angular/cli/lib/config/schema.json",
  "version": 1,
  "newProjectRoot": "projects",
  "projects": {}
}
package.json file lists all the dependencies required by Angular.
As the ng new command also install the npm dependencies, a package-lock.json file is generated as well as a node_modules folder that contains the downloaded dependencies.
The tsconfig.json file specifies TypeScript compiler options (Angular projects are written in TS). And the tslint.json file configures the TypeScript Linter, a tool that analyzes source code to flag programming errors, bugs, stylistic errors, and suspicious constructs.
Finally, a README.md file is also generated.
Read it to get information related to the Angular CLI usage: how to build, serve and test the newly generated application.
Create an Application
The ng generate application <name> command is used to create a new application in the projects sub-folder of the workspace.
- The parameter
--style=scsssets the SCSS preprocessor to use for style files (default is CSS). - The parameter
--routing=truetells Angular CLI to generate a routing NgModule.
Run the following commands to generate two applications, Administration and Gatling:
cd frontend
ng generate application administration --style=scss --routing=true
ng generate application gatling --style=scss --routing=true
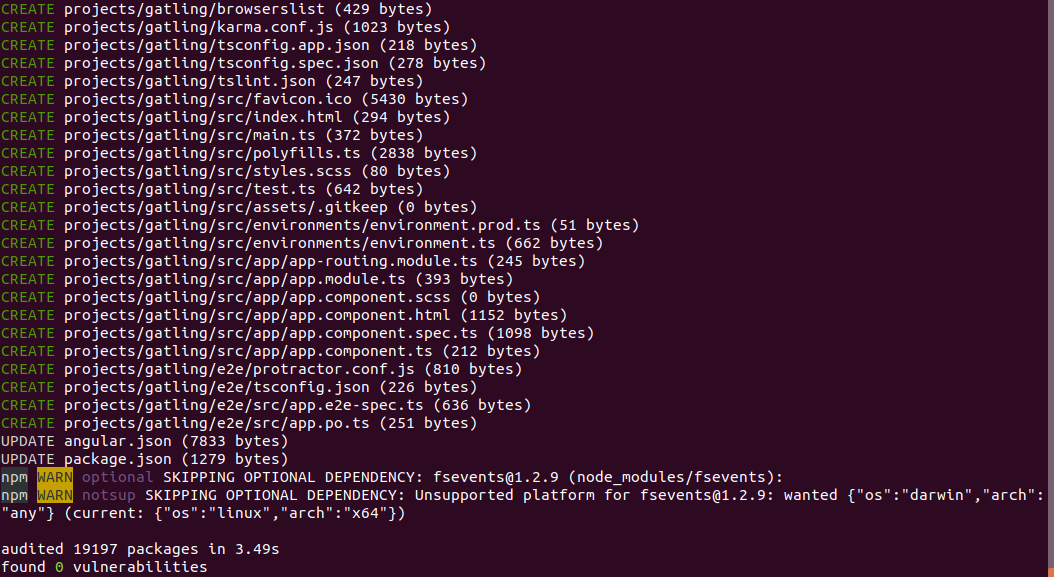
These commands create files for each application in the sub-folders projects/administration and projects/gatling:
- Two
tsconfig.*.tsfiles. They extend the workspace roottsconfig.tsand set specific configuration to compile the application (tsconfig.app.ts) or its unit tests (tsconfig.spec.ts). Read more about TypeScript configuration on Angular documentation. - The
srcfolder, it contains all TypeScript, HTML and CSS sources for your application (More on thesrcfolder structure). - The
karma.conf.jsKarma configuration file used for unit tests. - The
e2efolder for running End-To-End tests with protractor.
It also updates the root angular.json file, adding the two applications:
{
  "$schema": "./node_modules/@angular/cli/lib/config/schema.json",
  "version": 1,
  "newProjectRoot": "projects",
  "projects": {
    "administration": {
      "projectType": "application",
      [...]
    },
    "gatling": {
      "projectType": "application",
      [...]
    }
  },
  "defaultProject": "administration"
}
We will come back later on the configuration specific to each application project as we will have to update them in order to share resources.
Create a Library
The ng generate library <name> command is used to generate libraries.
In the workspace folder (frontend if you followed this tutorial to the letter), run these commands:
shell
ng generate library tools
ng generate library vendors
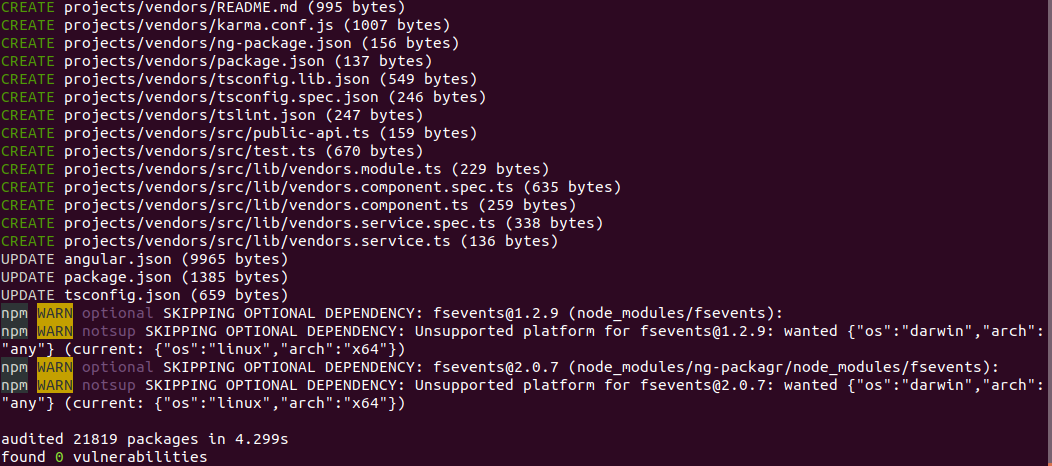
Here again, the angular.json file is updated with the two newly created libraries:
{
  "$schema": "./node_modules/@angular/cli/lib/config/schema.json",
  "version": 1,
  "newProjectRoot": "projects",
  "projects": {
    "administration": {
      [...]
    },
    "gatling": {
      [...]
    },
    "tools": {
      "projectType": "library",
      [...]
      }
    },
    "vendors": {
      "projectType": "library",
      [...]
    }
   },
  "defaultProject": "administration"
}
It also creates files for each library in the projects/tools and projects/vendors.
They are mostly similar to the ones generated for applications.
One thing to note is that you cannot specify the style preprocessor when generating a library.
And there is no configuration related to it in the workspace configuration (angular.json file) for the libraries.
The result is that you must specify the style each time you generate a component in a library, for example with the command ng generate component my-component --style=scss --project=tools.
Create a Shared Service
The idea here is to generate a service inside a library, and use it in an application.
Let's create a dummy service in the tools library:
ng generate service hello-world --project=tools
The syntax is ng generate service <service-name> and the parameter --project is mandatory to specify the library where to generate the service.

This creates a file projects/tools/src/hello-world.service.ts and its unit test (projects/tools/src/hello-world.service.spec.ts).
Update it to create a simple getter:
import {Injectable} from '@angular/core';

@Injectable({
  providedIn: 'root'
})
export class HelloWorldService {
  get message(): string {
    return 'Hello World!';
  }
}
Note: The service is declared as injectable with the
providedIn: 'root'option. That means this service is a singleton. It can be used in any component or service without having to provide it. It is always the same instance, anywhere you use it.Without this option, we could have injected one instance for each component using it with the syntax
@Component({providers: [HelloWorldService]}). We could also do the same on the module level with the syntax@NgModule({providers: [HelloWorldService]}).Read more about dependency injection in Angular documentation.
Update the AppComponent projects/administration/src/app/app.component.ts to use this service:
import {Component} from '@angular/core';
import {HelloWorldService} from 'projects/tools/src/lib/hello-world.service';

@Component({
  selector: 'app-root',
  templateUrl: './app.component.html',
  styleUrls: ['./app.component.scss']
})
export class AppComponent {
  title = 'administration';

  constructor(helloWorld: HelloWorldService) {
    this.title = helloWorld.message;
  }
}
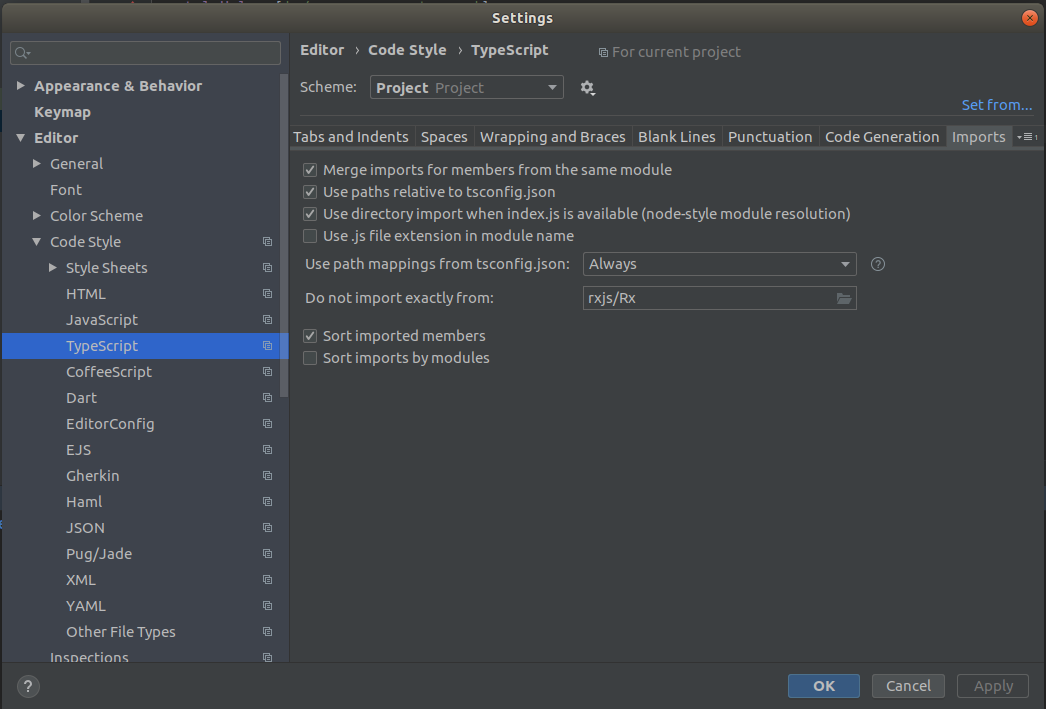
If you are using IntelliJ Idea or Webstorm, the default import for the HelloWorld service is import {HelloWorldService} from '../../../tools/src/lib/hello-world.service';.
That's ugly and hard to maintain if you move files around.
You can open the project settings and select the TypeScript > Imports > 'Use path relative to tsconfig.json' option:
Install Angular Material
Angular Material is a set of components that follows the conventions set by Material Design.
Installing it is done in no time thanks to the Angular CLI. Simply run the following commands to install Angular Material on both applications.
ng add @angular/material
ng add @angular/material --project=gatling
Note: We do not need to specify the
--project=administrationfor the first command as it is the default project in the workspace configuration ("defaultProject": "administration"in theangular.jsonfile).

These commands add the dependency @angular/material in the package.json file and also automatically update various project files,
adding the proper styles, importing the fonts and NgModules:
UPDATE projects/administration/src/main.ts (391 bytes)
UPDATE projects/administration/src/app/app.module.ts (502 bytes)
UPDATE angular.json (10132 bytes)
UPDATE projects/administration/src/index.html (482 bytes)
UPDATE projects/administration/src/styles.scss (181 bytes)
I find it cleaner to regroup external dependencies into a single NgModule.
That's why we previously created a vendors library.
So let's update the VendorsModule file projects/vendors/src/lib/vendors.module.ts to import and export the MatButtonModule,
thus regrouping our external dependencies in a single place:
import {NgModule} from '@angular/core';
import {MatButtonModule} from '@angular/material';

@NgModule({
  imports: [MatButtonModule],
  exports: [MatButtonModule]
})
export class VendorsModule { }
Then, we import our VendorsModule in our AppModule projects/administration/src/app/app.module.ts:
@NgModule({
  [...]
  imports: [
    VendorsModule,
  ],
  [...]
})
export class AppModule { }
Finally, use the mat-raised-button directive in the AppComponent projects/administration/src/app/app.component.html:
<div style="text-align:center">
  <h1>
    Welcome to Angular Workspaces: Multi-Application Projects!
  </h1>
  <div><img width="300" alt="Angular Logo" src="data:image/svg+xml;base64,..."></div>
  <button mat-raised-button color="primary" >Click Me!</button>
</div>
Launch The Applications
To serve an Angular application, simple run the command ng serve --project=administration.
You can then open the web page at http://localhost:4200/:

If you followed every step of this tutorial, you should see the "Welcome to Hello World!!" message as well as the raised Material "Click Me!" button.
You may otherwise download the source code (simply run npm install before launching the application).
If you want to have a look at a more complex application, please head to the Complete Application Sample chapter.
Also note that if you want to launch both administration and gatling applications at the same time, you will see an error message:
Port 4200 is already in use. Use '--port' to specify a different port.
Error: Port 4200 is already in use. Use '--port' to specify a different port.
Either use the --port option or read the How To Serve Multiple Angular Applications With HAProxy chapter to learn how to set the default port used by an application.
Angular Multi-Application Shared Resources
It's always nice to split a big application into several modules and libraries. It eases the maintenance and improves code reusability.
But regarding reusability, sharing CSS styles and assets across component libraries is pretty handy. It might be cleaner to have completely isolated modules, but since all my libraries and applications rely on Angular Material, I do not want to duplicate the import code for each project.
Sharing CSS Across Libraries and Applications
In the previous chapter we imported one of the default Angular Material themes. I wanted to use a custom Angular Material theme with:
- A dark background,
- More colors than the base primary and accent (adding warning, success, danger, and other colors),
- A more dense layout of the components (multi-level density is not available yet).
To create this UI, I had to create several component libraries:
- Resizable split panels,
- Tabs for the console and file trees,
- Code editors,
- And workspaces that combine all of these.
They all use common CSS located at the root of the workspace, in the styles folder. For example, the custom material theme SCSS file initializes Material Design and declares custom colors:
@import '../node_modules/@angular/material/theming';

[...]

$app-primary: mat-palette($mat-blue);
$app-accent: mat-palette($mat-green);
$app-info: mat-palette($mat-light-blue);
$app-success: mat-palette($mat-light-green);
$app-error: mat-palette($mat-deep-orange);
$app-background: mat-palette($mat-gray);

[...]

$mat-theme: (
  [...]
);

@include angular-material-theme($mat-theme);
And the compact Scss file declares custom CSS classes used to change components density:
@import 'app-padding';
@import 'app-font';

// Must also disable the ripple effect
@mixin compact-checkbox($size: 34px) {
  $half: $size / 2;
  .mat-checkbox-inner-container {
    height: $half;
    width: $half;
  }
}

@mixin compact-button($size: 34px) {
  .mat-icon-button {
    width: $size;
    height: $size;
    line-height: $size * 0.9;

    .ng-fa-icon {
      font-size: $size * 0.5;
    }
  }
}
[...]
In order to use these SCSS files in our Administration and Gatling Load Testing applications, we must declare them in Angular's workspace configuration angular.json:
"stylePreprocessorOptions": {
  "includePaths": [
    "styles"
  ]
},
stylePreprocessorOptions must be added into projects > administration / gatling > architect > build > options.
While running unit tests, you may get the following error if some components under test need the common styles:
ERROR in ../icon/src/lib/icon/icon.component.scss
Module build failed (from /home/kojiro/workspaces/kraken/frontend/node_modules/sass-loader/lib/loader.js):

@import 'app-margin';
       ^
      Can't find stylesheet to import.
In this case, simply add the stylePreprocessorOptions to into the section projects > my-project > architect > test > options of the workspace configuration.
Note: I'm used to Bootstrap. Its theme offers more colors than Material with primary, success, error, etc. I like Angular Material but I think having only a primary and an accent colors is not enough for complex applications. If it's not the case for you, you can create component libraries while staying separated from the Angular Material theme used: Theming Your Components Guide.
You might want to limit the usage of common CSS classes in such case.
Sharing Assets Across Libraries and Applications
Along with commons CSS files, you may also want to share assets across your applications and libraries.
For example:
- The application logo,
- Javascript files used by Ace editor,
- etc.
In fact, the Ace theme and mode files are located in the ext folder and copied thanks to the angular.json configuration.
For instance, the Gatling build architect options include the following configuration:
"assets": [
  "projects/gatling/src/favicon.ico",
  "projects/gatling/src/assets",
  {
    "glob": "**/*",
    "input": "assets/",
    "output": "assets/"
  },
  {
    "glob": "**/worker-*.js",
    "input": "node_modules/ace-builds/src-min/",
    "output": "assets/ace/"
  },
],
"glob": "**/*" syntax.
Finally, all Ace workers are copied in assets/ace/.
We also use many other javascript files related to the Ace code editor.
These themes, modes, and snippets must be declared in the scripts section of the build architect options:
"scripts": [
  "node_modules/ace-builds/src-min/mode-xml.js",
  "node_modules/ace-builds/src-min/mode-yaml.js",
  "node_modules/ace-builds/src-min/ext-searchbox.js",
  "node_modules/ace-builds/src-min/ext-language_tools.js",
  "node_modules/ace-builds/src-min/ext-modelist.js",
  "ext/mode-log.js",
  "ext/theme-kraken.js",
  "ext/snippets/scala.js"
]
No matter what you want to achieve with assets and external scripts, I suggest you have a look a this Angular-Cli documentation page: Stories Asset Configuration.
Angular Workspaces and Unit Testing
The Angular CLI allows you to run unit tests on a specific project with the syntax:
ng test --project=<my-project>
- By default it only runs the unit tests continuously, letting you know if they succeed or fail.
Use
fitinstead ofiton a unit test definition to run only this one particular test (You can also usefdescribeon a test suite). - It automatically generates test coverage reports in the folder
/coverage/my-projectwith the options--watch=false --codeCoverage=true.
I wanted to have a single report that regroups all coverage information, as well as speed up test executions by running unit tests in parallel. So I created the following script:
#!/bin/bash
rm -rf coverage
rm -rf coverage-all

for dir in projects/*; do
  if [["$dir" != *-e2e]]
  then
    prefix="projects/";
    project=${dir#$prefix}; #Remove prefix
    echo "$project"
    ng test --watch=false --codeCoverage=true --sourceMap=true --project=$project &
  fi
done

wait  # Wait for all tasks to complete

./node_modules/istanbul/lib/cli.js report --dir ./coverage-all/ html

google-chrome ./coverage-all/index.html &
It runs unit tests with coverage in parallel for each project not ending with -e2e (these are end-to-end test projects).
Then, all reports are aggregated using Istanbul client.
Warning: If you have many projects, this script will run several web browsers at the same time. It may freeze your computer while it is running!
Istanbul needs report in the JSON format in order to aggregate them.
So, update the karma.conf.js files as well.
They are located at the root of every application or library.
Simply add the json report:
coverageIstanbulReporter: {
  dir: require('path').join(__dirname, '../../coverage/analysis'),
  reports: ['html', 'lcovonly', 'json'],
  fixWebpackSourcePaths: true
},
Take a look at Angular documentation about testing if you want to know how to write unit tests.
How To Serve Multiple Angular Applications With HAProxy
The idea is to serve two applications on different ports and base Href; and then to package them as docker images served on the same port but using different base Href.
Serving Angular Apps on Specific Port and Base Href
By default, Angular serves all applications on the same url and port: http://localhost:4200.
To be able to start two applications at the same time while developing, change the port of one of them in the Angular workspace configuration angular.json file.
For example, the Gatling application has a serve architect configured to serve it on port 4222:
"serve": {
  "builder": "@angular-devkit/build-angular:dev-server",
  "options": {
    "browserTarget": "gatling:build",
    "port": 4222
  },
  "configurations": {
    "production": {
      "browserTarget": "gatling:build:production"
    }
  }
},
Then, run the ng serve command with the following parameters:
ng serve --open --project=gatling --baseHref /gatling/
It will open a web browser at the URL http://localhost:4222/gatling thanks to the --baseHref parameter and the angular.json configuration.
Packaging Angular Apps as Docker Images
Angular apps are built thanks to the Angular-Cli ng build command:
ng build gatling --prod --baseHref /gatling/
Here again, the --baseHref /gatling/ is used to specify the base Href.
The application is built in the folder dist/gatling.
The following DOCKERFILE generates an NGINX Docker image with the built application attached:
FROM nginx:1.15.9-alpine
ARG APPLICATION
COPY nginx.conf /etc/nginx/nginx.conf
WORKDIR /usr/share/nginx/html
COPY dist/$APPLICATION .
RUN ls -laR .
EXPOSE 80
The output of the ng build command is copied into the folder /usr/share/nginx/html of the image, and the following Nginx configuration is used:
worker_processes  1;

events {
    worker_connections  1024;
}

http {
    server {
        listen 80 default_server;
        server_name  localhost;

        root   /usr/share/nginx/html;
        index  index.html index.htm;
        include /etc/nginx/mime.types;

        gzip on;
        gzip_min_length 1000;
        gzip_proxied expired no-cache no-store private auth;
        gzip_types text/plain text/css application/json application/javascript application/x-javascript text/xml application/xml application/xml+rss text/javascript;

        location / {
            try_files $uri $uri/ /index.html;
        }
    }
}
Run the command below to generate the Docker image:
docker build --rm=true -t gatling-ui:latest --build-arg APPLICATION=gatling .
Serving Production Images With HAProxy
HAProxy is an open-source software that provides a high availability proxy server for TCP and HTTP-based applications.
We use it to redirect HTTP requests on the proper Frontend, depending on the base Href (thanks the path_beg /administration keyword).
Here is the configuration file:
global

defaults
    mode    http
    option  forwardfor
    option  http-server-close
    # Set the max time to wait for a connection attempt to a server to succeed
    timeout connect 30s
    # Set the max allowed time to wait for a complete HTTP request
    timeout client  50s
    # Set the maximum inactivity time on the server side
    timeout server  50s
    # handle the situation where a client suddenly disappears from the net
    timeout client-fin 30s

frontend http-in
    bind *:80
    mode http

    acl has_administration  path_beg /administration
    acl has_gatling  path_beg /gatling

    use_backend administration if has_administration
    use_backend gatling if has_gatling

backend administration
    server administration-ui administration-ui:80 check fall 3 rise 2
    reqrep ^([^\ ]*\ /)administration[/]?(.*)     \1\2

backend gatling
    server gatling-ui gatling-ui:80 check fall 3 rise 2
    reqrep ^([^\ ]*\ /)gatling[/]?(.*)     \1\2
The easiest way to start it is using the HAProxy Docker image.
Complete Application Sample
I hope this blog post is helpful for anyone that would like to give a try to Angular for a complex multi-project workspace.
